Detecting your location...
Free Star San at $100 Spend $100 for the 8 oz, $150 for the 16 oz — ends 8/24 at 11:59pm PST
Shop Now
Detecting your location...
$25 off $200 — Draft & Kegging Sale On qualifying Draft & Kegging items — ends Monday 11:59pm PST
Shop Now
MoreBeer Category Header
Premium Fermentation Equipment

Elevate Your Homebrew with Pro-Grade Fermenters

Start your next batch off right with top-tier conical fermenters, glass carboys, and precise temperature control gear from leading brands like BrewBuilt.

  • Professional Performance: Stainless steel conicals built to last a lifetime and mimic commercial brewery setups.
  • Scratch-Free Cleaning: 1 to 6-gallon glass carboys and jugs that make sanitation a breeze.
  • Complete Temp Control: Dial in your fermentation environment for the perfect flavor profile every time.
  • Unmatched Quality: Access commercial-grade brewing capabilities at the most affordable prices.
Learn More About Fermentation ↓
1

Sanitize & Prep

Thoroughly clean your chosen fermenter to ensure a flawless, bacteria-free environment for your chilled wort.

2

Pitch & Ferment

Add your yeast and use temperature control accessories to maintain the perfect brewing climate.

3

Keg & Enjoy

Once fermentation is complete, easily transfer your clear, professional-quality beer to serve and enjoy.

Shop by collection
401 products

  • Low stock! Inline Thermometer - Assembly Inline Thermometer - Assembly

    Inline Thermometer Assembly

    3 reviews

    This is the Thermometer half of the FE390. One side has a 3/8" Barb and the other has a 1/2" fnpt. Add a H616 barb or use alone or thread on to a 1/2" npt fitting. It is used to measure the temperature on the outflow side of your counterflow wort chiller. How long should I apply oxygen while transferring to the fermenter? We recommend you transfer half of your wort to your fermenter before applying inline oxygen (O2) to your wort transfer. If you apply O2 the whole time while transferring you are wasting O2.

    $49.99

  • Grainfather GC4 Glycol Chiller Grainfather GC4 Glycol Chiller

    Grainfather GC4 Glycol Chiller | Control Up to 4 Fermenters

    2 reviews

    PLEASE NOTE: The supplier of this product has temporarily halted shipments to addresses within the state of California. If you are a CA resident, please note your order will not be fulfilled and will ultimately be canceled. We hope to have this issue resolved with the supplier as soon as possible.   Precisely control your fermentation temperature and improve the taste of your finished beer Independently control up to four Grainfather Conical Fermenters Compact design takes up little space in your home brewery Cold crash beer to clarify before kegging or bottling These systems will ship free to anywhere in the contiguous United States. Control your fermentation temperature accurately, every time with the Grainfather Glycol Chiller! Temperature control is one of the most crucial elements for producing a good quality beer. Temperature swings can cause yeast to stress out and throw off unwanted flavors that will negatively affect your beer. Keeping the fermentation temp regulated and stable throughout the whole process will ensure you get the right flavor profile. With the ability to individually power and control the temperature of up to four Grainfather Conical Fermenters, each with their own fermenting schedules, the Grainfather Glycol Chiller is the perfect addition to ensure superior fermenting results. Design With a sleek and compact design, that still accommodates the full array of features, the Glycol Chiller maintains the Grainfather’s principle of providing quality home brewing equipment, that delivers craft brewery like results, with a small footprint. With the addition of the Glycol Chiller, your system is operating at the ultimate level and you are even able to cold crash and lager down to 39-43°F (4-6ºC). The Glycol Chiller connects to a hidden cooling sleeve, located in between the two stainless steel walls of the Conical Fermenter. Your desired temperature is dialed into the digital temperature controller on the Conical Fermenter, the liquid then travels through this sleeve, cooling the stainless steel which in turn cools the beer in the fermenter. The cooling sleeve never comes into contact with the beer, is completely concealed and does not need cleaning or sanitizing - a true innovation for a fermenter on this scale. Features Allows you to cold crash 23 L (6 US Gal) of wort to as low as 4-6ºC (39-43°F). Minimum temperature will vary based on external factors such as ambient room temperature, the number of fermenters connected and other environmental conditions. Cools and powers up to 4 Conical Fermenters at different temperatures and fermenting schedules. What's Included? Glycol Chiller Wall outlet power cord with plug 2 x cooling connection couplers 2 x 6.5 ft (2 m) insulated hoses 1 x Glycol Funnel 1 x silicon tube for priming pump Propylene Glycol not included Specifications: LED display 1.5 Gal (6 L) glycol tank 300 W 110-120V, 60Hz 15.3" W x 17.7" D x 25.8"H Weight: 62 lbs CSA Certified   Note: The instructions for the Glycol Chiller will be attached to the outside of the shipping box. It is important that you retain these, do not throw them away and read them carefully before use to ensure no damage occurs to the unit. If these for any reason are not included with your purchase, we highly recommend you download a new copy via the instructions tab on this page and read them carefully.

    $1,149.00

  • Anvil Temperature Controller Anvil Temperature Controller

    Anvil Temperature Controller

    2 reviews

    The Anvil temperature controller is tuned and designed for home brewing. No need to spend time configuring and fiddling with settings. Just plug it in and start controlling your temps! The unique design has an integral male plug on the back allowing it to be to plugged into any 120V wall receptacle greatly reducing cable clutter and eliminating the need to drill holes for mounting. Simply plug your refrigerator or pump into the front and you’re ready to go. The 9.5 ft long sensor cable reaches anywhere you need. We’ve also selected a robust 15A internal relay for long life and more capacity than the competition. All this at one cool price. Features: 120V 15A operation Control temps to +/- 1F Temperature Control Range: 16 - 220°F Fahrenheit display Selectable heat and cool modes (not dual stage) Plugs into any 120V wall receptacle – no mounting holes needed! Reduced cable clutter Plug can be inverted to match your receptacle 9.5 ft sensor cable length 1.5" sensor probe length  

    $27.49

  • Fermonster 6 Gallon Ported Carboy Fermonster 6 Gallon Ported Carboy

    FerMonster 6 Gallon Ported Carboy (Spigot Not Included)

    2 reviews

    Smooth, ribless design prevents yeast and bacteria buildup, making sanitation a breeze Punted bottom and conical top promote sediment collection and reduce oxidation during storage Extra-wide 4" mouth opening simplifies filling, additions, and cleaning Constructed from heavy-duty, virgin PET plastic without plasticizers Made with food-grade and BPA-free materials The Ported Fermonster is a brand new fermenter designed specifically for fermentation. MoreBeer! gave product feedback for over 2 years of development and we think they nailed the design. The large lid allows for easy filling and makes hop or oak additions a breeze. The smooth sides are fantastic for sanitization - no ribs or texture to collect yeast or bacteria. The 6 gallon size is great for most fermentations, and the larger 7 gallon is available for even bigger beers. The punted bottom allows sediment to collect to the sides so that you can siphon liquid from the center. Because they are made from virgin PET plastic they nearly unbreakable and a lot safer than similar glass carboys. Also notice the conical top which reduces surface area if you plan to store beer or wine long term. These Fermenters are ported but do not come with a spigot. FE347 is the plastic spigot we recommend along with this fermenter. Made from heavy PET plastic, the same material used in 2 L soda bottles, which is nearly impermeable to oxygen penetration. Due to the thickness of the material and the overall geometry the Fermonster does not require ribs or dimples for stability. That results in a super smooth interior surface that reduces yeast and sediment buildup making it the easiest to clean, most sanitary PET carboy on the market. The huge 4" opening makes filling a breeze, and cleanup is as easy as wiping down the inside. Fermonsters are easily moved by hand or consider using our Carboy Carrier for even greater ease of use. These fermentors are completely air-tight and the lids sealed tight with an O-Ring. Additional O-Rings and Lids both with and without holes are available for purchase, see our You Might Also Need items below. Features: 4" wide mouth carboy - easy to clean! Food grade PET plastic construction is nearly impermeable to oxygen penetration No hard to clean dimples or ribs Volume Markers at 5 and 6 Gallons Punted bottom for less sediment transfer during racking O-Ring and Lid with one hole is included (Fits #10 Stopper) Additional O-Rings and Lids available Weight: 1.5 lbs Temperature Limit: 140° F Height: 19.25 inches Diameter: 11.25 inches Completely taste and odor free Perfect for Beer, Wine, Cider, Mead, Kombucha or any other fermented beverage! Thick walls for better oxygen barrier.

    $44.99

  • Quantity 6- Swing Tops For PopTops Bottles  (B357 & B358) Quantity 6- Swing Tops For PopTops Bottles  (B357 & B358)

    Pop Cultures | Replacement Swing Tops for PopTops™ Bottles | 6 Pack

    Replacement swing tops for PopTops bottles. Swing Tops are reusable but the gaskets will wear out over time. Use with 16 oz swing top bottles B357 & B358. Pack of 6. Please Note: These swing tops are not compatible with EZ Cap brand bottles.

    $5.99

  • Mini Gauge for Duotight In-Line Regulator & Blowtie G2 - 0-150 psi Mini Gauge for Duotight In-Line Regulator & Blowtie G2 - 0-150 psi

    Mini Pressure Gauge (0-150 psi)

    This mini pressure gauge is compatible with the BlowTie 2 spunding valve, Duotight in-line regulator, and KegLand mini regulator. We recommend using the gauge with a range closest to your desired pressure setting. If you'd prefer a digital instant read gauge, check out the Digital Mini Pressure Gauge (for gas applications only). Pressure Range: 0-150 psi (0-10 bar) Body Dimensions: 26mm x 26mm x 15mm Probe Diameter: 8mm WARNING: Do not exceed gauge pressure. Exceeding the pressure range will damage the gauge. Note: These gauges are accurate to 10% of the whole pressure range. (ie the 0-30psi Gauge is accurate to +/- 3psi). KegLand Part number: KL1501

    $7.69

  • FerMonster 1 Gallon Ported Carboy FerMonster 1 Gallon Ported Carboy

    Fermonster 1 Gallon Ported Carboy (Spigot Not Included)

    2 reviews

    Smooth, ribless design prevents yeast and bacteria buildup, making sanitation a breeze Punted bottom and conical top promote sediment collection and reduce oxidation during storage Extra-wide 4" mouth opening simplifies filling, additions, and cleaning Constructed from heavy-duty, virgin PET plastic without plasticizers Made with food-grade and BPA-free materials The Fermonster is a brand new fermenter designed specifically for fermentation. MoreBeer! gave product feedback for over 2 years of development and we think they nailed the design. The large lid allows for easy filling and makes hop or oak additions a breeze. The smooth sides are fantastic for sanitization - no ribs or texture to collect yeast or bacteria. The punted bottom allows sediment to collect to the sides so that you can siphon liquid from the center. Because they are made from virgin PET plastic they nearly unbreakable and a lot safer than similar glass carboys. These Fermenters are ported but do not come with a spigot. FE347 is the plastic spigot we recommend along with this fermenter. Made from heavy PET plastic, the same material used in 2 L soda bottles, which is nearly impermeable to oxygen penetration. Due to the thickness of the material and the overall geometry the Fermonster does not require ribs or dimples for stability. That results in a super smooth interior surface that reduces yeast and sediment buildup making it the easiest to clean, most sanitary PET carboy on the market. The huge 4" opening makes filling a breeze, and cleanup is as easy as wiping down the inside. These fermentors are completely air-tight and the lids sealed tight with an O-Ring. Additional O-Rings and Lids both with and without holes are available for purchase, see our You Might Also Need items below. Features: 4" inner diameter wide mouth carboy - easy to clean! Food grade PET plastic construction is nearly impermeable to oxygen penetration No hard to clean dimples or ribs Punted bottom O-Ring and Lid with one hole is included (Fits #10 Stopper) Additional O-Rings and Lids available Weight: 0.6 lbs Temperature Limit: 140° F Height: 9.45 inches Diameter: 6.7 inches Completely taste and odor free Perfect for Beer, Wine, Cider, Mead, Kombucha or any other fermented beverage! Thick walls for better oxygen barrier. Please note: the pictured #10 Stopper (FE470VS) and three piece airlock (FE370) are not included.

    $29.99

  • Mini Oxygen Regulator Mini Oxygen Regulator

    Mini Oxygen Regulator

    Due to high demand, this item is currently out of stock. Be the first to receive your items by placing a pre-order today. We will automatically ship this to you when we receive more inventory. Mini oxygen regulator with integrate gauge for beverage applications. Use with a refillable O2 cylinder to oxgenate wort before pitching yeast. Features: CGA-540 connection 0 - 4 LPM flow range with 1/16th increment Barbed outlet Dimensions: Weight: 1.25 lb Length: 6.75" Width: 1.75" Depth: 1.25"  

    $54.99

  • Rubber Stopper - #13 With Hole

    Rubber Stopper - #13 With Hole

    #13 stopper - with 3/8 inch hole. Top diameter 2.64 inches (67 mm), bottom diameter 2.28 inches (58 mm), length 1 inch (25 mm). BPA-free stopper made of food grade materials. Injection molded TPE for superior consistency throughout. Perfect for use with carboys, as the material sticks well to glass and PET, even when wet. To create a solid stopper, simply use a #000 solid stopper (FE400) to plug the hole. Max. Temperature Rating: 158 °F (70 °C).

    $6.49

  • Ranco Controller - Replacement Temperature Sensor

    Replacement Probe For Ranco Digital Temperature Controller

    4 reviews

    In case yours got too close to the flame on your brewing system. Probes can also be damaged by kinking which will cause a controller to give an inaccurate, high, reading. This is a replacement wire and thermistor for our line of Ranco controllers. The sensor probe is 1/4 in diameter and works well with the Stopper or Coupler Thermowells. Temperature Range of -30 to 220F. 8 ft. long.   Probes are water-resistant, but not water proof.

    $34.99

  • Grainfather Glycol Chiller GC2

    Grainfather GC2 Glycol Chiller | Control Up to 2 Fermenters

    1 review

    PLEASE NOTE: The supplier of this product has temporarily halted shipments to addresses within the state of California. If you are a CA resident, please note your order will not be fulfilled and will ultimately be canceled. We hope to have this issue resolved with the supplier as soon as possible.   Control and power up to two fermenters at different temperatures and fermenting schedules Use with the GCA Glycol Chiller Adapter to connect to the Grainfather S SERIES range of fermenters or most other fermenters Sleek and compact design with LED control display Compatible with the Grainfather App when connected to a Grainfather G SERIES fermenter or the GCA for managing your fermentation from anywhere via Wi-Fi The Grainfather GC2 Glycol Chiller makes consistent beer every time with accurate temperature control of up to two fermenters, even if they are running at different temperatures and fermentation schedules. Don’t leave your fermentation to chance, leave it to Grainfather. Control and power up to two fermenters at different temperatures and fermentation schedules with the GC2. By accurately controlling the temperature of your fermentation, you can produce consistent beers, every time. What's Included: GC2 Glycol Chiller Glycol funnel Silicone tubing for priming pump Specifications: Size: 23" x 12.6" x 14.6" Weight: 71.5 lbs Capacity: 0.8 gal glycol tank Power: 110V, 160W

    $849.99

  • Bucket Buddy w/ Heating - 65L Stainless Steel Fermenter with Integrated 60W Element - 110-120V Bucket Buddy w/ Heating - 65L Stainless Steel Fermenter with Integrated 60W Element - 110-120V

    Stainless Bucket Fermenter w/ Heating - 65L/17.1G (110V)

    1 review

    If you've been looking to step up from fermenting in plastic buckets or carboys, this is an excellent choice for your next fermenter. Stainless steel is a much better option than glass or plastic, as it is extremely easy to clean and virtually lasts forever. There's also much less chance of contamination as stainless doesn't scratch like plastic. Over time, you'll get scratches in plastic fermenters from normal wear and tear, creating microscopic havens for bacteria. Meanwhile, glass carboys are always at risk of breaking which is something you will never have to worry about with stainless steel. The Bucket Buddy is a great value if you're looking for a stainless steel fermenter with built-in heating control. If you live in a cold climate, ale fermentations may be a seasonal affair, as cold ambient temperatures can easily drive down the temperature of your wort below your yeast's optimal fermentation temp range. The Bucket Buddy offers a simple solution with an integrated heating element and digital temperature control. Program your fermentation temperature and if the temp drops below your set point the unit will gently heat your wort from the bottom up via the concealed element located in the base. For cooling, you can place the fermenter in a dedicated refrigerator or drill into the lid to install a Temp Twister Cooling Coil. A temperature controller probe can then be taped to the side of the fermenter to control your cooling source, or you can drill another spot in the lid for a thermowell. Another advantage over carboys and plastic buckets is the domed base inside the fermenter which is great for yeast flocculation when fermentation is complete. The included racking arm will make it easy to transfer out every last drop of beer while leaving the yeast cake undisturbed. The entire racking arm and ball valve assembly is weldless, which means you can remove the assembly to clean and sanitize it between batches. You can even boil the assembly for added assurance that it's been sterilized. To help maintain a steady temperature and cut down on power consumption, the Bucket Buddy pairs well with either the BrewZilla Neoprene Jacket. This unit comes standard with silicone tubing to transfer from the ball valve to your bottles or cans, as well as a stopper and airlock for the domed lid. Specifications: 304 stainless steel construction 17.1 gallon total capacity Digital temperature control 110V / 60W power Stainless steel outlet valve with rotating racking arm Temperature reads in °F or °C With elements turned off, hold both +/- buttons to switch between °F or °C Please note: Heating capacity is highly dependent on ambient temperature and use of insulation. The 65L Bucket Buddy is appropriate for warm fermentations such as kveik. Adding insulation may increase heating capacity while colder ambient environments may lower heating capacity. KegLand Part Number: KL23061

    $299.99

  • Farro Glass Wide Mouth Carboy Stainless Steel Spigot 1 - Standard Turn Farro Glass Wide Mouth Carboy Stainless Steel Spigot 1 - Standard Turn

    Farro Glass Wide Mouth Carboy | Stainless Steel Spigot | Standard Turn

    Stainless steel spigot for wide mouth glass carboys, jugs, and beverage dispensers. Standard left to right turn. Compatible with Farro Glass ported wide mouth glass carboys. Threading: M16 x 1.25

    $10.99

  • Rubber Stopper - #7.5 Solid

    Rubber Stopper - #7.5 Solid

    #7.5 stopper - solid. Top diameter 1.5 inches (39 mm), bottom diameter 1.22 inches (31 mm), length 1 inch (25 mm). BPA-free stopper made of food grade materials. Injection molded TPE for superior consistency throughout. Perfect for use with carboys, as the material sticks well to glass and PET, even when wet. Max. Temperature Rating: 158 °F (70 °C).

    $2.49

  • Stopper #11-1/2 - With Hole Stopper #11-1/2 - With Hole

    Stopper #11-1/2 - With Hole

    1 review

    #11 1/2 natural latex rubber stopper with 3/8 inch hole. Top diameter 63 mm, bottom diameter 50 mm, length 25 mm. 6 stoppers per pound.

    $9.49

  • Replacement Reservoir for BrewBuilt 1.5 in. T.C. Spunding Valve with Pressure Gauge Replacement Reservoir for BrewBuilt 1.5 in. T.C. Spunding Valve with Pressure Gauge

    Tri-Clamp Spunding Valve | Integrated Pressure Gauge | Replacement Polycarbonate Cup Reservoir

    Replacement Polycarbonate Cup if you happened to damage or lose the reservoir for the 1.5" Tri-Clover Spunding Valve during routine cleaning and replacement of sanitizer solution post-fermentation. KegLand Part Number: KL27472

    $16.49

  • Blichmann Temperature Controller Blichmann Temperature Controller

    Blichmann Temperature Controller

    The Blichmann temperature controller is a simple and easy to use controller for home brewing. Plug it in and start controlling your temps right out of the box! Simply plug your refrigerator or pump into the front and you’re ready to go. This is a direct replacement to the controller found in the Blichmann Fermenator™ Pump & Controller Kit. Features: 120V 15A operation Control temps to +/- 1F Temperature Control Range: 16 - 220°F Fahrenheit display Selectable heat and cool modes (not dual stage) Plugs into any 120V wall receptacle – no mounting holes needed! Reduced cable clutter Plug can be inverted to match your receptacle 9.5 ft sensor cable length 1.5" sensor probe length Please note: this controller is not intended to be used with a heating element.  

    $27.49

  • Brewtools - F80 Unitank 20-75 liters capacity Brewtools - F80 Unitank 20-75 liters capacity

    Brewtools | F80 Unitank | 5.2-19.8 Gallon Capacity | 20-75L

    Ferment, cold crash, and carbonate beer all in one vessel with the Brewtools F-Series Unitank Cooling jacket welded to the vertical walls of the tank provide superior cooling capabilities compared to in-solution cooling coils Made from stainless steel throughout with Brewtools' proprietary PureBlast™ surface—no passivation required, simply rinse with warm water before your first use Pressure rated to 30 PSI so you can safely ferment under pressure and pressure transfer finished beer to kegs with virtually no oxygen pickup Brewtools is a Norwegian brand known for high-quality products made without compromise. From brewing systems to fermenters, they continue to push the envelope of innovation for homebrewers around the globe All valves, fittings, and gaskets come included Brewtools Unitanks are fermenters made for ambitious homebrewers and small breweries. As part of the Brewtools identity, they've explored new techniques and solutions. This has resulted in a series of high-end fermentation tanks with new features and a lot of possibilities. Key Features: Brewtools PureBlast™ surface inside and out which eliminate the use of wax and polishing compounds and does not require passivation Cooling jacket in the vertical walls offers efficient cooling without the hassle of cleaning a coil Many options for connecting accessories like sensors, heaters, carb. stones and other accessories Pressure rated for 2 bar / 30 PSI Cooling jacket pressure rated for 0.5 bar / 7 PSI 8" TC port on top for easy access 2" TC dump and racking valves Brewtools Unitanks are designed and manufactured with special attention to safety and quality. They are tested and certified according to the requirements for PED 2014/68/EU by a third party. Specifications: Low height w/o acc.: 43.3" Max height w/o acc.: 51.2" Packaging size: 44.5" (h) x 20.5" (w) x 20.5" (d) Net weight: 99 lbs Gross weight: 110 lbs Tank diameter (inside): Ø15.75" Gross volume: 22.7 gal Max rec. volume: 21.1 gal Min rec. volume: 5.3 gal Volume, cone: 3.1 gal Material: 1.5mm stainless steel (SS304) Operating pressure: 1.0 bar / 15 PSI Max pressure: 2.0 bar / 30 PSI In the box: Unitank with adjustable frame 1 pcs Analog pressure gauge, TC34mm 2 pcs Butterfly-valve, 2" 1 pcs Butterfly-valve, 34mm DN20 1 pcs Blow-off pipe 1 pcs Racking arm 2" 1 pcs TC elbow 90°, 2" 1 pcs Insulation jacket, black neoprene 1 pcs Sample valve, 34mm 1 pcs TC Adapter 8"-3" 1 pcs TC blind cap, 3" 1 pcs TC blind cap 2" 2 pcs TC blind cap 1.5" 3 pcs TC blind cap 34mm 2 pcs TC gasket 8" lipped 2 pcs TC gasket 3" 2 pcs TC gasket 2" 5-pack 1 pcs TC gasket 1.5" 5-pack 3 pcs TC gasket 34mm 5-pack (DN20) 1 pcs Tri Clamp 8" 1 pcs Tri Clamp 3" 5 pcs Tri Clamp 2" 2 pcs Tri Clamp 1.5" 10 pcs Tri Clamp 34mm 1 pcs TC tool 4 pcs M10 steel/rubber feet 1 pcs TC34mm safety valve (PRV, 2 bar) Necessary bolts and parts for assembly 5 year manufacturer's warranty Recommended accessories include: HopDrop-kit, Thermowells for your sensors, 34mm Ball-Lock gas adapter for CO2 filling, Coil for sample valve, Spunding valve, Hose barbs for filling and dumping, etc. For User Manuals and support, please follow this link to Brewtools Docs. NOTE: Model in photo is a prototype. Minor changes and improvements may occur.

    $2,467.00

  • Stopper - #12 Solid

    Stopper #12 - Solid

    #12 natural latex rubber stopper - solid. Top diameter 64 mm, bottom diameter 54 mm, length 25 mm. 6 stoppers per pound.

    $7.99

  • Thermowell - 1.5" T.C., 7" Length Thermowell - 1.5" T.C., 7" Length

    Tri-Clamp Thermowell

    1.5" Tri-Clamp end cap welded to thin wall stainless tubing for quick accurate temperature readings. Insert 1/4" thermal probe from controller. Works perfectly with our Ranco digital controllers. Thermowell mounts into 1.5" Tri-Clamp ferrule in the side or your tank. Has a 6 inch probe. Works with new 2016 Rancos

    $32.99

  • Expansion Stopper

    Expansion Stopper

    Expansion stopper for sealing beer, wine, and other narrow neck bottles. Simply insert the expansion stopper into the neck of the bottle, press the lever down, and the bottle will hold carbonation and liquids inside. Great for saving a partial bottle of beer or wine while keeping a good seal on the bottle.

    $2.49

  • Chronical 2.0 Fermenter - PLACEHOLDER Chronical 2.0 Fermenter - PLACEHOLDER

    Ss Brewtech Chronical 2.0 Fermenter

    Updating the iconic series of Chronical fermenters is not something Ss took lightly. The Chronical was a product launched in the earliest days of Ss Brewtech. It, along with the Brewmaster Edition that would join a few years later, has formed a core product line that has elevated the standard of what homebrewers have come to expect from a cylindro-conical vessel, and what homebrewed beer could be. So, with a blank sheet of paper, they went to work designing the ultimate Chronical fermenter. Priority number one was to continue on Ss's mission to elevate every home product they offered to sanitary connections and valves. For the Chronical 2.0 they addressed that by adding a new welded 3/4" TC sampling port, and paired that with an all-new sampling valve based on the Pure Flow sanitary technology. Secondly, Ss redesigned the lid to use the Unitank's lid-mounted cooling coil system, which removes the side-mounted weldless ports from the Chronical BME. The Chronical 2.0's lid-mounted cooling coils extend further down into the fermenter, enabling users to ferment partial batch sizes. Although Chronical 2.0 is a massive evolutionary leap forward, Ss also stayed true to the product line's core. The full-width lid, a revolution when the original Chronical launched is retained, the pro-inspired 60° cone, and bottom dump port is still here. And last but not least, the ever-popular neoprene jacket from the Chronical Brewmaster Edition is standard on Chronical 2.0.  This means that every Chronical 2.0 has a coil and jacket included as standard. Free shipping within the contiguous United States.

    $599.00 - $799.00

  • Low stock! BrewZilla Ultimate Grain to Glass Combo Pack - 35L Gen 4.1 BrewZilla 220V - 27L FermZilla Tri-Conical Easy-Grip

    BrewZilla Ultimate Grain to Glass Combo Pack | Gen 4.1 BrewZilla All Grain Brewing System (220V) | WiFi/Bluetooth/RAPT Enabled | Neoprene Jacket & Hop Spider Included | FermZilla Tri-Conical Fermenter | Pressure Kit & Blowtie 2 Spunding Valve Included

    The Ultimate Grain to Glass Combo Pack! Get the Gen 4 BrewZilla & FermZilla Easy-Grip Tri-Conical with all the best accessories at an unbeatable price! Brew extract or all grain batches on the BrewZilla; ferment, carbonate, and serve from the FermZilla. Everything you need from Grain to Glass! Comes with all of the most highly recommended accessories for the BrewZilla, including the Neoprene Jacket to speed up heating times, Hop Spider to keep vegetal matter out of your wort, and Chilling Connection kit so you're ready to use the Immersion Chiller out of the box Includes some of our favorite accessories for the FermZilla, such as the Pressure Kit with Floating Dip Tube so you're always racking the clearest beer and the Duotight BlowTie 2 for pressure fermentations and flow control keg transfers Over $100 savings when purchasing this kit bundle compared to buying everything piece-by-piece! Also available in 110V (AG580) You can search high and low, but you won't find a better deal than the BrewZilla Ultimate Grain to Glass Combo Pack! Combo Pack Includes: BrewZilla Brewing System | Gen 4.1 | 9.25G | 220V Neoprene Jacket Hop Spider Wort Chiller Connection Kit FermZilla Tri-Conical Fermenter | Gen 3.2 | 7.1G Plastic Pressure Kit w/ Floating Dip Tube Duotight BlowTie 2 Spunding Valve Insulating Jacket Gen 4 BrewZilla All-in-One Brewing System WiFi / Bluetooth enabled RAPT Controller tracks your brewday and automatically uploads detailed information to the RAPT portal The top mounted RAPT Controller can be tilted upward for easy viewing, or detached from the unit to mount it on the wall or placed on your bench Mirror polished dome shaped bottom with center drain — get every last bit of wort into your fermenter while the perforated bottom screen filters out 95% of hot break and hop matter Make larger batches or higher gravity beers! BrewZilla offers the largest malt pipe capacity for units in its size range, and the Gen 4 unit has a 30% larger malt pipe compared to the previous generation Perforated bottom on the newly designed malt pipe allows for improved mash recirculation flow without sacrificing efficiency Element power percentage can be adjusted via the RAPT Controller. Go full power to heat up quickly, or dial it down so you don’t overshoot your strike water temp The built-in pump is plumbed to both the recirculation and arm and the bottom ball valve. Recirculate wort during your mash, then close the recirculation valve and pump wort to your fermenter via the bottom valve Pair with the RAPT-enabled Bluetooth Thermometer, allowing your BrewZilla to calculate a core mash temperature reading and more accurately control temperatures and mash steps More RAPT-enabled accessories are coming, and future firmware updates can be downloaded to the RAPT Controller itself over the internet WiFi/Bluetooth Enabled RAPT Controller The RAPT Controller is mounted to the top of the boiler body, allowing for easy operation when you have the unit set on the ground. The controller can be tilted upwards to give you an even better view, or it can be removed from the BrewZilla entirely if you’d prefer to mount the controller on your wall or lay it down on a workbench. From the controller, you’ll orchestrate your entire brew day. Program mash steps, dial in element power, and operate the integrated pump all from one screen. But the RAPT Controller is much more than a beautiful, full-color display switch board. Once synced to the RAPT Portal, you’ll be able to track, record and monitor your brews online. No need for handwriting notes or punching brew day details into your phone – all of the data from your brew is automatically logged to your portal profile. This information doesn’t just include your mash profile; it also captures detailed information about your element power and pump activity, opening the door for very precise repeatability. And the RAPT Portal isn’t just a digital archive for your brew days. With your BrewZilla powered on, you can control your brewery from virtually anywhere using your phone’s web browser. Not sure when you’ll be home from work or your kid’s ball game going into extra innings? No problem! Before you head out, simply log into the RAPT Portal from your phone and tell the BrewZilla to start heating your strike water. Along with remote control, the portal enables you to program alarms and push notifications for all of your boil additions. We’ve all been caught up with a side task and failed to throw in that yeast nutrient or clarifying agent at the end of the boil, but the BrewZilla has the back of even the most forgetful brewer! But wait, there’s more! In addition to WiFi connectivity, the RAPT Controller is also a Bluetooth gateway device. KegLand is currently developing various Bluetooth devices such as the Bluetooth Beacon Thermometer and other sensors which will be compatible with your brewery upon release. The RAPT Controller is able to receive information from Bluetooth Low Energy (BLE) devices, adjusting its processes based on this new stream of information while simultaneously logging it to your RAPT Portal. With the Bluetooth Beacon Thermometer, for example, you’ll be able to feed temperature readings from the top of your mash bed to the controller. The controller will then compare this reading with the main temp probe reading at the base of the kettle and adjust element cycling based on these combined readings. Finally, the RAPT Controller WiFi connectivity allows you to update the controller’s firmware with a single click. Take advantage of new features and accessories as soon as they become available by simply keeping your BrewZilla connected to your local WiFi network. And again, the WiFi is already built-in! No need to come back for an expensive add-on accessory down the road. High Capacity Malt Pipe With an approximately 23.5 lb capacity, the BrewZilla can mash nearly 50% more grain than similar sized models of the Anvil Foundry and Grainfather G30. If you want to fill your fermenter with more than a 5-gallon batch worth of wort, or brew the highest gravity beer recipes, the BrewZilla is the brewhouse for the job. And the included malt pipe is just the beginning. If you want to expand your brewery’s grain capacity even further, KegLand makes Boiler Extension Kits and Extended Malt Pipes for that very purpose. The malt pipe features a perforated section at the bottom which improves mash recirculation flow without sacrificing efficiency. Concave Base with Center Draining Leave no wort behind! The concave base with center drain means you’ll be able to extract every last drop of wort to your fermenter. If you’ve brewed in a traditional flat bottom kettle, this center drain may be a bit perplexing at first. Many brewers are used to whirlpooling after the boil to pull hop matter into the center of the kettle, then transfer out using a pick-up tube that pulls from the kettle wall in order to avoid sucking up the solids. But fear not! One of the key features of the BrewZilla is the false bottom protection screen. This screen avoids the need for doing a whirlpool, filtering wort as it transfers and blocking more than 95% of hops and hot break from getting sucked into the pump. This not only prevents blocked pump issues, it also increases the efficiency of your brewhouse by eliminating kettle loss from wort that may have otherwise been left behind. Ultra Low Watt Density Elements The concave base on the BrewZilla also allowed for larger heating elements with significantly lower watt density than other breweries. When a lot of energy is coming off of a small element, the local temperature near the element can be so high that it scorches the wort and causes caramelization. Lower watt density essentially means you can produce lighter color beers that would otherwise have fallen victim to caramelization effect. It also reduces that chance of boilovers and reduces stress on the elements which extends their life expectancy. Easy Access Built-In Pump The built-in pump allows you to recirculate your wort during the mash for improved efficiency and more even temperature distribution. But it can also be used to transfer your wort from kettle to fermenter rather than relying on a gravity feed, and with the optional CIP Rotar, you can used the pump to clean your BrewZilla (or fermenter) after every use. During your brew day you’ll be able to control the pump from the RAPT Controller with a dedicated button for turning the pump on and off. Another feature you’ll find on the controller is adjusting the pump flow. This doesn’t control the actual volume of the flow (you can do that from the ball valve located on the recirculation arm), but rather cycles the pump on and off automatically based on your setting. At 100%, the pump remains on continuously. But at 80%, the pump will cycle to be on 80% of the time and off 20% of the time. This may not be a feature that every brewer thinks they need, but it’s an excellent way to avoid running the pump dry accidentally, as the time the pump is off allows recirculating wort to filter through the grain bed and back into the pump inlet. If you flip over the boiler, you’ll find the magnetic drive pump and all the plumbing is right at your fingertips. This means you don’t have to disassemble the base in order to access the pump for cleaning or maintenance if required. It also means the plumbing can be changed more easily too. For instance, the unit comes as standard with the plumbing from the pump feeding both the recirculation arm and the transfer valve, but you change this so the tap outlet bypasses the pump if you prefer. MoreBeer!'s Final Word We’ve been selling all-in-one brewing systems ever since they first hit the market, and we have to say that the Gen 4 BrewZilla is not only the most feature-packed unit ever made, it’s also offered at an incredibly competitive price point when compared to other systems. You’ll get all of the cutting edge Bluetooth technology you’d get with the Grainfather and at an exceptionally lower price tag. Plus, you get the WiFi capabilities as standard, rather than as a $100 add-on accessory. When it comes to mash recirculation, that’s yet another built-in feature on the BrewZilla, and the pump can also be used for transferring and CIP cleaning. The Foundry has a great starting price, but if you want to unlock its full potential, you’ll need to spend another $100 for the recirculation pump kit. What’s more, no other system in the same ‘weight class’ has the same grain capacity. And if the standard capacity isn’t quite enough, the BrewZilla can be easily upgraded with a Boiler Body Extension Kit and Extended Malt Pipe. When you purchase the BrewZilla, you can feel confident that you’re investing in a top shelf system and all of the critical features you’re expecting will be included. Perfect for Distillation If you want to expand your lineup of homemade libations to offer Spirits in addition to Ales & Lagers, the BrewZilla makes an excellent pot still! Add the Distillation Lid upgrade and pair it with an AlcoEngine Copper Reflux Condenser or Copper Pot Still Top. AlcoEngine Stills have been selling on the home market for years and offer some of the most affordable, beginner-friendly stills you'll find. Features: Gen 4.1 Stainless steel construction 9 gallon total capacity with a finished beer output of 5-6 gallons WiFi/Bluetooth Enabled RAPT digital temperature controller Automatic step mashing with 6 programmable stages 220-240V power NEMA 6-30P plug Requires NEMA 6-30R receptacle Requires 11 amps from 30 amp circuit Dual heating elements (1900 watts and 500 watts) Stainless steel 1/2" ball valve for gravity draining or transferring via pump Immersion wort chiller included Stainless steel malt pipe/basket Stamped in volume markers Glass lid Adjustable lid clamps (do not use with glass lid in place - see below) Magnetic drive pump for recirculation, transfers, and cleaning Recirculation arm PPSU sight glass Bottom handle for easy lifting and pouring Rubber feet Temperature reads in °F or °C Approximately 32.75" H (with recirculation arm) x 12.5" D Recommended max. grain bill: 23.5 lbs AlcoEngine Still ready with the purchase of a Distillation Lid Pump Specs: Max Capacity: 2.9–3.1 gal/min Max Head: 4.9–6.8 ft. Poles: 2 Voltage: 220–240V-AC Frequency: 50–60Hz Power: 6 watts Current: 60 mA Speed: 2600–3000rpm Duty Cycle: Continuous Capacitor: 2µF Input/Output: 13mm barb Water Resistance: IPX2 Please note: due to patent restrictions in the United States, the malt pipe has been redesigned with one set of bottom feet. This model does not include the "two stage" malt pipe as advertised by KegLand and featured in previous MoreBeer! YouTube videos. Please Note: When removing the malt pipe to drain after mashing, it is important to do so slowly rather than in one swift pull. If the malt pipe is removed all at once when it is full of wort, it is possible for the draining wort to spray out and over the rim of the brewery through the perforated bottom. Remove the malt pipe slowly so that some of the wort can drain out before it is fully removed and set on its bottom feet. This can be done by hand on the 35L unit, but for the 65L and 100L units we highly recommend using the Pulley System for removing the malt pipe. Warning: Do not engage the adjustable lid clamps when brewing with the BrewZilla's standard glass lid. The clamps are only intended to be used with distillation lids or other metal accessories. With too much tension, it is possible for the lid clamps to break the glass lid when engaged. Warning: If you are going to use an extension cord with the BrewZilla, you must ensure that the cord is the correct gauge and properly rated to suit the power requirements of your brewery. See the reference chart below for the recommended gauge based on your unit and the length of cord you wish to use.   35L (110V) 35L (220V) 65L (220V) 100L (220V) 10 ft. 14 Gauge 14 Gauge 12 Gauge 10 Gauge 25 ft. 14 Gauge 14 Gauge 12 Gauge 10 Gauge 50 ft. 12 Gauge 12 Gauge 10 Gauge 8 Gauge     FermZilla Tri-Conical Easy-Grip Fermenter A best seller for a reason! Tons of features at an incredible cost Crystal Clear super smooth PET makes fermenting and cleaning super easy 3" Butterfly valve at bottom makes removing yeast/trub easy with the 600mL collection jar. Pressurizable for fermentation and closed transfer to your keg Includes BlowTie spunding valve kit, red & yellow carbonation caps, and floating dip tube as standard The FermZilla is the perfect option for brewers that want all the advantages of a conical fermenter without the price tag of a full-blown stainless-steel unit. It allows you to dump trub, harvest yeast, and with the addition of CO2 cylinder and regulator, you can carbonate and serve – all in one vessel! The clear PET tank allows you to visually monitor fermentation activity and is pressure rated to 2.4 Bar (34.8 psi), which means you can ferment under pressure, reducing ester and fusel alcohols in your finished beer. This also gives the ability to perform pressure transfers. If you prefer to move your finished beer to a keg or other vessel, you can do so with little to no oxygen exposure. The FermZilla Tri-Conical Easy-Grip model comes packed with accessories so you can take full advantage of this pressurizable fermenter on day one. The new stock standard includes Easy-Grip threaded lid ring, BlowTie spunding valve with integrated pressure gauge, ball lock carbonation caps for the lid and collection container, floating dip tube kit with weighted filter, volume marker graduation sticker, and adhesive thermometer. What's Included: FermZilla 27L Tank with 3" T.C. Bottom Port Easy-Grip Threaded Lid Ring Integrated Gauge BlowTie Kit Spunding Valve (0-15 psi) Silicone Dip Tube Kit with Yellow Weighted Filter and SS Float (2) Yellow Liquid Carbonation Caps (2) Red Gas Carbonation Caps Fermzilla Pressure Lid with Red PRV (35 psi) 3" T.C. Butterfly Valve 600 mL Collection Container with 3" T.C. Connection Stainless Steel Stand with Swing Handles 3" tri-clamp with gasket Graduation Sticker Adhesive Thermometer Specs: 27 L (7.1 gal) Total Volume Pressure Rated to 2.4 Bar (34.8 psi) Height in Stand - 30.2" Tank Diameter - 13.9" Diameter in Stand - 15.3" Lid & Collection Container Ports - 28 mm PCO 1881 threads Temperature Rating: When not under pressure, do not expose to liquids above 131°F When under pressure, do not expose to any temperatures above 95°F* *Please note that the temperature rating for the FermZilla tank is lower when using it under pressure. When not under pressure, it is perfectly safe to transfer wort into the tank below 131°F or to use hot liquids below this temp for cleaning. When under pressure, make sure to keep your fermentation temperature below 95°F and keep the fermenter in an environment that is below 95°F ambient. This is especially important when fermenting with kveik yeast. These strains are known to ferment hot if no temperature control is being used. Exceeding the temperature rating may compromise the tank, leading to a shorter life span or sudden failure to maintain pressure. Even with proper use, we recommend replacing the tank every two years. Please note: when using the FermZilla under pressure, you must perform a water pressure check to ensure your connections are leak proof. To do this, fill your FermZilla up with water, apply at least 15 psi pressure, and check for leaks around all caps and threads. Pressure Stress If you use the FermZilla to ferment under pressure, or you use CO2 to pressure transfer or force carbonate your finished beer, it is very important that you conduct semi-annual inspections of your tank. Even with perfect care, the FermZilla tank may show signs of wear from pressure stress over time. We recommend visually inspecting your tank for stress creases or other signs of wear once or twice a year. A hydro test should be conducted every two years, even if no signs of wear are found. The process is simple: Fill the tank to the brim with water Replace the Red PRV with a Green PRV rated to 4.5 BAR or higher Pressurize the tank to 4 BAR (58 psi) Check for leaks, then replace the Red PRV when finished If leaks or potential points of failure are found, replace the tank before you continue using pressure with your FermZilla. General Care Taking good care of your FermZilla begins with cleaning and sanitizing the unit before and after use. The tank is made from food-grade PET, which is beautifully clear, but can be sensitive to long soaks in cleaners and acid-based sanitizers. In general, we do not recommend leaving products like PBW or StarSan soaking in the tank for more than an hour. Extended soaks have the potential to degrade the PET material and shorten the lifespan of the tank.   KegLand Part number: KL47296 NOTE: FermZilla tanks are marked with a manufacturer’s “expiry date”. This does not indicate that the tank is bad after this date; it simply indicates that a hydro test may be in order. 2 years after production and every 2 years after first use, it is recommended that the tank be hydro tested to ensure the tank is holding pressure. You will also need the D1072 Green PRV to perform the test. If you do not plan to pressurize the fermenter, the test is not necessary.   FermZilla Tri-Conical 27L & 55L | User Guide

    $829.99

  • BrewBuilt X3 Uni - Jacketed Conical - Premium Chilling Package - Max 4 - PLACEHOLDER BrewBuilt X3 Uni - Jacketed Conical - Premium Chilling Package - Max 4 - PLACEHOLDER

    BrewBuilt® X3 Jacketed Uni Conical Fermenter | Premium Chilling Package | IceMaster Max 4

    1 review

    Due to high demand, some of these items are currently out of stock but available for pre-order. Please check status notes below when selecting a size option to see if it is In Stock or tagged as PreBook. We will automatically ship this to you when we receive more inventory. The X3 Jacketed Conical and IceMaster Max 4 work hand in glove from yeast pitching to cold crashing External cooling jacket with neoprene insulation allows for unparalleled temperature control for a homebrew fermenter Max 4 glycol chiller with digital controllers and built-in submersible pumps provides quiet and efficient chilling With room to connect up to 4 conicals, this package is perfect for brewers planning to expand their fermentation capacity over time Insulated tubing sets eliminate line sweating and feature dry break quick disconnects at the cooling jacket connection points The BrewBuilt Ultimate Chilling package includes everything you'll need to maintain a precise level of temperature control throughout the fermentation process. The X3 Jacketed Conical is second-to-none in homebrew-level cooling capabilities—mirroring the fermenter design that professional brewers have long relied on to keep their temperatures in check. And what better unit to provide the cooling solution than the IceMaster Max 4? This powerful glycol chiller has more than enough cooling capacity for your chosen X3 Conical with room to add an additional three fermenters down the road. X3 Jacketed Uni Conical & IceMaster Max 4 The X3 Jacketed Uni Conical offers cutting edge design features that have long been reserved for pro-level fermentation tanks. Circulating cooling solution through an external cooling jacket offers superior cooling power when compared to internal cooling coils, and eliminates the need for cleaning a wonky apparatus after you've transferred out your finished beer. This pressurizable fermenter also sports a neoprene jacket for added insulation, Flex Chamber collection container for yeast harvesting or trub dumps, internal floating racking tube for clear beer transfers, and so much more! The IceMaster Max 4 makes for the perfect tag team partner, providing all the cooling capacity you'll need for up to four fermenters. BrewBuilt Insulated Glycol Tubing Kit In addition to the conical and chiller, the kit also includes an insulated tubing set that improves chilling efficiency and eliminates line sweating. The kit consists of: 1 - Insulated Tubing Set (2 x 6' lines) 2 - High Temp Plastic Female QDs w/ 3/8" Barb* 2 - High Temp Plastic Male QDs w/ 1/2" MPT* 2 - 1.5" Tri-Clamps 2 - 1.5" T.C. Gaskets 2 - 1.5" T.C. x 1/2" FPT Adapters *These premium quick disconnects feature shutoff valves that provide a "dry break" when they're disconnected. That means no cooling solution leaking all over your brewery every time you take the system apart for cleaning. The Female QDs are installed on the insulated tubing, and the Male QDs are installed on the T.C. x FPT Adapters that connect to the cooling jacket's inlet and outlet.

    $2,479.99 - $3,359.99

  • Ss BrewTech - Unitank 2.0 - PLACEHOLDER Ss BrewTech - Unitank 2.0 - PLACEHOLDER

    Ss Brewtech Unitank 2.0 | Jacketed Conical Fermenter

    The Unitank 2.0 features 50% more cooling surface than the previous generation for better cooling efficiency and crashing performance. Manufactured with professional level quality that has been the standard for Ss Brewtech's professional-level Unitanks New Ss Brewtech Racking Arm co-molded with the geometry of the valve body and TC gasket which prevents the arm from coming loose Quickly carbonate beer in under 24 hours using the carb stone while precisely monitoring head pressure Adding an optional Sspunding Valve to the Unitank gives the brewer the ability to ferment under pressure An evolutionary step forward in homebrew technology. The Unitank 2.0 builds upon the venerable Unitank line by increasing the full body wall thickness from 1.2 to 1.5mm 304 Stainless Steel. Then we added a fully laser welded, professional-grade jacketed cooling solution to the already advanced feature set the original Unitank is known for. With up to 50% more cooling surface area, maintaining a stable temperature and crashing your beer has never been more efficient. Jacketed Cooling The benefits of jacketed cooling are numerous, and such engineering has become the standard in Ss Brewtech professional Unitanks for years. With Unitank 2.0, those same benefits are available to the 5, 10, 15 and 31 gal home or nano brewer. When paired with FTSs Touch and Ss Glycol Chillers, the Unitank 2.0 can provide an uncompromised level of fermentation control. The increased surface area of jacketed cooling allows more precise temp control not seen in the home brew industry. Additionally, the added surface area allows the fermenter to crash cool in even the most challenging environments. Another benefit of moving to jacketed cooling is that removing the coil makes the cleaning process much more straightforward. When used with the Ss Brewtech CIP ball, cleaning can be performed just as the pros do in craft breweries. Staggered inlet and outlet ports for the glycol jacket help with even coolant distribution in the jacket. The rear-mounted thermowell cleans up the coolant control wiring for an even more professional setup. Keyed Racking Arm Like the Chronical 2.0, the Unitank 2.0 features a version of the new Ss Brewtech Racking Arm co-molded with the geometry of the valve body and TC gasket; this ingenious design captures the racking arm and prevents it from coming loose. Additionally, the keyed elements of the valve allow the brewer to know precisely what direction the racking arm is facing based on the orientation of the valve on the vessel. What's more, the Unitank valve is the same full pressure-rated valve used on professional Ss Brewtech equipment. All the Valves & Ports The Unitank 2.0 continues with all the beloved features of the original Unitank. On top of all the fully welded TC connections and pro features, the Unitank 2.0 allows the brewer to quickly carbonate beer in under 24 hours using the carb stone while precisely monitoring head pressure. After fermenting and carbonating, the brewer can perform a true pressurized and closed transfer to a keg or canning machine significantly reducing the chances of oxidation when compared to open transfers. Higher pressure limits allow the user to dispense beer directly out of the vessel. Lastly, adding an optional Sspunding Valve to the Unitank  gives the brewer the ability to ferment under pressure and gives them the option to use the final few gravity points left of active fermentation to naturally carbonate their beer instead of force carbonate. This feature set and flexibility are why pro brewers use Unitanks in their brewing and packaging processes. Features: Welded Cylinder Glycol Jacket Fully welded TC flanges 15 PSI operating pressure Rotatable Silicone Racking Arm 1.5” TC Butterfly Valves 1.5” TC Carb Stone with 3/8” ball valve 1.5” TC Blow Off Arm with Welded Blow Off Arm Mount 1.5” TC to ½” Ball Valve for Blow Off Cane 1.5” TC Pro Sanitary Pressure Gauge 1.5” TC Pro Sanitary Sampling Valve 1.5” TC Thermowell 3” TC Pressure Relief Valve (PRV) 6” TC to 3" TC Lid Reducer (Dry Hop, CIP, and PRV Port) Neoprene Insulation Jacket Stainless Lower Shelf Adjustable Feet

    $1,099.00 - $1,999.00

  • Low stock! Stainless Ball Valve - PCO 1881 Stainless Ball Valve - PCO 1881

    Stainless Ball Valve | PCO 1881 | FermZilla Dry Hopping Valve

    Use this valve with a standard soda bottle as an inexpensive and effective dry hopping solution Attaches to the PCO 1881 threaded port on the FermZilla fermenter's lid Carbonation Cap and Tee Piece can be added to allow for purging the hops with CO2 This really handy stainless adapter ball valve will enable you to connect two PCO 1881 threads with a valve in between. Each side has an integrated O-ring that will seal on the neck of the PCO1881 Thread. Ideally suited to making a dry hop device for FermZilla with a standard soda bottle or PET growler with PCO 1881 threaded neck. As shown in the photo, if you use this stainless ball valve in conjunction with the PCO 1881 Tee Piece and the Carbonation Cap, you will have the added advantage of being able to use CO2 to purge out oxygen from the hops before you dry hop. This assembly makes an inexpensive and very effective dry hopping tool. Please note: Dry hop pellets will require a bit of a shake to get them to fall through the 3/4" bore. Tapping the PET bottle should be enough to make the hops fall down into the fermenter through the ball valve. KegLand Part Number: KL18074

    $14.49

  • Universal Stopper #11-11.5 - Solid - Each (Large) Universal Stopper #11-11.5 - Solid - Each (Large)

    Universal Rubber Stopper - Size #11-11.5 (Solid)

    1 review

    Universal stoppers have a longer taper to help produce a better fit and a snug seal, and a lip which prevents them from falling into your container. Available with a 3/8 inch hole for an airlock, or solid with no hole. #11-11.5 (large) size is recommended for full size barrels and 14 gallon demijohns.

    $4.99

  • Silicone Bung (Solid) - Carboy G2

    CellarScience® Silicone Bung | Solid | Glass Carboys

    1 review

    Designed to fit 3 to 6.5-gallon glass carboys and 500ml flasks, making it ideal for a variety of storage needs. Ribbed body and ridge prevent slipping or being sucked in, ensuring a reliable seal during long-term storage. Despite its ribbed design, this silicone bung is easy to clean and sanitize for hassle-free use. Solid Silicone bung that will fit a 3, 5, 6 or 6.5 gallon glass carboy or 500ml flask. A solid stopper is the most reliable way to keep oxygen out for long term storage. This bung has a ridge to keep it from getting sucked in when temperatures cool. It also features a ribbed body it doesn't slip out during use. Even though it isn't perfectly smooth like some other stoppers, it remains easy to clean and sanitize. The top measures 1.5" wide and the bottom is 1.13" wide. While the FE592 carboy stopper is a great, economical choice, you may also want to check out our premium, silicone carboy hood FE496 as well. Working as both a solid or a breathable bung (depending on how the plug is set), the FE496 is like getting two bungs in one!

    $7.69

  • Blichmann Fermenator Pump & Controller Kit Blichmann Fermenator Pump & Controller Kit

    Blichmann Fermenator™ Pump & Controller Kit

    Manage your fermentation temperatures to exacting precision and repeatability with the Blichmann Pump & Controller Kit.  The perfect system to pair with a glycol chiller or ice bath, and the Fermenator™ cooling coils.  Features: High quality 24V DC submergible pump has 5 GPM output and quiet operation Temperature Controller is tuned and designed for brewing. No need to spend time configuring and fiddling with settings. Just plug it in and start controlling your temps!  15A 120V operation 12” long thermowell fits in the included three hole stopper.  Fits all Fermenator™ conicals and any other vessel requiring a #7 stopper Includes 10ft of 3/8” PVC hose and hose clamps Compatible with Fermenator™ sizes 7, 14.5, 27, and 42 gallon Kit Includes: Submergible Pump Temperature Controller 10 ft. of 3/8" Silicone Tubing 3 Butterfly Hose Clamps Thermowell Dual Hole Stopper Power Adapter      

    $130.99

  • FTSs Replacement O Ring Set (4)

    Replacement Thermowell O-Rings for FTSs Systems (4 pcs / 16mm x 1.8 mm N90 O-rings)

    4 replacement O-rings for Thermowell of Ss Brewtech FTSs: 16mm x 1.8mm O-ring for weldless thermowell and lid and coil seal on FTSs

    $1.95

  • Stainless Steel Spigot 2 - Push Down Stainless Steel Spigot 2 - Push Down

    Full Stainless Steel Spigot - Twist

    1 review

    Stainless steel spigot for wide mouth glass carboys, jugs, and beverage dispensers. Stainless twist handle. This spigot is compatible with the old model of Farro Glass Wide Mouth Carboys below. For the compatible spigot with the new model carboy, See related product.

    $18.49

  • Buon Vino Stopper #8-9 - Solid - Each Buon Vino Stopper #8-9 - Solid - Each

    Buon Vino Rubber Stopper - Size #8-9 (Solid)

    Buon Vino stoppers have a longer taper to help produce a better fit and a snug seal, and a lip which prevents them from falling into your container. Available with a 3/8 inch hole for an airlock, or solid with no hole. #8-9 (medium) size is recommended for medium size barrels and 9 gallon demijohns. 1 13/16''- 1 7/16''

    $2.59

  • 1/2 Gallon Plastic Jar - 110 mm Wide Mouth - No Lid

    1/2 Gallon Plastic Jar - 110 mm Wide Mouth - No Lid

    Wide mouth plastic tub in "natural" opaque white color. Opening is 110 mm wide. Lids are sold separately, see item JAR01A. Holds 1/2 gallon, or 6 pounds of liquid malt extract (LME). Sold individually, packed in cases of 6. 360 each per pallet.

    $2.99

  • Farro Glass Wide Mouth Carboy - Replacement Lid Gasket Farro Glass Wide Mouth Carboy - Replacement Lid Gasket

    Farro Glass Wide Mouth Carboy | Replacement Lid Gasket

    Replacement lid gasket for Farro Glass wide mouth glass carboys.

    $1.99

  • Ss BrewTech - Chilling Coil Kit - 7 gal Brew Bucket Ss BrewTech - Chilling Coil Kit - 7 gal Brew Bucket

    Chilling Coil Kit | 7 gal Brew Bucket | Ss BrewTech

    The Chilling Coil kit can be used to update the 7 gal Brew Buckets for temperature control. Then you can add an FTSs Touch kit for use with the Ss Glycol Chiller. Features: Thick 5 mm zippered neoprene jacket Immersion chiller coil mounted to 6" TC cap Cap | 3” TC with ½” Blow-Off and 300mm Thermowell 3/8" hose barbs on the chiller coil 17mm Plug for Brew Bucket Brewmaster Edition Included hose clamps (for chiller coil), TC Clamps, TC Gaskets Kit not compatible with Brite Tanks, Chronical Series, or Unitanks. Specs: Assembled Dimensions: 27.5"H x 13"W x 13"D (on Bucket) Assembled Weight: 22lbs / 10kgs (on Bucket)  

    $199.95

  • Temp Twister Stainless Steel Lid with Thermowell Port for 35L Bucket Buddy Temp Twister Stainless Steel Lid with Thermowell Port for 35L Bucket Buddy

    Temp Twister Lid for Bucket Buddy Fermenters | 35L

    This flat lid with pre-drilled holes allows you to easily add a Temp Twister Cooling Coil to your 35L Bucket Buddy fermenter. It also has holes for your stopper & airlock (included with the Bucket Buddy) as well as a Thermowell so you can control the circulation of cooling solution with a Temperature Controller. The lid is also compatible with 35L BrewZillas and DigiBoils. If you're fermenting in the Bucket Buddy with built-in heating element, we recommend plugging the unit into the heating outlet of your temperature controller and leaving the power switch turned on. This will allow the temp controller to provide power to the unit only when heating is needed and it will cut the power as soon as you're back to your set temperature. Using the Bucket Buddy's controller to maintain the heating set temp and using a separate controller to maintain the cooling may result in heating and cooling cycling at the same time. NOTE: The pre-drilled holes are meant for specific sizes of Duotight bulkheads and the stopper included with the Bucket Buddy fermenter. All holes need to be occupied in order to protect your fermentation from outside contaminants. Depending on the placement of the Temp Twister, you might need to shorten the inlet/outlet tubes on the outside of the fermenter using a Pipe Cutter. Lid only. Other accessories must be purchased separately. You Will Also Need: Temp Twister Cooling Coil FermZilla Thermowell Temperature Controller KegLand Part Number: KL28103

    $38.49

  • FermZilla Tri-Conical - Butterfly Valve - 2 in. x 3 in. T.C. FermZilla Tri-Conical - Butterfly Valve - 2 in. x 3 in. T.C.

    FermZilla Tri-Conical Butterfly Valve - 2 in. x 3 in. T.C.

    Compatible with the 27L and 55L FermZilla Tri-Conical Series or any 2" or 3" T.C. fittings. This valve comes standard on the Tr-Conical FermZillas where the bottom of the tank attaches to the collection container.  KegLand Part Number: KL26505

    $43.99

  • RAPT - Fermentation Chamber - Heavy Duty Wire Shelf (60kg Rating) RAPT - Fermentation Chamber - Heavy Duty Wire Shelf (60kg Rating)

    RAPT Fermentation Chamber | Replacement Heavy Duty Wire Shelf

    Replacement Heavy Duty Wire Shelf for the RAPT Fermentation Chamber. Weight Rating: 132 lbs (60 kg) Dimensions: 17.7" W x 16.1" D x 1.1" H (450mm x 410mm x 30mm) KegLand Part Number: KL15844

    $21.99

  • FermZilla Flat Bottom Fermenter Lid with Integrated Handles FermZilla Flat Bottom Fermenter Lid with Integrated Handles

    FermZilla Flat Bottom Fermenter Lid with Integrated Handles

    This optional lid is a great accessory if you want a more convenient way to move your Flat Bottom FermZilla around. Includes a silicone grommet for your airlock pre-installed. This unique FermZilla lid piece does not require thread tape, o-rings or washers to form an airtight seal. Please Note: This lid is not pressure rated.   KegLand Part Number: KL20848  

    $10.99

  • The Cornical - Keg Only The Cornical - Keg Only

    Blichmann Cornical Fermenter - Keg Only

    This is the Cornical Keg only. For the Fermentation Kit check out BL279 or for the complete kit check out BL275. The Cornical™ is a new, unique offering from Blichmann that allows you ferment and keg in the same vessel. Saving you on both time and labor. Built with sanitary stainless steel and rated up to 50 psi you can perform a no chill transfer and ferment under pressure. It is made from two main pieces. The first is a modular keg with a removable base that makes cleaning fast and easy. The second part is a versatile conical bottom that clamps onto the keg and converts it into a pressure capable fermentor. With the upcoming addition of Spunding valve accessory you will be able to control pressure during fermentation. Allowing you to have even greater control over your fermentation profile. This modular design allows you to use the conical bottom to ferment another batch on a different keg while you carbonate and drink your first batch all in same fermentation vessel. Thus eliminating the kegging step and cutting down the risk of possibly introducing your beer to oxygen and bacteria. Features: Ferment, carbonate, and serve all from a single vessel Sanitary sample valve with rotating racking arm Keg can be used as a fermentor or a serving keg Cleaning made easy with a removable bottom 1.5 in. butterfly dump valve Rated up to 50 psi Made from sanitary stainless steel Note: The Cornical can be bought as a complete system (both Keg and Fermentation Kit) or you can buy a Keg or Fermentation Kit on their own.

    $144.99

  • Demijohn Lid - For All Wide Mouths Demijohn Lid - For All Wide Mouths

    Demijohn Lid - For All Wide Mouths

    4 reviews

    Plastic dust cap for all wide mouth demijohns

    $2.19

  • Low stock! Kegmenter - Hop Bong Pressure Pack - 2 in. Kegmenter - Hop Bong Pressure Pack - 2 in.

    Hop Bong Pressure Pack for Kegmenter Fermentation Kegs | 4" Tri-Clamp

    2 reviews

    Oxygen-Free Dry Hopping: Designed to allow dry hopping without exposing the batch to oxygen. Customizable with Accessories: Features undrilled ports for optional accessories such as the Temp Twister Cooling Coil and Thermowell, enhancing functionality and convenience. Improved WiFi Reading: The plastic lid improves KegLand RAPT Pill WiFi reading, ensuring better connectivity. Compatible with all Kegmenter Fermentation Kegs with 4" Tri-Clamp ferrule. The Hop Bong is a versatile pressurizable tri-clamp accessory, capable of not only dry hopping oxygen purged hops into fermenters, but also as an inline carbonation/oxygenation accessory. Load up the Hop Bong, flush it with CO2, purge out oxygen with the handy PRV on top, then simply open the Butterfly Valve to inject your beer with a 6 oz payload of dry hops. This kit includes the 4" T.C. Pressure Lid to fit the tri-clamp ferule on Kegmenter Fermentation Kegs. The plastic lid also allows for improved KegLand RAPT Pill WiFi reading compared to the Kegmenter fully encasing the Pill in stainless steel. Due to the large 4" tri-clamp diameter, it is difficult to get higher pressures without leaking. Therefore we suggest using this up to 21 psi. The included Yellow PRV for the Pressure Lid is rated to 17 psi. The 3 Pieces of the Hop Bong Pressure Pack: Pressure Kit ​The Pressure Kit includes two Ball Lock Caps for Gas & Liquid. The Liquid cap can be paired with the optional Floating Dip Tube and Filter Attachment. These pieces allow you to pressure transfer finished beer out of the fermenter into kegs or a bottling bucket, or you can carbonate and serve beer directly from the Kegmenter. Tri-Clamp Pressure Lid Replacing the standard lid with the Tri-Clamp Pressure Lid provides you with a 2" T.C. port at the top of your fermenter. This will give you an opening to add dry hops or other additions without needing to remove the entire lid. Take off the butterfly valve to add your yeast pitch, and when you're ready to add flavoring additions when fermentation is complete, drop them in oxygen-free via the Hop Bong. PCO1881 threaded ports are there for your Ball Lock Caps, as well as undrilled ports for an optional Thermowell and/or Temp Twister cooling coil. Hop Bong Load up the Hop Bong and add CO2 to purge your hop charge of oxygen. This kit comes with a third Ball Lock Cap to introduce CO2 directly to the Hop Bong, as well as a pull ring PRV to release pressure and purge oxygen. Once you've flushed your hop charge with CO2, open the butterfly valve to inject your beer with up to 6 oz of hop pellets. Hop Pellet Capacity: 150–180g (5.2–6.3 oz) Kit Includes: Kegmenter 4" T.C. Pressure Lid 2" Hop Bong 2" Butterfly Valve Red PRV & PCO1881 Cap Combo Yellow PRV Yellow Ball Lock Cap (2) Red Ball Lock Caps (3) 2" Tri-Clamps (3) 2" Silicone T.C. Gaskets Optional Accessories: Floating Dip Tube (FE115A) Filter Attachment (KEG657) Available Kegmenters: 7.6 Gallon (FE582) 13.2 Gallon (FE584) 15.3 Gallon (FE581) 1 bbl (FE585) KegLand Part Number: KB23665 Warning: Always depressurize your system COMPLETELY before removing fittings from your fermenter.

    $164.99

  • Grainfather Glycol Chiller Adapter (GCA) Grainfather Glycol Chiller Adapter (GCA)

    Grainfather Glycol Chiller Adapter | GCA

    1 review

    PLEASE NOTE: The supplier of this product has temporarily halted shipments to addresses within the state of California. If you are a CA resident, please note your order will not be fulfilled and will ultimately be canceled. We hope to have this issue resolved with the supplier as soon as possible.   The Glycol Chiller Adapter works in a similar way to the GF30 Conical Fermenter but instead of the built-in cooling sleeve and heating element, it uses a stainless steel cooling coil and a heating pad to control the temperature of almost any fermenter. The cooling coil is connected to the Glycol Chiller and immersed in the fermenter. The heating pad is attached to the side of the fermenter using hook and loop tape. A temperature probe is also attached to the fermenter and the GCA will then regulate the cooling, or heating, as required. The GCA connects to the Grainfather App so you can control your fermentation temperature on the go. Included in the GCA Kit: GCA Controller Heating Pad (12V 30W) 5m Cooling Coil Hose Rubber Bung Velcro Hook Strip x 4 Hose Clamps x 2 Rubber Bung Stoppers x 4

    $246.00

  • Rubber Stopper - #8.5 Solid

    Rubber Stopper - #8.5 Solid

    1 review

    #8.5 stopper - solid. Top diameter 1.66 inches (43 mm), bottom diameter 1.43 inches (36 mm), length 1 inch (25 mm). BPA-free stopper made of food grade materials. Injection molded TPE for superior consistency throughout. Perfect for use with carboys, as the material sticks well to glass and PET, even when wet. To create a solid stopper, simply use a #000 solid stopper (FE400) to plug the hole. Max. Temperature Rating: 158 °F (70 °C).

    $2.99

  • Wooden Pickle Packer Wooden Pickle Packer

    Wooden Pickle Packer

    1 review

    A pickle packer is an ideal tool for making fermented sauerkraut, kimchi, or other vegetables. Works well for tamping down a full jar of veggies, mashing them to release their juices, and to remove any air bubbles that may be present. The slender design allows it to be used for both wide and regular mouth mason jars. Can also be used to muddle mint leaves, citrus and spices when making cocktails. Made from European Beech Wood  

    $12.49

  • Rubber Hood - Fits Italian 6.5 Gallon Carboy

    Rubber Hood - Fits Italian (Threaded) 6.5 Gallon Carboy

    Natural rubber hood for jubs and carboys. Features 3/8 inch hole for airlocks.

    $4.99

  • Replacement Spunding Valve Reservoir Cup - CON4P35-MB, CON4P36 Replacement Spunding Valve Reservoir Cup - CON4P35-MB, CON4P36

    Replacement Reservoir for Tri-Clamp Spunding Valve

    Replacement reservoir for 1.5" tri-clamp spunding valve. Compatible with both 1 BAR BrewBuilt model (CON4P36) and 2 BAR MB model (CON4P35-MB).

    $18.99

  • Ss Brewtech - FTSs Touch - Heating Pad  - PLACEHOLDER Ss Brewtech - FTSs Touch - Heating Pad  - PLACEHOLDER

    FTSs Touch | Heating Pad | Ss BrewTech

    Designed to work with the FTSs Touch to heat fermenting wort in colder climates. Includes XT30 Connector - Will not work with legacy FTSs controllers.

    $49.95


You have seen 288 out of 401 products

Frequently Asked Questions

Fermenting Equipment Collection Article +

Fermentation: A Play in Three Acts By John Palmer The fermentation of malt sugars into beer is a complicated biochemical process. Although the conversion of sugar into alcohol can be regarded as yeast’s primary function, fermentation is much more. Total fermentation is a composite of three phases: the lag (or adaptation) phase, the attenuative (or primary) phase, and the conditioning (or secondary) phase. Yeast does not end the second phase before beginning the third; rather, the processes occur in parallel. Yeast’s early gusto for wort sugars is gradually phased out as the concentration of remaining easy food (simple sugars) in the wort decreases relative to the amount of complex sugars and yeast by-products. The conditioning process occurs more slowly than the attenuative process, however, which is why beer (and wine) will improve with age, to a degree, as long as they are in contact with the yeast. The accompanying box below summarizes the key factors required for a good fermentation: Pitch plenty of yeast, make sure the cells have the nutrients they need to multiply, and let them do their thing at the right temperature. Act I —the adaptation phase: Immediately after pitching, yeast spends some time adjusting to the wort conditions and indulging in a period of high growth. During this time, yeast takes stock of the sugars, free amino nitrogen (FAN), and other nutrients present in the wort and figures out what enzymes and other attributes it needs to adapt to the environment. This delay between the pitching of the yeast and the formation of the foamy head in the fermentor is referred to as the adaptive phase, or lag time. This initial phase is critical in setting the stage for a good fermentation. During the adaptation phase, yeast cells use their own glycogen reserves, lipids, and any dissolved oxygen from the wort to synthesize sterols. Sterols are critical for the development of healthy, permeable cell membranes, which makes wort sugars and other wort nutrients available to the yeast. Strong cell membranes will also protect the yeast from premature death due to rising alcohol levels as the fermentation progresses. Yeast can also synthesize sterols under oxygen-poor conditions from the fatty acids found in wort trub, but that method is less efficient and less reliable for the brewer. With healthy, permeable cell membranes, yeast can start metabolizing its food — free amino nitrogen (FAN) and sugars in the wort. Like every animal, yeast cells live to reproduce, which they do asexually by “budding,” a process in which daughter cells split off from the parent cell. Reproduction takes a lot of energy, and the process works more efficiently when oxygen is present (that is, under aerobic conditions). Thus, an oxygen-rich wort shortens the adaptation phase and allows yeast to quickly reproduce to levels that will ensure a good fermentation. Once the oxygen is used up, the yeast cells switch metabolic pathways and begin what brewers regard as fermentation: the anaerobic metabolism of sugar to alcohol. The key to a good fermentation is lots of strong healthy yeast cells that can get the job done before depleted resources, rising alcohol levels, and old age render them dormant. As noted, the rate of reproduction is slower in the absence of oxygen. At some point in the fermentation cycle of the beer, the rate of yeast reproduction will fall behind the rate of yeast dormancy. By providing optimum conditions for yeast growth and reproduction in the wort initially, we can ensure that this rate transition will not occur until after the beer has become fully attenuated. Worts that are underpitched or poorly aerated will have insufficient quantities of viable yeast, leading to slow or incomplete fermentations. Experienced brewers make a great point about wort aeration and building up a yeast starter because these practices guarantee a large enough population of yeast to do the job well. Under nominal conditions, yeast should proceed through the adaptation phase and begin primary fermentation within 12 hours. If 24 hours pass without apparent activity, then a new batch of yeast should probably be pitched. Lag time is a common benchmark that brewers use to gauge the health of yeast and the vigor of fermentation. It is possible, however, to overemphasize the significance of lag time, on its own, as a meaningful indicator. A very short lag time, for example, does not necessarily mean that your yeast has gotten off to a phenomenal start and just can’t wait to ferment. It could well mean just the opposite — that a low supply of nutrients and oxygen in the wort gave the yeast no recourse but to begin converting sugar to alcohol in order to survive. The latter stages of fermentation may also appear to finish more quickly when in fact the process was not super-efficient, but rather, incomplete. The point is that speed does not necessarily correlate with quality. Under optimal conditions, of course, the process will generally be more efficient and thus will take less time. But it’s better to pay attention to getting the process right than to focus on a rigid time schedule. Check out our yeast starter kits and accessories to improve fermentation! Act II — the attenuative phase: The attenuative, or primary, phase is a time of vigorous, robust fermentation during which the gravity of the beer drops by two-thirds to three-quarters of the original gravity. The primary phase will last anywhere from 2 to 6 days for ales or 4 to 10 days for lagers, depending on the yeast and on the fermentation conditions. A head of foamy kräusen will form on the beer as the sugar is converted to alcohol and the beer attenuates. The foam will be a light creamy color with islands of green-brown gunk that will tend to collect and adhere to the sides of the fermentor. The gunk is made up of extraneous wort protein, hop resins, and dead yeast. These compounds are very bitter and will contribute harsh aftertastes to the beer if allowed to mix back into the wort. Fortunately these compounds are relatively insoluble and will separate themselves from the wort, sticking to the sides of the fermentor as the kräusen subsides; they can also be removed by racking (transferring) to another, or secondary, vessel. Alternatively, they can be removed using the blow-off method, whereby a tube is attached to the fermentor at one end and submerged in water (makeshift sanitary airlock) at the other. Pressure in the fermentor forces the material on the surface of the wort out of the fermentor through the tube and into the water at the other end. As this primary phase winds down, a majority of the yeast cells start settling out and the kräusen begins to subside. If you are going to transfer the beer off of the trub and primary yeast cake, this is the proper time to do so. Take care to avoid aerating the beer during the transfer. At this point in the fermentation process, any exposure to oxygen will only contribute to staling reactions in the beer or worse, expose it to contamination. Click here to browse our fermenting equipment, fermenters and accessories! Key Factors for a Good Fermentation Yeast-Based Factors Pitch plenty of yeast: The first step to achieving a good fermentation is to pitch enough yeast. Yeast can be grown using yeast starters or it can be harvested from previous fermentations. When recycling yeast, use yeast that has proven itself through good fermentations in the past. Harvest from the middle layer of the primary yeast cake, where you are most likely to find healthy cells from the most active period of the fermentation. This yeast will have the optimum characteristics for repitching: It will have good glycogen reserves and will readily adapt to the new wort. With nominal levels of aeration and nutrients, the yeast will quickly multiply to the levels necessary for an exemplary fermentation. Yeast can also be taken from the secondary, but it may be less inclined to flocculate. However you obtain your yeast, plan to pitch at least 1/3 cup (75 mL) of yeast slurry for a typical 5-gallon batch of ale, or 2/3 cup (150 mL) of slurry for lagers. For stronger beers (O.G. >1.050 [12.34 °P]), pitch more yeast to ensure optimum fermentations. For very strong beers such as Doppelbocks and barleywines, pitch at least 1 cup (225 mL) of slurry. Wort-Based Factors Three issues must be considered to ensure that the wort has been properly prepared to support a good fermentation. Aeration: The first issue is the infusion of oxygen into the wort through aeration. Yeast will use up any available oxygen in the wort during the lag time to synthesize sterols for growth and cell membrane development. Strong cell membranes enable the yeast to absorb nutrients and protect it from rising ethanol levels later in the fermentation. FAN content: The second issue is the level of amino acid nutrients in the wort, specifically referred to as free amino nitrogen (FAN). Malted barley normally supplies all of the FAN that yeast needs to grow and adapt to the fermentation environment. If the recipe incorporates large amounts of adjuncts (refined sugar, corn, unmalted wheat, or unmalted barley, for example), however, then the wort may not have the minimum levels of nutrients necessary for yeast to build strong cells. In extract brewing, it is always advisable to add some yeast nutrient powder to worts made exclusively from light-colored extracts because these extracts are often thinned with corn sugar. Avoid refined sugars: Be aware also that in worts that contain a high percentage of refined sugar (about 50% or more), yeast will sometimes lose the ability to secrete the enzymes that allow it to ferment maltose. Temperature Factors Yeast cells are greatly affected by temperature — too cold and they go dormant; too warm (more than 10 °F [6 °C] above the nominal range, which varies from strain to stain) and they indulge in an orgy of fermentation resulting in by-products that often cannot be cleaned up by conditioning. High temperatures also encourage the production of fusel alcohols — heavier-than-average alcohols that can have harsh solvent-like flavors. Many of these fusels esterify during secondary fermentation, but in large amounts these esters can dominate the beer’s flavor. Excessive “banana” flavors are a common consequence of high-temperature fermentation. High temperatures can also lead to excessive levels of diacetyl. A common problem among home brewers is to pitch the yeast when the wort is too warm. If the yeast is pitched when the wort is 90 °F (32 °C), for example, and slowly cools to room temperature during primary fermentation, the early stages will produce more diacetyl than the yeast can reabsorb during the secondary stage. Furthermore, primary fermentation is an exothermic process. Yeast activity can raise the internal temperature of the fermentor as much as 10 °F (6 °C) above ambient conditions, but as long as this higher temperature is within the optimal range for the yeast, the beer will be fine, even if the yeast is warmer than its surroundings. The point is that if it is midsummer in Florida, you might want to find a way to keep the fermentor cool or just consider waiting until the weather turns cooler. Beer fermented too warm will not be drinkable. Keep the Yeast Happy Fermentation is the most important part — the purpose, in fact — of the whole process of brewing. Careful attention to the factors that affect fermentation will help to ensure that your labor of love lives up to your expectations. Many canned kits and even brewing texts advise bottling the beer after one week or after the kräusen has subsided. Don’t. The beer has not yet gone through the conditioning phase. The flavor of unconditioned beer reveals rough edges such as yeasty, buttery, or green apple flavors that will disappear after a few weeks of conditioning. Take your time — it will be worth the wait! The final act — the conditioning phase: The reactions that take place during conditioning are primarily a function of the yeast. The vigorous, primary stage is over, the majority of the wort sugars have been converted to alcohol, and a lot of the yeast cells are going dormant — but some are still active. Flavor effects. During the earlier phases, the yeast produced many compounds in addition to ethanol and carbon dioxide (acetaldehyde, esters, amino acids, ketones-diacetyl, pentanedione, and dimethyl sulfide, for example). By the time the kräusen has subsided, the yeast has eaten the easy food and now turns its attention toward the heavier sugars such as maltotriose and dextrins, as well as to the reprocessing of its own undesirable by-products. Diacetyl and pentanedione are two ketones that have buttery and honey-like flavors. These flavors are considered flaws when present in large amounts, and the compounds responsible cause flavor stability problems during storage. The compound acetaldehyde is a specific aldehyde that has a pronounced green apple smell and taste. It is an intermediate compound in the production of ethanol, and is reduced during the later stages of fermentation. Primary fermentation also produces an array of fusel alcohols that often give harsh solvent-like tastes to beer. During secondary fermentation, yeast converts many fusel alcohols to more pleasant-tasting fruity esters. Natural filtration. Conditioned beer is not only better tasting, but naturally clearer. Toward the end of secondary fermentation, a majority of the suspended yeast cells flocculate (settle out). Tannin and phenol compounds will bind with high molecular weight proteins and also settle out, greatly smoothing the taste of the beer. This process can be helped along by chilling the beer, very much like one might do in lagering. In reference to ales, this process is referred to as cold conditioning and is a popular practice at most brewpubs and microbreweries. Depending on the yeast strain, cold conditioning for a week will often clear the beer without the use of finings.* *Fining agents such as isinglass and gelatin are added to the secondary fermentor to help speed the flocculation process and to promote the settling of haze-forming proteins and tannins. While finings are most often used to drop unflocculant yeast strains and to combat chill haze, their real benefit is to improve the taste and stability of the beer. Conditioning times. How long you choose to condition will depend on your recipe and your preference. Different beer styles benefit from different amounts of conditioning time. Generally, the higher the original gravity, the longer the conditioning time needed for a beer to reach peak flavor. Small beers such as 1.035 O.G. (8.76 °P) pale ales will need less than two weeks. Stronger, more complex ales such as porters may require a month or more. Very strong beers such as Doppelbocks and barleywines can take six months to a year before they condition to their peak flavor. The downside. Unfortunately, yeast may also consume some of the proteins and other compounds in the trub, the “fermentation” of which can produce any of several off-flavors. In addition, the dormant yeast on the bottom of the fermentor begins excreting more amino and fatty acids. If the postprimary beer is left on the trub and yeast cake for too long (more than about two weeks), soapy off-flavors may become evident. The longer the yeast cells are left in contact with the beer, the more likely it is that they will begin to secrete enzymes that allow them to feed on each other (autolysis), which produces rubbery, sulfury tastes and smells. For these reasons, it can be important to remove the trub and dormant yeast from the beer during the conditioning phase. Conditioning Fundamentals Conditioning can take place in either the primary fermentor, a secondary fermentor, or the bottle, but each method produces different results. Debates over the benefits of each abound within the home brewing community. For and against bottle conditioning: Beer bottled immediately after completion of the primary fermentation will condition in the bottle, and this is the method of choice for many brewers. Many seasoned home brewers declare, for example, that racking to a secondary fermentor offers no real taste benefit and that the dangers of contamination and the cost in additional time are not worth what little benefit may be gained. I agree that for a new brewer’s first low-gravity pale beer, the risks probably outweigh the benefits, and I advise keeping it simple until you have gained some experience with racking and sanitization. If you are concerned about the risks of racking and want to bottle without using a secondary fermentation phase, you can leave an ale in the primary fermentor for a total of two weeks instead of just one, which will give the conditioning reactions time to improve the final beer. The extra time will also let more sediment settle out before bottling and result in a clearer beer and easier pouring. Just remember not to leave the beer on the yeast for more than two weeks. For most beer styles, however, conditioning before bottling makes the most sense, partly because the larger yeast mass in the fermentor is more effective at conditioning than the smaller amount of yeast suspended in the bottle. Priming and bottling right after the primary can create some other unwelcome problems as well. Studies have shown that bottle-conditioned beer actually goes through another mini-primary fermentation, making use of some of the headspace air. Unfortunately, though, only about 30% of that oxygen is used for reproduction; the rest slowly diffuses into the beer as it ages, contributing to staling reactions. Furthermore, a bottle-conditioned beer is stuck with the job of dealing with all of the usual intermediary compounds and by-products of fermentation, including aldehydes, diacetyl, fusels, and esters, that are produced during this short fermentation process on top of any byproducts left over from primary fermentation. Thus, to avoid these problems and get the most of conditioning, the beer should be given time in a secondary fermentor before priming and bottling. This is as true for homemade beer as it is for commercial “bottle-conditioned” beers. Even if the yeast has flocculated and the beer has cleared at bottling time, enough active yeast will still be in suspension to ferment the priming sugar and carbonate the beer. Bottle conditioning is not, however, always bad or inefficient. Bottle conditioning simply results in different ester profiles than those that are normally produced in the main fermentor. In fact, in some styles, for instance Belgian strong ale and Hefeweizen, bottle conditioning and the resultant flavors are the cornerstones of the style. These styles cannot be produced with the same hallmark flavors if they are immediately kegged (draft style). Click here to check out our bottles, caps, and other bottling equipment! The case for secondary fermentation: Secondary fermentation is beneficial to all beer styles if you have a good understanding of fermentation processes and can complete the transfer carefully. The key is in mastering some of the simple facts of racking. Dos and don’ts of racking. Racking from the primary can occur any time after primary fermentation has more or less finished, when the bubbling rate drops off dramatically to about 1–5 per minute. This will be about 2–6 days after pitching for ales, 4–10 days for lagers (though if it has been more than two weeks for ales you may as well just bottle). The kräusen will have started to settle back into the beer. Use a sanitized siphon to rack the beer off the trub into another sanitized fermentor and affix an airlock. The beer should still be fairly cloudy with suspended yeast. Although oxygen is a desirable commodity very early in the critical adaptation phase, it is absolutely not wanted in the later stages of fermentation. Racking at any time exposes the beer to the potential risks of exposure to oxygen and bacterial contaminants. Also, racking the beer before the primary fermentation phase is completed can result in a stuck or incomplete fermentation. Most brewers will notice a brief increase in activity after racking which is due not to additional primary fermentation, but simply to dissolved carbon dioxide coming out of solution because of the disturbance. Fermentation (conditioning) does continue after racking, so just leave it alone for awhile. A minimum useful time in the secondary fermentor is two weeks. Leaving the beer in the secondary for too long (more than six weeks for ales) may require the addition of fresh yeast at bottling time to achieve good carbonation. (Always use the same strain as the original.) Keep liquid notes. No matter which method you choose for fermenting and packaging your beer, it is always a good idea to set aside a six-pack in the corner of the basement and leave it for a good long time. It can be enlightening to compare a home-brewed beer after three months of bottle conditioning to the batch as it initially tasted. Browse our selection of equipment for racking and siphoning your homebrew! Rave Reviews Can Be Yours Fermenting a beer without allowing time for the conditioning phase is like raising the house lights and leaving the show before the final act has played out. Something will be missing from the total experience, and you deprive yourself of the full value of the show you paid for. Giving the beer time to condition smoothes and refines the beer’s flavor. Conditioning reduces diacetyl levels, vents dimethyl sulfide, and esterifies fusel alcohols. Yeast is given time to consume the remaining fermentables without also consuming the junk food in the trub. The low concentration of dormant yeast cells also prevents off-flavors caused by fatty acid excretion and autolysis. Finally, secondary fermentation allows time for more yeast and haze to settle out before bottling. The result is better beer. With a little patience, you can see the process through to the end and discover the full rewards of the grand finale. Fermentation FAQ What is fermentation? Fermentation is any process where bacteria or fungus change one thing into antoher. Lots of foods are fermented too!: Sauerkrautt, kimchi, soy sauce, and more! What is yeast and what does it do? Yeast is a single celled fungus that eats sugar and poops ethanol. What is the primary role of yeast? To transform our sugars into alcohols. Do you need to rehydrate dry yeast? why or why not? Strongly recommended but not necessary, if you do not hydrate you could experience a long lag time until your fermentation takes off. Do you want a constant temperature for fermentation? Absolutely!  This is extremely important.  Fluctuations in temperature can have a large impact on the final flavor outcome. What is a carboy? A carboy is a container with a typical capacity of 3 to 6.5 gallons and is used for transporting liquids.  They are used as both fermenters and storage containers for beer, wine and other fermented beverages.  Many people have seen them used as water jugs for businesses to have water on tap. What is a hydrometer? A hydrometer is a measuring tool used to detect the density of liquid.  It is used in brewing to determine the sugar content in wort. How do I read my Hydrometer? After filling your hydrometer jar with wort, you’ll carefully drop the hydrometer in.  Allow the wort to reach the appropriate temperature (some hydrometers will have a temperature correction scale, but not all will).  Once at the correct temperature find where the liquid comes up to on the hydrometer (meniscus) and read that number.  It will generally be a “1.0XX” number - the higher the XX, the more sugar in solution. What is specific gravity? The measure of the density of a liquid specifically grams of sugar per liter of water. A gravity of 1.040 means 40 grams of sugar per liter. "Specific" refers to "this sample right now". What is gravity and what is brix? how are they related? Gravity refers to the specific gravity or the relative density compared to water.  Gravity describes the concentration of malt sugar in the wort.  Brix describes the amount of available extract as a weight percentage of cane sugar in solution.  Both are used to describe the amount of potential alcohol and can be used to determine the amount alcohol in a beer or wine. How do you measure brix and how to you convert to gravity? Brix is measured by using a refractometer and you can convert by multiplying the number you get by 4 and  then putting “1.0” in front of that number and you will get your gravity.  This is a loose calculation and is okay at lower gravities but the higher your starting gravity goes the less accurate the conversion is.  So for example you get a brix reading of 12 which would be a 1.048 in specific gravity. What is original gravity? The gravity of the substrate before it was fermented. Usually called OG. Tells you the potential alcohol of a wort. What is final gravity? The gravity of the beer after it has fermented. Also called Terminal Gravity. How do I calculate ABV? (OG - FG) x 0.131 = ABV Using the SG and FG, how do you determine ABV? (SG - FG) * 131 = ABV (Starting gravity minus final gravity multiplied by 131 = Alcohol by volume)

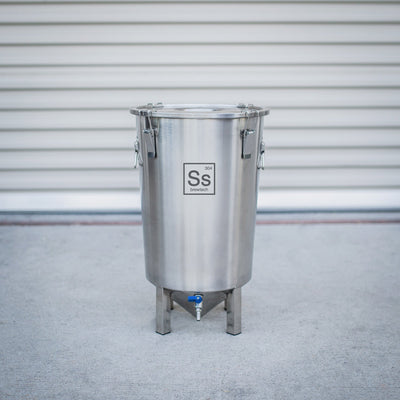
There is a small localized spot or area of rust on my kettle / fermenter that I bought recently. I thought stainless steel can't rust? +

Stainless steel itself shouldn't rust, you are right there. Especially a high grade 304 Ss like we use on all of our products. But what can rust are surface particles of iron that are sometimes left residual from the manufacturing process and the tools used to grind and polish the interiors and exteriors of Ss Brewtech's various vessels. This is one reason why proper cleaning and care prior to first use (or even exposure to water) is important. We have detailed documentation both in the box and on our website on all the product pages. The main thing here is cleaning and conditioning the stainless the first time prior to exposure to beer, water, whatever… In any case, if you do see a localized spot(s) of surface rust - simply get yourself a WHITE (NOT green type pad if you can avoid it) Scotchbrite pad, dab some Starsan onto the pad, and then GENTLY brush over the area in question until the surface rust has broken up and the area looks consistent with the surrounding areas of stainless. Then just rinse off, dry it with a paper towel, and the area will be good to go and free of the surface layer iron particles that were causing the issue to begin with.

Is my beer finished fermenting? +

If you have waited two weeks for an ale, or four weeks for a lager, or you're just curious. Most veteran homebrewers will tell you the beer is done once the airlock stops bubbling but this isn't a sure thing that fermentation is complete. This is where a hydrometer is sometimes worth its weight in gold. If you call our advice line and ask "Is my beer finished fermenting?" the first question will be, "Have you taken a hydrometer reading?" A hydrometer reading at the end of fermentation is called a final gravity reading, often abbreviated "FG". This tells you the amount of sugar left in the beer. Most yeast strains consume 65-75% of sugar in solution, this is called "attenuation." Here's an example gravity: OG: 1.050 your Goal FG would be: 1.010-1.015. If you are more than a few points above your estimated FG you will need to wait a couple more days. After a few days take another reading to see if the FG has dropped. If the FG has not dropped you will either need to consult us on our advice line at 925-671-4958. We will ask you some questions about the recipe, the yeast strain, and the fermentation temperatures your beer was exposed to. Sometimes we have some insightful comments on why fermentation is acting strangely, and other times only the beer Gods know.

My beer started fermenting, then stopped, and then started again? +

This usually happens when the beer goes through temperature changes. The yeast stops fermenting when it gets cold as the metabolic activity of the yeast slows down. It then proceeds to start up again when the fermenter warms up. If your fermentation gets stuck warm up the beer to the desired temperature range for your yeast. Sometimes it helps to give the carboy a swirl. DO NOT add oxygen. If there is one step you do as a homebrewer, investing in temperature control equipment will be the best thing you ever do for your beer.

Login

Forgot your password?

Don't have an account yet?
Create account