Detecting your location...
MoreBeer Category Header
Premium Fermentation Equipment

Elevate Your Homebrew with Pro-Grade Fermenters

Start your next batch off right with top-tier conical fermenters, glass carboys, and precise temperature control gear from leading brands like BrewBuilt.

  • Professional Performance: Stainless steel conicals built to last a lifetime and mimic commercial brewery setups.
  • Scratch-Free Cleaning: 1 to 6-gallon glass carboys and jugs that make sanitation a breeze.
  • Complete Temp Control: Dial in your fermentation environment for the perfect flavor profile every time.
  • Unmatched Quality: Access commercial-grade brewing capabilities at the most affordable prices.
Learn More About Fermentation ↓
1

Sanitize & Prep

Thoroughly clean your chosen fermenter to ensure a flawless, bacteria-free environment for your chilled wort.

2

Pitch & Ferment

Add your yeast and use temperature control accessories to maintain the perfect brewing climate.

3

Keg & Enjoy

Once fermentation is complete, easily transfer your clear, professional-quality beer to serve and enjoy.

Shop by collection
418 products

  • FermZilla All Rounder Fermenter - 30L FermZilla All Rounder Fermenter - 30L

    FermZilla All Rounder Fermenter | 7.9 gal. | 30 L

    82 reviews

    The lowest price Pressuizable fermentor out there Prefect for most ales that ferment in 2 weeks or less Super smooth PET makes cleaning very easy Transfer to your keg closed and under pressure, oxygen free PET is a better oxygen barrier than fermentors made of HDPE Super lightweight yet strong and shatterproof The FermZilla All Rounder is the most affordable pressurizable fermenter on the market. Although it doesn't feature a dump valve like the FermZilla Conical, the All Rounder carries the same pressure rating, making it an absolute steal if you're looking to ferment under pressure, perform pressure transfers, or want to carbonate and serve directly from the fermenter. The All Rounder is made from super smooth PET that's easy to clean, and the simple design means no nooks or crannies for microbes to hide. With a 4.75" lid opening, you'll have no trouble getting your arm inside to scrub away stubborn krausen rings. As with all FermZilla fermenters, the lid features molded drill locations that make installing accessories like a thermowell or Temp Twister Cooling Coil a breeze. In order to unlock the full potential of the All Rounder, you'll want to pick up the 55L FermZilla Pressure Kit. The silicone dip tube will be a little long, but you can cut it shorter to the appropriate length. The pressure kit is available with either stainless or plastic ball lock caps. Why MoreBeer! loves the All Rounder FermZilla: Super smooth PET makes cleaning very easy. Pressure rated lid and PET material make for a better oxygen barrier than fermenters made of HDPE. Lightweight and easy to move around, yet strong enough to be considered shatterproof. The 4.75" lid opening makes it easy to get your arm inside and clean after use. The lid is designed for the easy installation of accessories such as a thermowell or cooling coil. Price! A pressurizable fermenter in this price range is an incredible value, and it opens the door for many cold-side processes that can't be done in a normal carboy or plastic fermenter. What's Included: FermZilla 30L All Rounder Fermenter Stainless Steel Stand Stainless Steel Handle Top Lid with PRV (35 psi) 3-Piece Airlock Adhesive Thermometer Graduation Sticker Specs: 30 L (7.9 gal) Total Volume Pressure Rated to 2.5 Bar (36.2 psi) Height in Stand - 21.7" Height w/ Airlock - 24.2" Tank Diameter - 13.9" Lid & Collection Container Ports - 28 mm PCO 1881 threads Temperature Rating: When not under pressure, do not expose to liquids above 131°F When under pressure, do not expose to any temperatures above 95°F* *Please note that the temperature rating for the FermZilla tank is lower when using it under pressure. When not under pressure, it is perfectly safe to transfer wort into the tank below 131°F or to use hot liquids below this temp for cleaning. When under pressure, make sure to keep your fermentation temperature below 95°F and keep the fermenter in an environment that is below 95°F ambient. This is especially important when fermenting with kveik yeast. These strains are known to ferment hot if no temperature control is being used. Exceeding the temperature rating may compromise the tank, leading to a shorter life span or sudden failure to maintain pressure. Even with proper use, we recommend replacing the tank every two years. Kegland Part number: KL15189 NOTE: FermZilla tanks are marked with a manufacturer’s “expiry date”. This does not indicate that the tank is bad after this date; it simply indicates that a hydro test may be in order. 2 years after production and every 2 years after first use, it is recommended that the tank be hydro tested to ensure the tank is holding pressure. Hydro test instructions are available here. You will also need the D1072 Green PRV to perform the test. If you do not plan to pressurize the fermenter, the test is not necessary.

    $84.99

  • Airlock - 3 Piece Airlock - 3 Piece

    Airlock - 3 Piece

    187 reviews

    Airlocks are another one of those necessary pieces of equipment for every homebrewer. If you ferment in a carboy or bucket this 3 piece airlock is a must! It’s a popular alternative to the triple ripple type of airlock because it can be taken apart and cleaned, and is easy to fill. (However we do sell the triple ripple type (FE371) in case you are used to that type and would like to stay with it.) While a simple device not all airlocks are the same. Some other designs have only a couple holes in the plastic lid and this can cause the airlock to pop out during an active fermentation. Our design features multiple holes that allow CO2 to escape easily. Additionally some other airlocks have a cross hatch design on the bottom. We have found this more easily leads to Krausen clogs and the airlock being pushed out of the fermenter. Ours is open, allowing Krausen foam to enter the airlock if necesary. Better to clean your airlock out than to find it laying on the floor next to your fermenter 3 days later. Another cool feature of this 3-piece airlock is that 1/2" ID Silicone tubing will fit onto the center post for use as a blowoff. In the cases where you are using a yeast known to produce lots of Krausen (wlp002 from White Labs or 1968 from Wyeast for example) remove the top cover, remove the plastic 'hat', and install the silicone tubing. Run the silicone tubing into a jar or bucket of water. When fermentation dies back down remove the tubing and replace the hat and cover. Please Note: Airlock only - stopper not included.

    $3.29

  • Universal Stopper #10 - With hole - Each (Medium) Universal Stopper #10 - With hole - Each (Medium)

    Universal Rubber Stopper - Size #10 (With Hole)

    23 reviews

    Universal stoppers have a longer taper to help produce a better fit and a snug seal, and a lip which prevents them from falling into your container. Available with a 3/8 inch hole for an airlock, or solid with no hole. #10 size is recommended for PET carboys.

    $3.99

  • Airlock - S-Shaped

    Airlock For Fermentation - S-Shaped

    76 reviews

    S-shaped airlocks are the "OG" airlocks for home beer and winemaking. They make it easy to spot fermentation activity, and have no loose peices to lose. The advantage of this type of airlock is that they have a smaller chamber so you can more closely observe the CO2 rising and therefore the rate of fermentation. They are also handy when you are cooling a beer as there is less chance of sucking airlock water back into the fermentation. They cannot be cleaned manually if they get dirty during the ferment. That is why many homebrewers prefer 3-piece airlocks for the active portion of the ferment, when the krausen (foam) from fermentation might be pushed up into the airlock. Please Note: Stopper Not Included. 

    $2.89

  • Plastic Bucket With Spigot (6 Gallon) Plastic Bucket With Spigot (6 Gallon)

    MoreBeer!® 6 Gallon Bucket | Food Grade Plastic Fermenter | Bottling Bucket w/ Spigot | Volume Markers

    106 reviews

    Perfect for use as a 5-gallon batch beer fermenter or bottling bucket Inlcuded plastic spigot for easy gravity transfers or attaching a bottle filling wand Sediment blocker on the spigot's back locking nut helps minimize trub pickup when racking out after fermentation Once you've upgraded to a carboy or other fermenter, the bucket will remain a reliable brewing tool for cleaning and sanitizing purposes External volume markers provide a convenient reference point when filling the bucket with water to make cleaner or sanitizer solution A six gallon food grade bucket for fermentation or bottling with a built in spigot and external volume markings up to five gallons. Outlet barb accepts 3/8" ID vinyl tubing. To use as a fermenter you will need to pick up the optional lid, stopper, and an airlock. Includes our new Sediment Block Spigot, which will help minimize trub uptake as you rack after fermentation. If using this as a bottling bucket, simply rotate the spigot to maximize product output. Spigot includes gasket and sediment blocking lock nut and can easily be removed for cleaning and sanitizing. If you use the bucket for fermentation be sure to use care when cleaning. Do not use any abrasive pads that would scratch. Once you get a scratch in a plastic bucket it is very hard to sanitize. This is also why we don't recommend storing equipment in a bucket between uses as a fermenter. A hot PBW soak is often a perfect way to clean a bucket, followed by a Star San soak for killing bacteria. Bucket has external volume markings up to 5 gallons. 17.5" H x 12" Ø Please Note: Buckets are translucent and do not come with lids Buckets are not designed to hold pressure Lids are not gasketed and so do not always form a perfect, airtight seal. Not intended for long-term storage Food-Grade to 180°

    $19.99

  • Fermonster 7 Gallon Carboy - Ported Fermonster 7 Gallon Carboy - Ported

    FerMonster Carboy With Spigot - 7 gal.

    193 reviews

    Smooth, ribless design prevents yeast and bacteria buildup, making sanitation a breeze Punted bottom and conical top promote sediment collection and reduce oxidation during storage Extra-wide 4" mouth opening simplifies filling, additions, and cleaning Constructed from heavy-duty, virgin PET plastic without plasticizers Made with food-grade and BPA-free materials The Ported Fermonster is a brand new fermenter designed specifically for fermentation. MoreBeer! gave product feedback for over 2 years of development and we think they nailed the design. The large lid allows for easy filling and makes hop or oak additions a breeze. The smooth sides are fantastic for sanitization - no ribs or texture to collect yeast or bacteria. The large 7 gallon size was designed to provide ample space for fermentation and you'll find the molded in volume markers super handy for accurate filling. The punted bottom allows sediment to collect to the sides so that you can siphon liquid from the center. Because they are made from virgin PET plastic they nearly unbreakable and a lot safer than similar glass carboys. Also notice the conical top which reduces surface area if you plan to store beer or wine long term. These ported versions come with our plastic spigot (FE347), allowing for easy racking and sampling! Made from heavy PET plastic, the same material used in 2 L soda bottles, which is nearly impermeable to oxygen penetration. Due to the thickness of the material and the overall geometry the Fermonster does not require ribs or dimples for stability. That results in a super smooth interior surface that reduces yeast and sediment buildup making it the easiest to clean, most sanitary PET carboy on the market. The huge 4" opening makes filling a breeze, and cleanup is as easy as wiping down the inside. The 7 gallon volume is a monster of a fermenter, reducing blowoff issues seen with standard 5 and 6 gallon carboys. Fermonsters are easily moved by hand or consider using our Carboy Carrier for even greater ease of use. These fermentors are completely air-tight and the lids sealed tight with an O-Ring. Additional O-Rings and Lids both with and without holes are available for purchase, see our You Might Also Need items below. Features: 4" wide mouth carboy - easy to clean! Ported version includes Spigot for easy racking Food grade PET plastic construction is nearly impermeable to oxygen penetration No hard to clean dimples or ribs Volume Markers at 5, 6, and 7 Gallons Punted bottom O-Ring and Lid with one hole is included (Fits #10 Stopper) Additional O-Rings and Lids available Weight: 1.5 lbs Temperature Limit: 140° F Height: 20.9 inches Diameter: 11.3 inches Completely taste and odor free Perfect for Beer, Wine, Cider, Mead, Kombucha or any other fermented beverage! Thick walls for better oxygen barrier.

    $49.99

  • FerMonster - Lid Opener FerMonster - Lid Opener

    FerMonster Lid Opener

    83 reviews

    Got a stuck lid on your Fermonster? Get it open much easier with this specially designed lid opener. It easily slides onto the lid and gives you comfortable hand grips to open a stuck lid. Note: We do not recommend using this tool to tighten the lid because the seal is made by the o-ring and not the pressure between the lid and neck.

    $5.99

  • FermZilla - Thermowell (60cm) w/ Duotight Bulkhead FermZilla - Thermowell (60cm) w/ Duotight Bulkhead

    FermZilla Thermowell w/ Duotight Bulkhead - 23.6 in.

    47 reviews

    This stainless steel thermowell is your best option of monitoring temperatures in the 27L or 55L FermZilla. Since the thermowell installs into the lid, the thermowell will be well positioned in the middle of the fermenter to provide an accurate core temperature reading. On the bottom side of the FermZilla's lid you'll find several convenient drill locations already molded into the plastic. The thermowell is long enough to work with either size FermZilla (or other fermenters!), so if you need to cut the tube down a bit, we recommend using one of these Pipe Cutters. The FermZilla will still be pressurizable after installing the thermowell, just be careful to drill the hole no wider than needed to fit the Duotight bulkheads. 23.6" long (60 cm) 5/16" OD (8 mm) 1/4" ID (7 mm) Made from 304 stainless steel Kegland Part number: KL14649

    $10.99

  • MoreBeer! Plastic Bucket (6 Gallon) MoreBeer! Plastic Bucket (6 Gallon)

    6.5 Gallon Food-Grade Fermenter Bucket with Volume Markers

    146 reviews

    The most affordable 5-gallon batch beer fermenter you'll find! Food-grade plastic buckets make a perfect starter fermenter for beginner brewers—simply add a lid with stopper and airlock Once you've upgraded to a carboy or other fermenter, the bucket will remain a reliable brewing tool for cleaning and sanitizing purposes External volume markers provide a convenient reference point when filling the bucket with water to make cleaner or sanitizer solution A food-grade six gallon plastic bucket perfect for all kinds of home beer or winemaking activities. Plastic buckets are often used as a fermenter, bottling bucket, or even sanitizer bucket. We go through thousands which helps keep our price down. If you want to use it as a fermenter you will also need to pick up the optional lid, stopper, and airlock. This bucket is also available in a version that includes a spigot (see recommended products below). If you use this plastic bucket for fermentation be sure to use care when cleaning. Do not use any abrasive pads that would scratch. Once you get a scratch in a plastic bucket it is very hard to sanitize.  This is also why we don't recommend storing equipment in a bucket between uses as a fermenter. A hot PBW soak is often a perfect way to clean a bucket, followed by a Star San soak for killing bacteria. Bucket has external volume markings up to 5 gallons. 17.5" H x 12" Ø Please Note: Buckets are translucent and do not come with lids Buckets are not designed to hold pressure Lids are not gasketed and so do not always form a perfect, airtight seal. Not intended for long-term storage Food grade up 180°F

    $16.99

  • FermZilla - Pressure Kit for 27L & 55L (Stainless Caps) FermZilla - Pressure Kit for 27L & 55L (Stainless Caps)

    Stainless Steel Pressure Kit for FermZilla

    31 reviews

    With the FermZilla Pressure Kit you can ferment under pressure, carbonate, and serve without ever needing to move your beer out of the fermenter. The kit inlcudes two stainless female threaded ball lock fittings with barbs, which thread onto the existing openings atop the FermZilla's lid. For the beverage out, you'll have a silicone dip tube with stainless steel float, allowing you to always draw from the clearest beer at the top of the tank. Pick up the Pressure Kit and turn your FermZilla into a true unitank! The silicone dip tube is 31" long. It will work perfectly as is for the 55L FermZilla. For the 27L model we recommend cutting the dip tube shorter to remove unwanted slack. With the optional Floating Dip Tube Filter, you can prevent hop material and other solids from ever entering the dip tube. Especially handy when you're pulling samples mid-fermentation! Fermenting Under Pressure: The pressure kit allows for fermenting under pressure, which will reduce esters and fusel alcohol production. This means you can ferment at warmer temperatures than you normally would, even making lagers at room temperature. Most commerical beer is fermented under pressure simply due to the size of commercial tanks and the pressure that is created by the column of beer. It is one of the distinct differences between homebrewing and brewing on a commercial scale. The FermZilla's lid already comes with a built-in pressure relief valve that will blow at 35 psi; the pressure kit simply allows you to add CO2 through the ball lock fitting. We strongly recommend that you also purchase an adjustable pressure relief valve, or spunding valve, which allows you to set a lower pressure. It's always a good idea to have two relief valves on the FermZilla anytime the unit is under pressure. Carbonating, Transferring, and Serving: When you are fermenting under pressure the beer is already carbonated when you are done fermenting. You can control the level of carbonation by using a spunding valve. This means you can eliminate kegging and serve directly from the fermenter. We love this idea but there will probably still be times that you want to keg. Attach a beer line from the FermZilla's bev out to your keg and enjoy the easiest kegging experience ever. You can also choose to send carbonated beer through a beer filter on the way to your keg. When applying pressure with a CO2 tank also make sure that you have a functional relief valve on your CO2 regulator. Eliminate Oxidation: Since the beer always has a CO2 blanket through fermentation and during any transfers out, oxidation is eliminated. When you cold crash you won't be sucking air back in through an airlock. Key Features: Ferment beer under pressure to reduce ester and fusel alcohol production Always draw clear beer with the floating dip tube Keg beer that has already been carbonated Use CO2 to push beer into a keg or through a filter into a keg Eliminate kegging altogether by carbonating and serving directly from the FermZilla Installation Note: For best performance, ensure there is not an excess amount of slack when the silicone dip tube is installed and shorten it if needed. With the floating dip tube installed on your empty FermZilla, you ideally want the dip tube to hang freely with just enough length for the end of the dup tube to touch the bottom of the tank. Please note: pressure kit does not include the lid pictured in the example photo. The ball locks and floating dip tube are installed on the FermZilla's existing lid.

    $32.99

  • Rubber Stopper- #7 With Hole

    Rubber Stopper - #7 With Hole

    10 reviews

    #7 stopper - with 3/8 inch hole. Top diameter 1.43 inches (36.3 mm), bottom diameter 1.19 inches (30 mm), length 1 inch (25 mm). BPA-free stopper made of food grade materials. Injection molded TPE for superior consistency throughout. Perfect for use with carboys, as the material sticks well to glass and PET, even when wet. To create a solid stopper, simply use a #000 solid stopper (FE400) to plug the hole. Max. Temperature Rating: 158 °F (70 °C).

    $2.09

  • Blowtie Diaphragm Spunding Valve Complete Kit - 8mm Duotight Blowtie Diaphragm Spunding Valve Complete Kit - 8mm Duotight

    Duotight BlowTie | Complete Kit | Diaphragm Spunding Valve | Triple Scale Pressure Gauge | 0-40 PSI | 8 mm Duotight | CM Becker Ball Lock Quick Disconnect (QD)

    77 reviews

    Automatically release pressure inside your fermenter during pressure fermentations Regulate beer flow during pressurized transfers from fermenter to keg Large triple scale pressure gauge with extended 0-40 PSI pressure range Diaphragm spunding valves offer higher accuracy compared to spring & poppet spunding valves Comes complete with ball lock QD, Duotight adapter, tee, and rigid joiners With this complete kit you'll be ready to use the Blow Tie Spunding Valve right out of the box. The BlowTie is used to release excess pressure on a pressurized fermenter or from a receiving keg during pressure transfers. This diaphragm spunding valve is much more accurate than the spring and poppet style, and works much better at lower pressures. Pressure Fermentation Pressure fermentation is becoming more and more popular at the homebrew level, but in order to do it safely and accurately, you need a way to release excess pressure. You'll pressurize your vessel to your desired psi, but once fermentation begins and those hungry, active yeast start creating CO2, the pressure inside the vessel will increase. Attach a spunding valve and set it to your desired pressure, and it will blow off when the pressure gets to high and close up again when it's back to your desired psi. Pressure Transfers Even if you don't have a pressurizable fermenter, you may have done pressure transfers from keg to keg during filtering or after fining. During pressure transfers, it's a good idea to have a bit of head pressure in the receiving keg, especially if you're transferring beer that is already carbonated. Having a spunding valve in place will allow you to consistently control the head pressure and give you more consistent results, without losing carbonation in the process. Diaphragm vs. Poppet With the poppet style spunding valve, a spring pushes against a poppet to keep the valve closed. When the poppet lifts up to open, the surface area the gas pushes against becomes larger, and the spring has to work harder to push the poppet down and reseal the valve. This can lead to more gas being released than intended, and the remaining pressure in your vessel may be at a lower psi than your spunding valve’s set psi.  Instead of a poppet, the spring inside the BlowTie pushes against a diaphragm, which has an immensely larger surface area. This means the surface area that the gas pushes against while the diaphragm is closed is significantly closer to the surface area it pushes against when the diaphragm is open. This leads to higher accuracy, and the remaining pressure after excess gas is released will be much closer to your set blow off pressure. Kit Includes: BlowTie Pressure Gauge (0-40 psi) Ball Lock Disconnect Duotight Tee & Flared Duotight Fitting 2x Lengths of EVABarrier 8mm OD Tubing  

    $38.49

  • FermWrap - 40 Watt Fermentation Heater FermWrap - 40 Watt Fermentation Heater

    The FermWrap™ Heater | Fermentation Heater | 40 watts | 115V

    300 reviews

    Achieve consistent and optimal fermentation temperatures with the FermWrap Fermentation Heater. This flexible and easy-to-use unit wraps snugly around your fermenter, providing gentle and controlled heat. Use alone or simply plug into the 110V heatnig plug on most popular temp controllers Provides gentle, even heating with 40 watts spread over almost two square feet Keep your yeast happy and your ferment warm during those cold winter months with this flexible heater wrap! Don't be fooled by imitators and cheap knock-offs, this is the original FermWrap that has been produced by Fermentap for over a decade. Unlike those old heater belts, the FermWrap covers a wide area of your carboy or fermentation vessel, promoting an even heat distribution. Using tape to adhere, the FermWrap can be attached directly to your fermenter, or can be used to heat the space in a box (or refrigerator) that the fermenter is in. Depending on your configuration and insulation, you can increase the temperature of your ferment from 5-20°F. This differential can be increased by using the BrewBuilt™ Neoprene Carboy Sleeve. With 40 watts of heat spread over almost two square feet, it provides gentle, even heating. For more precise results, we recommend a temp controller and carboy thermowell. The controller will monitor the fermentation temp and only power on the FermWrap if the temperature drops below your set point. For the ultimate level of control, we recommend pairing it with the BrewBuilt CoolStix™ to provide cooling. With both accessories plugged into the temp controller, you'll get cooling or heating whenever you need it. Specs: 40 watts 115V 11" H x 25" W Item does not include carboy as pictured. Kegland Part number: KL0625

    $32.99

  • FerMonster - Replacement O-Ring

    FerMonster Carboy - Replacement Lid O-Ring

    19 reviews

    Replacement O-ring for the Fermonster Plastic Carboy lids (all sizes use same lid).   The o-ring is a little tricky to install so please be sure to watch our video in the video tab on how to install it.   

    $3.99

  • Universal Stopper With Hole (Small) Universal Stopper With Hole (Small)

    Universal Rubber Stopper - Size #6-7 (With Hole)

    30 reviews

    You will love the versatility of this stopper!   The Universal Stopper with Hole fits a 2.8, 3, 5, 6, or 6.5 gallon glass carboy. Also fits our 500ml Erlenmeyer flask, and can be flipped over and used in most bottles! Made with a longer taper from a different material from standard stoppers to minimize popping out when wet.   Please Note: This stopper will not fit in plastic carboys, Better Bottles or Speidel Plastic Fermenters.

    $1.89

  • Temp Twister Cooling Coil for FermZilla / Kegmenter / Bucket Buddy Temp Twister Cooling Coil for FermZilla / Kegmenter / Bucket Buddy

    Temp Twister Cooling Coil

    47 reviews

    The Temp Twister Cooling Coil is the ideal option for maintaining fermentation temperatures in any model FermZilla. Use an IceMaster Glycol Chiller or ice bath with submersible pump to push coolant through the coil when temps get too hot. Designed for the FermZilla but can can be used with virtually any fermenter that has an opening diameter of 4-3/8" or wider. The inlet and outlet are extra long so the coil can be used with every sized FermZilla. In order to cut them to an appropriate length for your application, we recommend this compact pipe cutter. To install, simply drill two 22 mm (approx. 7/8") holes into the lid of the fermenter and use the included Duotight bulkhead fittings to attach the coil to the lid. The FermZilla will still be pressurizable after installing the Temp Twister, just be careful to drill the holes no wider than needed to fit the Duotight bulkheads. If you're using the Temp Twister with EVABarrier tubing, we suggest adding 2 x DUO112 to your order to help route your inlet and outlet lines. Specifications: Coil Diameter - 4.33" Coil Height - 14" Overall Length - 26.75" Tubing Diameter - 3/8" OD Made from 304 Stainless Steel Includes 2 x 9.5 mm Duotight bulkheads Kegland Part number: KL14618  

    $43.99

  • Inkbird Dual Stage Digital Temperature Controller Inkbird Dual Stage Digital Temperature Controller

    Inkbird Digital Temperature Controller

    126 reviews

    The Inkbird dual stage temperature controller is an easy to use and economical controller that is perfect for home brewing. Inkbird controllers allow you to control both heating and cooling, and set independent differentials for each to keep the exact temperature you need. The Ink bird ITC-308S controller performs many of the same functions as the Ranco or Johnson but at a more affordable price, making it a great alternative for temperature control.  Aside from brewing uses, this is a great dual relay output temperature controller for cooking (use in a smoker or bbq), home growing (heat mats for seedlings, climate control), or any other DIY project you come up with! Features: Simple plug and play design with user friendly LED interface Dual stage ITC-308 - control both heating and cooling Adjustable Heating/Cooling differential 1000W max power Celsius or Fahrenheit High and low temperature and sensor fault alarms Can control temperatures of -58° F through 210° F (-50° C - 99° C) Body Dimensions: 5.5 in x 2.7 in x 1.3 in

    $44.99

  • Blowtie 2 Diaphragm Spunding Valve Complete Kit - 8mm Duotight Blowtie 2 Diaphragm Spunding Valve Complete Kit - 8mm Duotight

    Duotight BlowTie 2 | Complete Kit | Diaphragm Spunding Valve | Built-In Pressure Gauge | 0-15 PSI | 8 mm Duotight | CM Becker Ball Lock Quick Disconnect (QD)

    22 reviews

    Automatically release pressure inside your fermenter during pressure fermentations Regulate beer flow during pressurized transfers from fermenter to keg Built-in pressure gauge for easy reference when adjusting the spunding valve Pressure gauge is interchangeable—swap to different pressure ranges that better suit your application Diaphragm spunding valves offer higher accuracy compared to spring & poppet spunding valves Comes complete with ball lock QD, Duotight adapter, and rigid joiner With this complete kit you'll be ready to use the BlowTie 2 Spunding Valve right out of the box. The BlowTie is used to release excess pressure on a pressurized fermenter or from a receiving keg during pressure transfers. This diaphragm spunding valve is much more accurate than the spring and poppet style, and works much better at lower pressures. This version of the Spunding Valve Kit includes the CM Becker Ball Lock QD, often considered the finest quality in plastic ball lock quick disconnects, and an 8 mm Duotight Flare Adapter for connecting to the BlowTie. The BlowTie 2 can also be upgraded with a Digital Mini Pressure Gauge. Pressure Fermentation Pressure fermentation is becoming more and more popular at the homebrew level, but in order to do it safely and accurately, you need a way to release excess pressure. You'll pressurize your vessel to your desired psi, but once fermentation begins and those hungry, active yeast start creating CO2, the pressure inside the vessel will increase. Attach a spunding valve and set it to your desired pressure, and it will blow off when the pressure gets to high and close up again when it's back to your desired psi. Pressure Transfers Even if you don't have a pressurizable fermenter, you may have done pressure transfers from keg to keg during filtering or after fining. During pressure transfers, it's a good idea to have a bit of head pressure in the receiving keg, especially if you're transferring beer that is already carbonated. Having a spunding valve in place will allow you to consistently control the head pressure and give you more consistent results, without losing carbonation in the process. Diaphragm vs. Poppet With the poppet style spunding valve, a spring pushes against a poppet to keep the valve closed. When the poppet lifts up to open, the surface area the gas pushes against becomes larger, and the spring has to work harder to push the poppet down and reseal the valve. This can lead to more gas being released than intended, and the remaining pressure in your vessel may be at a lower psi than your spunding valve’s set psi. Instead of a poppet, the spring inside the BlowTie pushes against a diaphragm, which has an immensely larger surface area. This means the surface area that the gas pushes against while the diaphragm is closed is significantly closer to the surface area it pushes against when the diaphragm is open. This leads to higher accuracy, and the remaining pressure after excess gas is released will be much closer to your set blow off pressure. Kit Includes: BlowTie 2 w/ Integrated Pressure Gauge (0-15 psi) CM Becker Gray Ball Lock Disconnect Duotight Flare Fitting 8 mm OD Rigid Plastic Joiner

    $32.99

  • FerMonster - Solid Lid

    FerMonster Carboy - Solid Lid

    21 reviews

    Solid replacement lid for the all sizes of Fermonster fermenter.  Does not include a gasket. Perfect for transporting wort after big brews where it was needed to drive the wort home before fermentation.    

    $5.99

  • Stopper - Autoclavable Foam Stopper, 35-45mm - PLACEHOLDER Stopper - Autoclavable Foam Stopper, 35-45mm - PLACEHOLDER

    Foam Stopper (Autoclavable)

    17 reviews

    Due to high demand, the case of 100 is currently out of stock. Be the first to receive your items by placing a pre-order today. We will automatically ship this to you when we receive more inventory.   Use this foam stopper with your Erelenmeyer flask when making a yeast starter. Aeration is an important aspect of making a strong, healthy starter. This is why we recommend using a stir plate, which provides continuous aeration. This foam stopper will allow air to flow freely into your flask while keeping pesky bugs and other contaminants out. A quick spray down with sanitizer is all you need. Suitable for flasks or other vessels with an inner diameter opening of 35-45mm (1-3/8" - 1-3/4"). Reusable Resists alcohols, bases, esters, and dilute acids Autoclavable up to 249°F (121°C).

    $2.99 - $199.99

  • Lid For Bucket (With Hole for #7 Stopper) - (For FE340/FE345/FE341N/FE342N))

    Lid For Bucket (With Hole for #7 Stopper)

    37 reviews

    For use with stopper and airlock on 6 gallon bucket. Comes with 1 1/4" hole which fits a #7 or universal stopper. Please Note: Lids are not gasketed and so do not always form a perfect, airtight seal. Not intended for long-term storage.

    $5.99

  • The Carboy Carrier - Fermonsters and PET Carboys The Carboy Carrier - Fermonsters and PET Carboys

    The Fermonster/Carboy Carrier

    44 reviews

    Use the Fermonster Carboy Carrier to move your Fermonster, Plastic or Glass Carboy around with ease. The harness and strap handles are made from heavy-duty polypropylene, enabling you to haul up to 100 lbs of your wort or finished beer without the risk of losing your grip. Cradle your carboy with confidence and avoid spilling! The carrier comes with handles in two different positions for added convenience. Short handles for lifting and long handles for moving. The long handles are especially handy when lifting your carboy out of a top-loading fermentation locker. Compatibility: 3, 5 and 6 gallon Plastic Carboys 3, 5 and 6 gallon Glass Carboys 3, 6 and 7 gallon Fermonsters Take Care of the Carrier: Avoid prolonged exposure to sunlight Machine wash safe (low temperatures only) Do not clean with bleach or products that contain bleach Hang dry in the shade Do not iron  

    $16.49

  • FermZilla All Rounder - 30 L - Pressure Brewing Kit

    FermZilla All Rounder Pressure Brewing Kit - 7.9 gal. / 30 L

    65 reviews

    This kit includes the 30L FermZilla All Rounder, ball lock cap adapters for the lid, floating dip tube with filter attachment, and the BlowTie 2 ball lock spunding valve. Everything one needs to ferment under pressure, carbonate in vessel, and pressure transfer. The FermZilla 30L All Rounder is the perfect fermentation vessel that can be used for fermenting under pressure, carbonating, and dispensing. It's far more capable than the FermZilla Flat bottom but less complicated and less expensive than the FermZilla Conical fermenter. The key differences are that the All Rounder can be pressurized, unlike the Flat Bottom, but it does not have a dump valve like the FermZilla Conical. What's Included: FermZilla 30L All Rounder Fermenter Stainless Steel Stand Stainless Steel Handle Top Lid with PRV (35 psi) 3-Piece Airlock Adhesive Thermometer (1) Red Ball Lock Carbonation Cap (1) Yellow Ball Lock Carbonation Cap Use one color for gas and one for liquid! Stainless Steel Float with Silicone Dip Tube Weighted Mesh Filter Attachment (KEG6571) All Rounder Stand Harness BlowTie Spunding Valve FermZilla All Rounder Specs: 30 L (7.9 gal) Total Volume Pressure Rated to 2.5 Bar (36.2 psi) Height in Stand - 21.7" Height w/ Airlock - 24.2" Tank Diameter - 13.9" Lid & Collection Container Ports - 28 mm PCO 1881 threads Temperature Rating: When not under pressure, do not expose to liquids above 131°F When under pressure, do not expose to any temperatures above 95°F* Installation Note: For best performance with your Floating Dip Tube, ensure there is not an excess amount of slack when the silicone dip tube is installed and shorten it if needed. With the floating dip tube installed on your empty FermZilla, you ideally want the dip tube to hang freely with just enough length for the end of the dup tube to touch the bottom of the tank. *Please note that the temperature rating for the PET tank is lower when using it under pressure. When not under pressure, it is perfectly safe to transfer liquid into the tank below 131°F or to use hot liquids below this temp to clean the tank. When under pressure, you should make sure to keep your unit in an environment no hotter than 95°F and to keep your fermentation temperature below this temp as well. If you are using kveik yeast to ferment under pressure, we highly recommend using temperature control. NOTE: FermZilla tanks are marked with a manufacturer’s “expiry date”. This does not indicate that the tank is bad after this date; it simply indicates that a hydro test may be in order. 2 years after production and every 2 years after first use, it is recommended that the tank be hydro tested to ensure the tank is holding pressure. Hydro test instructions are available here. You will also need the D1072 Green PRV to perform the test. If you do not plan to pressurize the fermenter, the test is not necessary.  

    $129.99

  • Spigot For Bucket Spigot For Bucket

    Plastic Spigot For Bucket

    69 reviews

    This Spigot can be easily installed onto any bucket for added convenience.   Drill a 1" hole and install in bucket with the gasket against the exterior of the bucket.    Spigot uses 3/8 in ID tubing.

    $4.49

  • Farro Glass - Wide Mouth Glass Carboy - PLACEHOLDER

    Farro Glass | Glass Carboy | Wide Mouth | Carrying Harness

    5 reviews

    Wide mouth carboys are the easiest glass fermenter to clean with plenty of room to get your arm inside to scrub Add bagged flavoring additions and remove them freely when finished—this can be nearly impossible with traditional narrow neck glass carboys Watch fermentation activity as it's happening! The ultimate advantage of translucent glass or plastic fermenters Ported lid with removable cap sized for a #5 stopper & airlock Carrying harness included for easier handling Glass carboys have been a staple of the brewing and winemaking world for generations, but traditional tight neck carboys aren't without their limitations. Standard glass carboys can be difficult to clean after fermentation. The wide mouth carboy is extremely easy to clean—simply removing the lid allows you to get your hand or arm all the way inside to scrub away stubborn sediment.  Each carboy comes with a carrying harness. Features: Gasketed lid for tight seal Included carrying harness Ported lid ready for #5 stopper & airlock 165mm (6.5") lid opening Continuous thread, 5mm pitch Please note: The carrying harness should not be used to move the vessel when full. The airlock lid is primarily recommended for short fermentations.

    $21.99 - $63.99

  • Blowtie 2 Diaphragm Spunding Valve - Adjustable PRV w/ Integrated Gauge (0-15 psi) - 8mm Duotight Blowtie 2 Diaphragm Spunding Valve - Adjustable PRV w/ Integrated Gauge (0-15 psi) - 8mm Duotight

    Duotight BlowTie 2 | Diaphragm Spunding Valve | Built-In Pressure Gauge | 0-15 PSI | 8 mm Duotight

    26 reviews

    Automatically release pressure inside your fermenter during pressure fermentations Regulate beer flow during pressurized transfers from fermenter to keg Built-in pressure gauge for easy reference when adjusting the spunding valve Pressure gauge is interchangeable—swap to different pressure ranges that better suit your application Diaphragm spunding valves offer higher accuracy compared to spring & poppet spunding valves 8 mm Duotight inlet/outlet for use with 8 mm OD EVABarrier tubing or 8 mm Rigid Joiners The Blow Tie Spunding Valve is used to release excess pressure on a pressurized fermenter or from a receiving keg during pressure transfers. This diaphragm spunding valve is much more accurate than the spring and poppet style, and works much better at lower pressures. The BlowTie 2 features an integrated pressure gauge so you can quickly and easily dial in your pressure setting. The analog gauge is removable and can be swapped out with a gauge of a different pressure range or it can be swapped out for the Digital Mini Pressure Gauge. Pressure Fermentation Pressure fermentation is becoming more and more popular at the homebrew level, but in order to do it safely and accurately you need a way to release excess pressure. You'll pressurize your vessel to your desired psi, but once fermentation begins and those hungry, active yeast start creating CO2, the pressure inside the vessel will increase. Attach a spunding valve and set it to your desired pressure, and it will blow off when the pressure gets too high and close up again when it's back to your desired psi. Pressure Transfers Even if you don't have a pressurizable fermenter, you may have done pressure transfers from keg to keg during filtering or after fining. During pressure transfers, it's a good idea to have a bit of head pressure in the receiving keg, especially if you're transferring beer that is already carbonated. Having a spunding valve in place will allow you to consistently control the head pressure and give you more consistent results, without losing carbonation in the process. Diaphragm vs. Poppet With the poppet style spunding valve, a spring pushes against a poppet to keep the valve closed. When the poppet lifts up to open, the surface area the gas pushes against becomes larger, and the spring has to work harder to push the poppet down and reseal the valve. This can lead to more gas being released than intended, and the remaining pressure in your vessel may be at a lower psi than your spunding valve’s set psi. Instead of a poppet, the spring inside the BlowTie pushes against a diaphragm, which has an immensely larger surface area. This means the surface area that the gas pushes against while the diaphragm is closed is significantly closer to the surface area it pushes against when the diaphragm is open. This leads to higher accuracy, and the remaining pressure after excess gas is released will be much closer to your set blow off pressure. Set Up The BlowTie spunding valve comes with 8 mm Duotight fittings on the inlet and outlet, and we recommend using it with EVABarrier 8 mm OD tubing (D1717 or D1718). You'll also need the flare Duotight fitting (DUO106) in order to attach it to a ball lock or pin lock disconnect. Dialing in your desired pressure is even easier with the BlowTie 2, thanks to the integrated pressure gauge. Simply start with the adjustment knob fully closed, then slowly open it until the gauge reading matches your desired pressure setting. Specifications: Made from food grade acetal Stainless screws Easily disassembles for cleaning 8mm (5/16") Duotight fittings at both ends Interchangeable pressure gauge Gauge reads from 0-15 psi WARNING: Do not exceed gauge pressure. Exceeding the pressure range will damage the gauge. Kegland Part number: KL15042

    $21.99

  • Stainless Steel Hop Tube with Chain Stainless Steel Hop Tube with Chain

    Stainless Hop Tube

    41 reviews

    This stainless steel hop tube is ideal for keeping kettle additions from clogging your pump or heat exchanger, and works perfectly for dry hopping in a keg or wide-mouth fermenter. Holds approximately 5 oz of pellet hops, allowing some space to permit full extraction of the hop oils. The stainless chain makes it the perfect partner to our Corny Keg Lid with Welded Tab. Hang the tube inside your keg for post fermentation hop, fruit, wood chip, or spice additions. When it's time to remove the hops/adjuncts simply pull the tube out. Works great for timing exactly how long your beer sits on the hops, oak, or other flavoring addition. 2.6" diameter 11.8" tall Made from 304 stainless steel Kegland Part Number: KL05210

    $18.99

  • Rubber Stopper- #10 With Hole

    Rubber Stopper - #10 With Hole

    18 reviews

    #10 stopper - with 3/8 inch hole. Top diameter 2 inches (51 mm), bottom diameter 1.66 inches (43 mm), length 1.10 inch (28 mm). BPA-free stopper made of food grade materials. Injection molded TPE for superior consistency throughout. Perfect for use with carboys, as the material sticks well to glass and PET, even when wet. To create a solid stopper, simply use a #000 solid stopper (FE400) to plug the hole. Max. Temperature Rating: 158 °F (70 °C).  

    $3.99

  • Sanitary Filter Sanitary Filter

    Sanitary Filter

    93 reviews

    This versatile little filter is a beer maker's insurance policy! Whether you’re aerating or racking you will appreciate having the peace-of-mind of knowing that your brew will not be contaminated by whatever is floating around in the air. Use it anywhere you need to keep something sanitary. Both 1/4"" and 3/8"" tubing will attach to it, and it will snugly fit in any standard stopper as well.   Check out this list of suggested uses: Airlock: The most common use might be as an airlock on any kind of fermenter. Unlike other small sanitary filters, this unit fits perfectly into a stopper. Works great for conical fermenters where air is taken in when samples are taken or trub is dumped. Using the sanitary filter as airlock also eliminates the concern of drawing air back in as hot liquid cools and contracts in a fermenter. It is not appropriate for long term storage of beer as it is not an oxygen barrier. Inline Aeration/Oxygenation Filter: With an oxygenation or aeration system, such as our FE375 or FE380, it will filter contaminants out of oxygen or air. It is connected inline between pump/O2 tank and Stainless Diffusion Stone. Hand Pumps: Some breweries use this filter with the breweries hand pump system. Air going back into the cask is sanitized through this filter. This has extended shelf life of Real Ales by up to 2 weeks! CO2 Filtration: Used inline with your CO2 Kegging setup, this piece can be used to filter out any potential contaminants from your CO2 Tank.   About the inline filters: There are two sides to the filter - an "in" and an "out". The direction you use doesn't matter, however, you want to take note of which way you first push air through it and always keep it that way. There is an arrow on the edge of the filter housing that we use to keep the airflow going one direction when using it. The filter should never get wet, so don't try and sanitize it by dunking it in sanitizer. If you want to clean the outside of it, use Alpet D2. To store the filter, use a little tinfoil on the "In" of the filter and store in a zip-lock bag. Can last up to 1 year. Discard if there are any signs of discoloration.   This product qualifies as a HEPA filter under US government standards.   STORE DRY AT ALL TIMES. DO NOT SANITIZE FILTER.   **NOTE: Temporarily shipping a smaller diameter unit due to supply chain issues**

    $5.49

  • Glass Bottles - 1 Gallon Flint Jug with Handle - PLACEHOLDER

    Glass Jug w/ Screw Top Finish | Finger Grip Handle | Clear | 1 Gallon | 128 oz

    30 reviews

    1 gallon glass jug that works well for small batch fermentations of beer, mead, wine and More! Clear glass allows you to monitor fermentation activity as it happens Accepts 38mm screw cap or can be used with a #6 stopper and airlock Great for splitting 5 gallons of wort into small batches to perform yeast experiments A handy 1 gallon glass jug that is perfect for a small batch of wine!  Our 1 gallon glass jar works great for holding small amounts of wine or mead for aging, small batch fermentation, overflow storage and fermentation experiments. Some Suggested Uses: Use to store excess wine when you press off and have more than you expected. Ferment small batches of mead, sake, fruit wine or anything else that strikes your fancy! Perform yeast experiments - split a batch of beer into five 1 gal batches and ferment them with different yeast strains Uses a #6 stopper. Please Note: DOES NOT INCLUDE LID

    $8.99 - $24.99

  • 7.9G (30 L) Wine Fermenter With Spigot and Lid 7.9G (30 L) Wine Fermenter With Spigot and Lid

    7.9 Gallon Bucket Fermenter Kit | Food Grade Plastic Fermenter | Wine Kit Fermenter | Includes Lid, Spigot, Airlock

    60 reviews

    Extra-large food-grade plastic bucket fermenter perfect for wine kits or high krausen beers like Hefeweizen Almost a full 2 gallons larger than standard 6-gallon buckets giving you plenty more room for active fermentations and larger batches of wine or beer Comes complete with lid, airlock grommet, 3-piece airlock, and plastic spigot with rotating tap (see note below) If you do not require a spigot or other accessories, the 7.9-gallon bucket can also be purchased by itself This is a 7.9 gallon plastic fermenter complete with lid, airlock, and spigot. The rotating spigot allows you to push the bucket deeper into your counter or benchtop without obstruction. When it's time to transfer out, bring the bucket to the edge of your counter and rotate the spigot to point down. These buckets are made from Polypropylene and are ideal for all types of fermentations, especially beers with high krausen. Why Polypropylene? These buckets are made from polypropylene as it is less porous and significantly smoother than other HDPE fermenters. HDPE is porous and can harbor microbial activity making it more difficult to clean and sanitize. Being less porous, polypropylene also does not absorb aroma like HDPE so there is less flavor carry over from batch to batch. Kit Includes: 7.9 gallon plastic bucket Plastic lid with hole and grommet Airlock Spigot Please note: the spigot hole comes pre-molded into the bucket and needs to be drilled out before installing the spigot. We recommend using a 5/8" drill bit and taking care not to strip the female threads that accept the spigot. The spigot includes a back nut that won't be needed—simply remove the back nut and thread in the spigot with the gasket in between the neck of the spigot and the bucket. The lid forms a very tight seal and requires a decent amount of downward force to lock in place.

    $32.99

  • Fermonster 3 Gallon Carboy - Ported Fermonster 3 Gallon Carboy - Ported

    FerMonster 3 Gallon Ported Carboy With Spigot

    32 reviews

    Smooth, ribless design prevents yeast and bacteria buildup, making sanitation a breeze Punted bottom and conical top promote sediment collection and reduce oxidation during storage Extra-wide 4" mouth opening simplifies filling, additions, and cleaning Constructed from heavy-duty, virgin PET plastic without plasticizers Made with food-grade and BPA-free materials The Fermonster is a brand new fermenter designed specifically for fermentation. MoreBeer! gave product feedback for over 2 years of development and we think they nailed the design. The large lid allows for easy filling and makes hop or oak additions a breeze. The smooth sides are fantastic for sanitization - no ribs or texture to collect yeast or bacteria. The punted bottom allows sediment to collect to the sides so that you can siphon liquid from the center. Because they are made from virgin PET plastic, they're nearly unbreakable and a lot safer than similar glass carboys. Also notice the conical top which reduces surface area if you plan to store beer or wine long term. These ported versions come with our plastic spigot (FE347), allowing for easy racking and sampling! Made from heavy PET plastic, the same material used in 2 L soda bottles, which is nearly impermeable to oxygen penetration. Due to the thickness of the material and the overall geometry, the Fermonster does not require ribs or dimples for stability. That results in a super smooth interior surface that reduces yeast and sediment buildup making it the easiest to clean, most sanitary PET carboy on the market. The huge 4" opening makes filling a breeze, and cleanup is as easy as wiping down the inside. These fermentors are completely air-tight and the lids sealed tight with an O-Ring. Additional O-Rings and Lids both with and without holes are available for purchase, see our You Might Also Need items below. Features: 4" inner diameter wide mouth carboy - easy to clean! Food grade PET plastic construction is nearly impermeable to oxygen penetration No hard to clean dimples or ribs Punted bottom O-Ring and Lid with one hole is included (Fits #10 Stopper) Additional O-Rings and Lids available Weight: 1.5 lbs Temperature Limit: 140° F Height: 14.6 inches Diameter: 9 inches Completely taste and odor free Perfect for Beer, Wine, Cider, Mead, Kombucha or any other fermented beverage! Thick walls for better oxygen barrier. Please note: the pictured #10 Stopper (FE470VS) and three piece airlock (FE370) are not included.

    $37.99

  • Airlock Grommet

    Airlock Grommet

    8 reviews

    Rubber grommet that is perfect for making a sealed container into a fermenter. Fits our 3 piece or S-shaped airlocks.  fits a 1/2" hole. Kegland Part number: KL01625

    $1.09

  • Stopper - #5 With Hole

    Rubber Stopper - #5 With Hole

    2 reviews

    Size 15/16" - 1 1/16" To create a solid stopper, simply use a #000 solid stopper (FE400) to plug the hole.

    $1.19

  • MonsterMesh - Mesh Strainer for Fermonster Carboys MonsterMesh - Mesh Strainer for Fermonster Carboys

    MonsterMesh Strainer for FermMonster Carboys

    4 reviews

    The MonsterMesh is perfect for adding dry hops to your beer! Keep your dry hopping on a precise schedule by adding them to this mesh sleeve inside the Fermonster Plastic Carboy, then easily pull them out after the desired contact time. This mesh sleeve is custom made for the FerMonster Plastic Carboy. The plastic ring sits inside the neck of the fermenter, and the lid can be secured on top to make an airtight seal. The ring actually holds onto the neck of the FerMonster so there's no risk of the mesh sleeve falling into the carboy. Made from food grade materials, the #50 mesh will not affect the flavor of the beer or wine, and is temperature rated to 122°F. Designed for multiple uses, the MonsterMesh can be cleaned in the dishwasher and sanitized with the sanitizer of your choice. The MonsterMesh can be used alongside the MiniMesh to hold multiple additions. The MonsterMesh will sit on the neck of the carboy, and the MiniMesh can be inserted through the stopper hole in the lid. This way you can have two different infusions starting or stopping at different times.

    $8.99

  • Fermonster 6 Gallon Carboy - Ported Fermonster 6 Gallon Carboy - Ported

    Fermonster Carboy - 6 gal. With Spigot

    53 reviews

    Due to high demand, this item is currently out of stock. Be the first to receive your items by placing a pre-order today. We will automatically ship this to you when we receive more inventory. Smooth, ribless design prevents yeast and bacteria buildup, making sanitation a breeze Punted bottom and conical top promote sediment collection and reduce oxidation during storage Extra-wide 4" mouth opening simplifies filling, additions, and cleaning Constructed from heavy-duty, virgin PET plastic without plasticizers Made with food-grade and BPA-free materials The Ported Fermonster is a brand new fermenter designed specifically for fermentation. MoreBeer! gave product feedback for over 2 years of development and we think they nailed the design. The large lid allows for easy filling and makes hop or oak additions a breeze. The smooth sides are fantastic for sanitization - no ribs or texture to collect yeast or bacteria. The 6 gallon size is great for most fermentations, and the larger 7 gallon is available for even bigger beers. The punted bottom allows sediment to collect to the sides so that you can siphon liquid from the center. Because they are made from virgin PET plastic they nearly unbreakable and a lot safer than similar glass carboys. Also notice the conical top which reduces surface area if you plan to store beer or wine long term. These ported versions come with our plastic spigot (FE347), allowing for easy racking and sampling! Made from heavy PET plastic, the same material used in 2 L soda bottles, which is nearly impermeable to oxygen penetration. Due to the thickness of the material and the overall geometry the Fermonster does not require ribs or dimples for stability. That results in a super smooth interior surface that reduces yeast and sediment buildup making it the easiest to clean, most sanitary PET carboy on the market. The huge 4" opening makes filling a breeze, and cleanup is as easy as wiping down the inside. Fermonsters are easily moved by hand or consider using our Carboy Carrier for even greater ease of use. These fermentors are completely air-tight and the lids sealed tight with an O-Ring. Additional O-Rings and Lids both with and without holes are available for purchase, see our You Might Also Need items below. Features: 4" wide mouth carboy - easy to clean! Ported version inlcudes spigot for easy racking Food grade PET plastic construction is nearly impermeable to oxygen penetration No hard to clean dimples or ribs Volume Markers at 5 and 6 Gallons Punted bottom for less sediment transfer during racking O-Ring and Lid with one hole is included (Fits #10 Stopper) Additional O-Rings and Lids available Weight: 1.5 lbs Temperature Limit: 140° F Height: 19.25 inches Diameter: 11.25 inches Completely taste and odor free Perfect for Beer, Wine, Cider, Mead, Kombucha or any other fermented beverage! Thick walls for better oxygen barrier.

    $43.99

Frequently Asked Questions

Fermenting Equipment Collection Article +

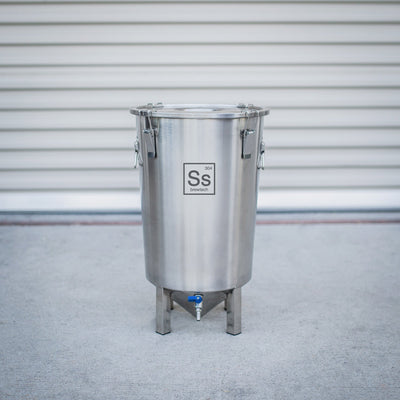
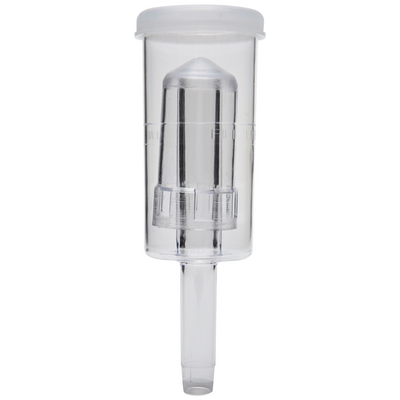
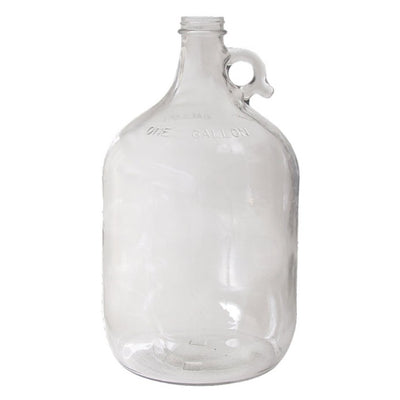
Fermentation: A Play in Three Acts By John Palmer The fermentation of malt sugars into beer is a complicated biochemical process. Although the conversion of sugar into alcohol can be regarded as yeast’s primary function, fermentation is much more. Total fermentation is a composite of three phases: the lag (or adaptation) phase, the attenuative (or primary) phase, and the conditioning (or secondary) phase. Yeast does not end the second phase before beginning the third; rather, the processes occur in parallel. Yeast’s early gusto for wort sugars is gradually phased out as the concentration of remaining easy food (simple sugars) in the wort decreases relative to the amount of complex sugars and yeast by-products. The conditioning process occurs more slowly than the attenuative process, however, which is why beer (and wine) will improve with age, to a degree, as long as they are in contact with the yeast. The accompanying box below summarizes the key factors required for a good fermentation: Pitch plenty of yeast, make sure the cells have the nutrients they need to multiply, and let them do their thing at the right temperature. Act I —the adaptation phase: Immediately after pitching, yeast spends some time adjusting to the wort conditions and indulging in a period of high growth. During this time, yeast takes stock of the sugars, free amino nitrogen (FAN), and other nutrients present in the wort and figures out what enzymes and other attributes it needs to adapt to the environment. This delay between the pitching of the yeast and the formation of the foamy head in the fermentor is referred to as the adaptive phase, or lag time. This initial phase is critical in setting the stage for a good fermentation. During the adaptation phase, yeast cells use their own glycogen reserves, lipids, and any dissolved oxygen from the wort to synthesize sterols. Sterols are critical for the development of healthy, permeable cell membranes, which makes wort sugars and other wort nutrients available to the yeast. Strong cell membranes will also protect the yeast from premature death due to rising alcohol levels as the fermentation progresses. Yeast can also synthesize sterols under oxygen-poor conditions from the fatty acids found in wort trub, but that method is less efficient and less reliable for the brewer. With healthy, permeable cell membranes, yeast can start metabolizing its food — free amino nitrogen (FAN) and sugars in the wort. Like every animal, yeast cells live to reproduce, which they do asexually by “budding,” a process in which daughter cells split off from the parent cell. Reproduction takes a lot of energy, and the process works more efficiently when oxygen is present (that is, under aerobic conditions). Thus, an oxygen-rich wort shortens the adaptation phase and allows yeast to quickly reproduce to levels that will ensure a good fermentation. Once the oxygen is used up, the yeast cells switch metabolic pathways and begin what brewers regard as fermentation: the anaerobic metabolism of sugar to alcohol. The key to a good fermentation is lots of strong healthy yeast cells that can get the job done before depleted resources, rising alcohol levels, and old age render them dormant. As noted, the rate of reproduction is slower in the absence of oxygen. At some point in the fermentation cycle of the beer, the rate of yeast reproduction will fall behind the rate of yeast dormancy. By providing optimum conditions for yeast growth and reproduction in the wort initially, we can ensure that this rate transition will not occur until after the beer has become fully attenuated. Worts that are underpitched or poorly aerated will have insufficient quantities of viable yeast, leading to slow or incomplete fermentations. Experienced brewers make a great point about wort aeration and building up a yeast starter because these practices guarantee a large enough population of yeast to do the job well. Under nominal conditions, yeast should proceed through the adaptation phase and begin primary fermentation within 12 hours. If 24 hours pass without apparent activity, then a new batch of yeast should probably be pitched. Lag time is a common benchmark that brewers use to gauge the health of yeast and the vigor of fermentation. It is possible, however, to overemphasize the significance of lag time, on its own, as a meaningful indicator. A very short lag time, for example, does not necessarily mean that your yeast has gotten off to a phenomenal start and just can’t wait to ferment. It could well mean just the opposite — that a low supply of nutrients and oxygen in the wort gave the yeast no recourse but to begin converting sugar to alcohol in order to survive. The latter stages of fermentation may also appear to finish more quickly when in fact the process was not super-efficient, but rather, incomplete. The point is that speed does not necessarily correlate with quality. Under optimal conditions, of course, the process will generally be more efficient and thus will take less time. But it’s better to pay attention to getting the process right than to focus on a rigid time schedule. Check out our yeast starter kits and accessories to improve fermentation! Act II — the attenuative phase: The attenuative, or primary, phase is a time of vigorous, robust fermentation during which the gravity of the beer drops by two-thirds to three-quarters of the original gravity. The primary phase will last anywhere from 2 to 6 days for ales or 4 to 10 days for lagers, depending on the yeast and on the fermentation conditions. A head of foamy kräusen will form on the beer as the sugar is converted to alcohol and the beer attenuates. The foam will be a light creamy color with islands of green-brown gunk that will tend to collect and adhere to the sides of the fermentor. The gunk is made up of extraneous wort protein, hop resins, and dead yeast. These compounds are very bitter and will contribute harsh aftertastes to the beer if allowed to mix back into the wort. Fortunately these compounds are relatively insoluble and will separate themselves from the wort, sticking to the sides of the fermentor as the kräusen subsides; they can also be removed by racking (transferring) to another, or secondary, vessel. Alternatively, they can be removed using the blow-off method, whereby a tube is attached to the fermentor at one end and submerged in water (makeshift sanitary airlock) at the other. Pressure in the fermentor forces the material on the surface of the wort out of the fermentor through the tube and into the water at the other end. As this primary phase winds down, a majority of the yeast cells start settling out and the kräusen begins to subside. If you are going to transfer the beer off of the trub and primary yeast cake, this is the proper time to do so. Take care to avoid aerating the beer during the transfer. At this point in the fermentation process, any exposure to oxygen will only contribute to staling reactions in the beer or worse, expose it to contamination. Click here to browse our fermenting equipment, fermenters and accessories! Key Factors for a Good Fermentation Yeast-Based Factors Pitch plenty of yeast: The first step to achieving a good fermentation is to pitch enough yeast. Yeast can be grown using yeast starters or it can be harvested from previous fermentations. When recycling yeast, use yeast that has proven itself through good fermentations in the past. Harvest from the middle layer of the primary yeast cake, where you are most likely to find healthy cells from the most active period of the fermentation. This yeast will have the optimum characteristics for repitching: It will have good glycogen reserves and will readily adapt to the new wort. With nominal levels of aeration and nutrients, the yeast will quickly multiply to the levels necessary for an exemplary fermentation. Yeast can also be taken from the secondary, but it may be less inclined to flocculate. However you obtain your yeast, plan to pitch at least 1/3 cup (75 mL) of yeast slurry for a typical 5-gallon batch of ale, or 2/3 cup (150 mL) of slurry for lagers. For stronger beers (O.G. >1.050 [12.34 °P]), pitch more yeast to ensure optimum fermentations. For very strong beers such as Doppelbocks and barleywines, pitch at least 1 cup (225 mL) of slurry. Wort-Based Factors Three issues must be considered to ensure that the wort has been properly prepared to support a good fermentation. Aeration: The first issue is the infusion of oxygen into the wort through aeration. Yeast will use up any available oxygen in the wort during the lag time to synthesize sterols for growth and cell membrane development. Strong cell membranes enable the yeast to absorb nutrients and protect it from rising ethanol levels later in the fermentation. FAN content: The second issue is the level of amino acid nutrients in the wort, specifically referred to as free amino nitrogen (FAN). Malted barley normally supplies all of the FAN that yeast needs to grow and adapt to the fermentation environment. If the recipe incorporates large amounts of adjuncts (refined sugar, corn, unmalted wheat, or unmalted barley, for example), however, then the wort may not have the minimum levels of nutrients necessary for yeast to build strong cells. In extract brewing, it is always advisable to add some yeast nutrient powder to worts made exclusively from light-colored extracts because these extracts are often thinned with corn sugar. Avoid refined sugars: Be aware also that in worts that contain a high percentage of refined sugar (about 50% or more), yeast will sometimes lose the ability to secrete the enzymes that allow it to ferment maltose. Temperature Factors Yeast cells are greatly affected by temperature — too cold and they go dormant; too warm (more than 10 °F [6 °C] above the nominal range, which varies from strain to stain) and they indulge in an orgy of fermentation resulting in by-products that often cannot be cleaned up by conditioning. High temperatures also encourage the production of fusel alcohols — heavier-than-average alcohols that can have harsh solvent-like flavors. Many of these fusels esterify during secondary fermentation, but in large amounts these esters can dominate the beer’s flavor. Excessive “banana” flavors are a common consequence of high-temperature fermentation. High temperatures can also lead to excessive levels of diacetyl. A common problem among home brewers is to pitch the yeast when the wort is too warm. If the yeast is pitched when the wort is 90 °F (32 °C), for example, and slowly cools to room temperature during primary fermentation, the early stages will produce more diacetyl than the yeast can reabsorb during the secondary stage. Furthermore, primary fermentation is an exothermic process. Yeast activity can raise the internal temperature of the fermentor as much as 10 °F (6 °C) above ambient conditions, but as long as this higher temperature is within the optimal range for the yeast, the beer will be fine, even if the yeast is warmer than its surroundings. The point is that if it is midsummer in Florida, you might want to find a way to keep the fermentor cool or just consider waiting until the weather turns cooler. Beer fermented too warm will not be drinkable. Keep the Yeast Happy Fermentation is the most important part — the purpose, in fact — of the whole process of brewing. Careful attention to the factors that affect fermentation will help to ensure that your labor of love lives up to your expectations. Many canned kits and even brewing texts advise bottling the beer after one week or after the kräusen has subsided. Don’t. The beer has not yet gone through the conditioning phase. The flavor of unconditioned beer reveals rough edges such as yeasty, buttery, or green apple flavors that will disappear after a few weeks of conditioning. Take your time — it will be worth the wait! The final act — the conditioning phase: The reactions that take place during conditioning are primarily a function of the yeast. The vigorous, primary stage is over, the majority of the wort sugars have been converted to alcohol, and a lot of the yeast cells are going dormant — but some are still active. Flavor effects. During the earlier phases, the yeast produced many compounds in addition to ethanol and carbon dioxide (acetaldehyde, esters, amino acids, ketones-diacetyl, pentanedione, and dimethyl sulfide, for example). By the time the kräusen has subsided, the yeast has eaten the easy food and now turns its attention toward the heavier sugars such as maltotriose and dextrins, as well as to the reprocessing of its own undesirable by-products. Diacetyl and pentanedione are two ketones that have buttery and honey-like flavors. These flavors are considered flaws when present in large amounts, and the compounds responsible cause flavor stability problems during storage. The compound acetaldehyde is a specific aldehyde that has a pronounced green apple smell and taste. It is an intermediate compound in the production of ethanol, and is reduced during the later stages of fermentation. Primary fermentation also produces an array of fusel alcohols that often give harsh solvent-like tastes to beer. During secondary fermentation, yeast converts many fusel alcohols to more pleasant-tasting fruity esters. Natural filtration. Conditioned beer is not only better tasting, but naturally clearer. Toward the end of secondary fermentation, a majority of the suspended yeast cells flocculate (settle out). Tannin and phenol compounds will bind with high molecular weight proteins and also settle out, greatly smoothing the taste of the beer. This process can be helped along by chilling the beer, very much like one might do in lagering. In reference to ales, this process is referred to as cold conditioning and is a popular practice at most brewpubs and microbreweries. Depending on the yeast strain, cold conditioning for a week will often clear the beer without the use of finings.* *Fining agents such as isinglass and gelatin are added to the secondary fermentor to help speed the flocculation process and to promote the settling of haze-forming proteins and tannins. While finings are most often used to drop unflocculant yeast strains and to combat chill haze, their real benefit is to improve the taste and stability of the beer. Conditioning times. How long you choose to condition will depend on your recipe and your preference. Different beer styles benefit from different amounts of conditioning time. Generally, the higher the original gravity, the longer the conditioning time needed for a beer to reach peak flavor. Small beers such as 1.035 O.G. (8.76 °P) pale ales will need less than two weeks. Stronger, more complex ales such as porters may require a month or more. Very strong beers such as Doppelbocks and barleywines can take six months to a year before they condition to their peak flavor. The downside. Unfortunately, yeast may also consume some of the proteins and other compounds in the trub, the “fermentation” of which can produce any of several off-flavors. In addition, the dormant yeast on the bottom of the fermentor begins excreting more amino and fatty acids. If the postprimary beer is left on the trub and yeast cake for too long (more than about two weeks), soapy off-flavors may become evident. The longer the yeast cells are left in contact with the beer, the more likely it is that they will begin to secrete enzymes that allow them to feed on each other (autolysis), which produces rubbery, sulfury tastes and smells. For these reasons, it can be important to remove the trub and dormant yeast from the beer during the conditioning phase. Conditioning Fundamentals Conditioning can take place in either the primary fermentor, a secondary fermentor, or the bottle, but each method produces different results. Debates over the benefits of each abound within the home brewing community. For and against bottle conditioning: Beer bottled immediately after completion of the primary fermentation will condition in the bottle, and this is the method of choice for many brewers. Many seasoned home brewers declare, for example, that racking to a secondary fermentor offers no real taste benefit and that the dangers of contamination and the cost in additional time are not worth what little benefit may be gained. I agree that for a new brewer’s first low-gravity pale beer, the risks probably outweigh the benefits, and I advise keeping it simple until you have gained some experience with racking and sanitization. If you are concerned about the risks of racking and want to bottle without using a secondary fermentation phase, you can leave an ale in the primary fermentor for a total of two weeks instead of just one, which will give the conditioning reactions time to improve the final beer. The extra time will also let more sediment settle out before bottling and result in a clearer beer and easier pouring. Just remember not to leave the beer on the yeast for more than two weeks. For most beer styles, however, conditioning before bottling makes the most sense, partly because the larger yeast mass in the fermentor is more effective at conditioning than the smaller amount of yeast suspended in the bottle. Priming and bottling right after the primary can create some other unwelcome problems as well. Studies have shown that bottle-conditioned beer actually goes through another mini-primary fermentation, making use of some of the headspace air. Unfortunately, though, only about 30% of that oxygen is used for reproduction; the rest slowly diffuses into the beer as it ages, contributing to staling reactions. Furthermore, a bottle-conditioned beer is stuck with the job of dealing with all of the usual intermediary compounds and by-products of fermentation, including aldehydes, diacetyl, fusels, and esters, that are produced during this short fermentation process on top of any byproducts left over from primary fermentation. Thus, to avoid these problems and get the most of conditioning, the beer should be given time in a secondary fermentor before priming and bottling. This is as true for homemade beer as it is for commercial “bottle-conditioned” beers. Even if the yeast has flocculated and the beer has cleared at bottling time, enough active yeast will still be in suspension to ferment the priming sugar and carbonate the beer. Bottle conditioning is not, however, always bad or inefficient. Bottle conditioning simply results in different ester profiles than those that are normally produced in the main fermentor. In fact, in some styles, for instance Belgian strong ale and Hefeweizen, bottle conditioning and the resultant flavors are the cornerstones of the style. These styles cannot be produced with the same hallmark flavors if they are immediately kegged (draft style). Click here to check out our bottles, caps, and other bottling equipment! The case for secondary fermentation: Secondary fermentation is beneficial to all beer styles if you have a good understanding of fermentation processes and can complete the transfer carefully. The key is in mastering some of the simple facts of racking. Dos and don’ts of racking. Racking from the primary can occur any time after primary fermentation has more or less finished, when the bubbling rate drops off dramatically to about 1–5 per minute. This will be about 2–6 days after pitching for ales, 4–10 days for lagers (though if it has been more than two weeks for ales you may as well just bottle). The kräusen will have started to settle back into the beer. Use a sanitized siphon to rack the beer off the trub into another sanitized fermentor and affix an airlock. The beer should still be fairly cloudy with suspended yeast. Although oxygen is a desirable commodity very early in the critical adaptation phase, it is absolutely not wanted in the later stages of fermentation. Racking at any time exposes the beer to the potential risks of exposure to oxygen and bacterial contaminants. Also, racking the beer before the primary fermentation phase is completed can result in a stuck or incomplete fermentation. Most brewers will notice a brief increase in activity after racking which is due not to additional primary fermentation, but simply to dissolved carbon dioxide coming out of solution because of the disturbance. Fermentation (conditioning) does continue after racking, so just leave it alone for awhile. A minimum useful time in the secondary fermentor is two weeks. Leaving the beer in the secondary for too long (more than six weeks for ales) may require the addition of fresh yeast at bottling time to achieve good carbonation. (Always use the same strain as the original.) Keep liquid notes. No matter which method you choose for fermenting and packaging your beer, it is always a good idea to set aside a six-pack in the corner of the basement and leave it for a good long time. It can be enlightening to compare a home-brewed beer after three months of bottle conditioning to the batch as it initially tasted. Browse our selection of equipment for racking and siphoning your homebrew! Rave Reviews Can Be Yours Fermenting a beer without allowing time for the conditioning phase is like raising the house lights and leaving the show before the final act has played out. Something will be missing from the total experience, and you deprive yourself of the full value of the show you paid for. Giving the beer time to condition smoothes and refines the beer’s flavor. Conditioning reduces diacetyl levels, vents dimethyl sulfide, and esterifies fusel alcohols. Yeast is given time to consume the remaining fermentables without also consuming the junk food in the trub. The low concentration of dormant yeast cells also prevents off-flavors caused by fatty acid excretion and autolysis. Finally, secondary fermentation allows time for more yeast and haze to settle out before bottling. The result is better beer. With a little patience, you can see the process through to the end and discover the full rewards of the grand finale. Fermentation FAQ What is fermentation? Fermentation is any process where bacteria or fungus change one thing into antoher. Lots of foods are fermented too!: Sauerkrautt, kimchi, soy sauce, and more! What is yeast and what does it do? Yeast is a single celled fungus that eats sugar and poops ethanol. What is the primary role of yeast? To transform our sugars into alcohols. Do you need to rehydrate dry yeast? why or why not? Strongly recommended but not necessary, if you do not hydrate you could experience a long lag time until your fermentation takes off. Do you want a constant temperature for fermentation? Absolutely!  This is extremely important.  Fluctuations in temperature can have a large impact on the final flavor outcome. What is a carboy? A carboy is a container with a typical capacity of 3 to 6.5 gallons and is used for transporting liquids.  They are used as both fermenters and storage containers for beer, wine and other fermented beverages.  Many people have seen them used as water jugs for businesses to have water on tap. What is a hydrometer? A hydrometer is a measuring tool used to detect the density of liquid.  It is used in brewing to determine the sugar content in wort. How do I read my Hydrometer? After filling your hydrometer jar with wort, you’ll carefully drop the hydrometer in.  Allow the wort to reach the appropriate temperature (some hydrometers will have a temperature correction scale, but not all will).  Once at the correct temperature find where the liquid comes up to on the hydrometer (meniscus) and read that number.  It will generally be a “1.0XX” number - the higher the XX, the more sugar in solution. What is specific gravity? The measure of the density of a liquid specifically grams of sugar per liter of water. A gravity of 1.040 means 40 grams of sugar per liter. "Specific" refers to "this sample right now". What is gravity and what is brix? how are they related? Gravity refers to the specific gravity or the relative density compared to water.  Gravity describes the concentration of malt sugar in the wort.  Brix describes the amount of available extract as a weight percentage of cane sugar in solution.  Both are used to describe the amount of potential alcohol and can be used to determine the amount alcohol in a beer or wine. How do you measure brix and how to you convert to gravity? Brix is measured by using a refractometer and you can convert by multiplying the number you get by 4 and  then putting “1.0” in front of that number and you will get your gravity.  This is a loose calculation and is okay at lower gravities but the higher your starting gravity goes the less accurate the conversion is.  So for example you get a brix reading of 12 which would be a 1.048 in specific gravity. What is original gravity? The gravity of the substrate before it was fermented. Usually called OG. Tells you the potential alcohol of a wort. What is final gravity? The gravity of the beer after it has fermented. Also called Terminal Gravity. How do I calculate ABV? (OG - FG) x 0.131 = ABV Using the SG and FG, how do you determine ABV? (SG - FG) * 131 = ABV (Starting gravity minus final gravity multiplied by 131 = Alcohol by volume)

There is a small localized spot or area of rust on my kettle / fermenter that I bought recently. I thought stainless steel can't rust? +

Stainless steel itself shouldn't rust, you are right there. Especially a high grade 304 Ss like we use on all of our products. But what can rust are surface particles of iron that are sometimes left residual from the manufacturing process and the tools used to grind and polish the interiors and exteriors of Ss Brewtech's various vessels. This is one reason why proper cleaning and care prior to first use (or even exposure to water) is important. We have detailed documentation both in the box and on our website on all the product pages. The main thing here is cleaning and conditioning the stainless the first time prior to exposure to beer, water, whatever… In any case, if you do see a localized spot(s) of surface rust - simply get yourself a WHITE (NOT green type pad if you can avoid it) Scotchbrite pad, dab some Starsan onto the pad, and then GENTLY brush over the area in question until the surface rust has broken up and the area looks consistent with the surrounding areas of stainless. Then just rinse off, dry it with a paper towel, and the area will be good to go and free of the surface layer iron particles that were causing the issue to begin with.

Is my beer finished fermenting? +

If you have waited two weeks for an ale, or four weeks for a lager, or you're just curious. Most veteran homebrewers will tell you the beer is done once the airlock stops bubbling but this isn't a sure thing that fermentation is complete. This is where a hydrometer is sometimes worth its weight in gold. If you call our advice line and ask "Is my beer finished fermenting?" the first question will be, "Have you taken a hydrometer reading?" A hydrometer reading at the end of fermentation is called a final gravity reading, often abbreviated "FG". This tells you the amount of sugar left in the beer. Most yeast strains consume 65-75% of sugar in solution, this is called "attenuation." Here's an example gravity: OG: 1.050 your Goal FG would be: 1.010-1.015. If you are more than a few points above your estimated FG you will need to wait a couple more days. After a few days take another reading to see if the FG has dropped. If the FG has not dropped you will either need to consult us on our advice line at 925-671-4958. We will ask you some questions about the recipe, the yeast strain, and the fermentation temperatures your beer was exposed to. Sometimes we have some insightful comments on why fermentation is acting strangely, and other times only the beer Gods know.

My beer started fermenting, then stopped, and then started again? +

This usually happens when the beer goes through temperature changes. The yeast stops fermenting when it gets cold as the metabolic activity of the yeast slows down. It then proceeds to start up again when the fermenter warms up. If your fermentation gets stuck warm up the beer to the desired temperature range for your yeast. Sometimes it helps to give the carboy a swirl. DO NOT add oxygen. If there is one step you do as a homebrewer, investing in temperature control equipment will be the best thing you ever do for your beer.

Login

Forgot your password?

Don't have an account yet?
Create account