By Vito Delucchi

Ciders have been gaining popularity and for good reason, they’re delicious, fairly easy to make and gluten free. Sure, an apple a day keeps the doctor away; but sometimes you’re looking for that Pear’fect beverage to unwind with. That’s when it’s time for a glass of Perry!
Perry (sometimes called Pear Cider) is similar to cider, as it’s an alcoholic fermented fruit beverage. But instead of fermenting Apple juice it’s made with Pear juice. Perry was and still is very popular in England, and France. Similar to regional beer styles Perry from different countries and even regions within the country have distinct flavor & aroma characteristics based on the type of pear and local wild yeasts.
With anything there is an umpteen way to do things. I have always made Perry using fresh picked fruit, so that’s what I will go over in this article. Sure you can probably find fresh pear juice without many additives, but what’s the fun in that! Below is a list of items you will need to make Perry, by reading about each of the itmes I will explain the proccess.
Basic list of items:
Basic process outline:
It's that easy!

Let’s start with the main and really only (Depending on your preference) ingredient, Pears! In my experience it typically takes about 12-18lbs of Pears to produce 1 gallon of juice. So if you’re looking to get about 5 gallons of juice you will need 70 to 80 pounds of pears. As far as ripeness of the pear it’s really a matter of personal taste. The less ripe the more acidic, the more ripe the sweeter. Speaking of sweetness, one reason Perry typically seems sweeter than cider (depending on cider style) is that Pears contain higher amounts of unfermentable sugars (Sorbitol) than apples. So I typically like to use slightly under ripe Pears for the increased acid level and they are easier to press (More! on that later). In regards to acid and sugar content of pears, depending on the ripeness they are around 13 plato (1.052) 4.2 pH.
 |
Have any feedback on this article? We want to here from you! Click here to contact us with any feedback. Or simply email articles@morebeer.com |

Ok, you got your fruit, now it’s time to crush it! I've used some McGyver rigs over the years built out of garbage disposals. But in my opinion you get what you pay for. Sure they worked, but they constantly overheated when pressing large amounts of fruit and tended to be a PIA. Recently I’ve been using the Speidel Motorized Apple & Pear Crusher and absolutely love it! It can crush several thousand pounds quickly, easily and without much effort. No matter how you slice it (Crush pun intended) you need to turn the fruit into a workable chopped up form for pressing. Also worth mentioning, there is no need to remove the seeds and stems prior to crushing.

Once your have chopped the pears it's time separate the solids from the liquids. Don’t worry, this separation is not depressing (sorry I love puns & dad jokes) for the Pears. We do this with a fruit press. I’ve always used a bladder press but a traditional basket/ratchet press works just fine as well. I have no experience using a basket press but I have read they can extract more bitterness as they are harder when pressing. Not to mention they take a little more physical effort. Either way you’re going need a way to press the crushed Pears. Definitely worth noting and something most brewers are familiar with is a stuck sparge! Depending on how ripe your fruit is and what you used to crush it with you might have something that looks like coleslaw or applesauce. If your working with a mushy pulp (apple sauce like) I would highely recommend adding some rice hulls when you press. This will greatly improve your liquid output efficiency.

You can’t have enough buckets around when making Perry! I typically fill the buckets with pears as I pick them and then as the pears get crushed fill empty buckets with the pulp to be pressed later. Speaking of press, depending on the height of your press you may need shorter buckets to catch the juice as it runs off. That, or stack your press on some empty pallets etc to raise it up high enough so a normal bucket fits underneath it.

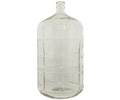
Before we go into fermenters I am going to talk about yeast for a moment. If you’ve tasted a lot of traditional Perry’s you will notice that a lot of them have Brett (Brettanomyces) character. This is definitely part of the “classic” Perry profile. Similar to wine, traditionally they are fermented using the wild yeast found on the pears skin. Being a Brewer before a Perry maker I just couldn't go the “au naturel” route. So on my first Perry I found myself not only rinsing the pears prior to crushing & pressing, but also soaking them in StarSan and then lightly sulfating the juice prior to pitching Cider yeast (Overkill, literally). The following year I opted to pitch some English Ale Yeast along with some Brett & Lacto cultures and the result was significantly better in my opinion. More recently I have taken the traditional approach and skipped the soaking in sani & adding sulfites letting the natural yeast from the orchard to do their thing. As a fan of Lambics I have to say, the “au naturel” route makes for a better end product IMHO. But it’s less controlled, i.e. can vary from year to year. Whatever path you choose you will need a fermenter. I started using Glass carboys, but any fermenter could work, PET, Stainless Steel, Wood. That’s right, Wood; The most recent batch of Perry I made is fermenting in neutral Oak Barrels!

I personally like bottle conditioning, mainly because it allows the Perry to continue to develop. Especially if you went the “au naturel” route. But kegging and force carbing works just fine as well. Either way, primary fermentation should only take a week or two and then I typically let it condition for another week or two before racking it off the yeast cake and finning it. For fining I have found Super-Kleer Finings (Kieselsol/Chitosan) to work best on Perry’s & Ciders. If you got a lot of haze you could also use a pectic enzyme to help clear it up as well. Regardless of bottle or kegging, pretty much follow your same process you would with beer.
Cheers to making something new!
|
|
Have any feedback on this article? We want to here from you! Click here to contact us with any feedback. Or simply email articles@morebeer.com |
All contents copyright 2024 by MoreFlavor Inc. All rights reserved. No part of this document or the related files may be reproduced or transmitted in any form, by any means (electronic, photocopying, recording, or otherwise) without the prior written permission of the publisher.


.png)
.png)
(1).png)
.png)