By Jack Horzempa

“Measure twice and cut once”. That was the mantra of my woodshop teacher in high school. And for you South Park fans there is the infamous “Stop screwing around!”.
I am a firm believer that if you want to have consistency in your homebrewing practice that conscientious and accurate measurements are a must.
Achieving and maintaining proper temperatures is critical to many steps of the brewing process:
There are a variety of mashing regimes which can be conducted to produce wort (single temperature infusion mashing, step mashing, decoction mashing) and achieving and maintaining your target temperature(s) is important to the qualities of the resulting beer. For single temperature infusion mashing, achieving a temperature on the lower end of the temperature range (e.g., 149 °F) will result in a very fermentable wort (i.e., achieving a low(er) final gravity) while a higher temperature (e.g., 156 °F) will result in a wort which has increased dextrins and consequently a beer with more body (i.e., a high(er) final gravity).
A typical target for sparge water is 170 °F. I choose to sparge at this temperature and it works for me with good extract efficiency and a timely runoff rate.
Each yeast strain has a suggested fermentation temperature range for optimum fermentation characteristics (e.g., good beer flavor characteristics). I often choose to ferment in the middle of the recommended temperature range but there are some styles where I prefer to ferment warmer to encourage certain flavor characteristics such as increased esters (fruity flavors) in my Belgian Trappist/Abbey style beers. And there are some beer styles where I prefer to ferment on the cooler side of the recommended range to create a more neutral yeast produced flavor profile with an example being Altbier. You can read more about this:
https://www.morebeer.com/articles/Fermenting_beer
The bottle conditioning process includes a secondary fermentation within the bottle to produce carbonation. A rule of thumb is to conduct bottle conditioning at room temperature (e.g., 70 °F) but at least at temperatures that are above the lowest temperature specified in the range for a given yeast strain. This temperature needs to be maintained for two weeks.
Lab thermometers use a liquid (either mercury or red dyed alcohol) to indicate the temperature measurement. These thermometers will indicate an accurate measurement but the time to reach a steady-state reading may be longer than many people will be willing to wait. Also, since these thermometers are made out of glass they are fragile. A lab thermometer is a good tool to periodically check other thermometers against (e.g., a digital thermometer) to ensure that they are providing accurate measurements.

An analog dial thermometer operates via a bimetallic strip whereby the bimetallic strip expands as the temperature increases. This expansion will push the pointer up the scale. Just like for a lab thermometer this device takes some time to reach a steady-state condition (reading) and typically the measurement is not very accurate. They do often have a feature whereby you can manually move a nut (or screw) on the back of the dial to calibrate the temperature reading (using a more accurate thermometer such as a lab thermometer to provide the baseline reading). When a kettle includes a thermometer they are often an analog dial thermometer.

Digital thermometers have a sensor (e.g., a thermocouple) within the temperature probe and then some digital electronics to translate the sensor readings to a digital display. Digital thermometers can be quite accurate and there are models which can provide an instant readout of the temperature.
An example of an instant read digital thermometer is the Thermapen:

A more economical digital thermometer which takes a few seconds to provide an accurate readout is Thermoworks RT301WA-N:

One way to measure temperature with no need for physical contact is by using an Infrared thermometer. You simply ‘point and shoot’ to obtain the temperature measurement. It is fast and convenient but the measurement is not as accurate as a lab thermometer or a high quality digital thermometer.

An inexpensive and convenient way to measure and monitor fermentation temperature is to place a Fermometer on the carboy or plastic bucket. I have found the Fermometer to be fairly accurate (within a degree or so) in my homebrewery. One aspect to keep in mind is that the Fermometer is not intended to get wet so do not immerse your fermenter in water such that the Fermometer is covered in water.

 |
Have any feedback on this article? We want to hear from you! Click here, to contact us with any feedback. Did you enjoy reading this article? Interested in writing one? Click here, to learn More! About becoming a contributor. Or simply email us at articles@morebeer.com |
A number of ingredients in brewing need to be quantified by weight:
Every beer recipe will list the types of grains (e.g., barley malt, flaked wheat, corn, rice, etc.) and other fermentables by type and weight (e.g., pounds, kilograms, ounces, etc.). In order to achieve brewing targets such as original gravity it is important that these be carefully measured.
Hops also need to be properly weighed. They are typically quantified in ounces or grams.
I bottle condition my beers and during the early stages of homebrewing I was instructed to add sugar via a volume measurement (e.g., ¾ cup of corn sugar). I noticed that some batches would come out more carbonated than others. I read on a homebrewing forum that it is better to measure out the sugar amount by weight vs. volume. I made the switch to measuring by weight (ounces for me) and my carbonation levels improved, becoming more consistent. The other aspect to keep in mind is that there are other variables in play here such as beer amount and temperature that the beer completed fermentation. Luckily there are online calculators which can be used to ‘fine tune’ your sugar amounts with one example being:
https://www.morebeer.com/content/priming_sugar_calculator
For brewers who build up their brewing water from distilled or Reverse Osmosis (RO) water you must accurately measure small amounts of brewing salts (e.g., Gypsum, Calcium Chloride, Epsom Salt, etc.). The same is true if you are looking to augment your tap water to increase the level of certain minerals.
There are two basic types of scales which can be used:
An analog scale typically operates using a spring mechanism. The advantages of an analog scale are that they are typically economical and durable. My wife uses an analog scale for her cooking and for a long time I also used it for my homebrewing. But it has a couple of drawbacks: it has a limited capacity (it can only weigh up to 5 lbs.) and the accuracy was something I questioned. Here is an example of an analog cooking scale:

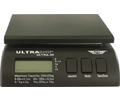
It took me a while but I did decide to purchase a digital scale mostly because I desired better accuracy. But I should mention that I am presently using my second unit (same brand) because my first unit failed after a few years. Here is an example of a digital scale good for measuring both hop amounts and grain amounts (capacity limit of 11 lbs.):

For the accurate measurement of small weights (e.g., brewing salts in fractions of grams) a smaller digital scale is required. Here is an example of a greater accuracy/precision scale for measuring small amounts:

Both wort and beer are characterized by the density of sugars within the liquid solution typically given in the dimensionless unit of specific gravity. Older standards which are still sometimes used are degree Plato (°P), degree Balling (°Balling) or degree Brix (°Brix).
The wort density can be measured both prior to the boil and after completion of the boil. I personally only measure the post-boil wort gravity and I do this at room temperature; this is the Original Gravity (OG) reading.
After the fermentation is complete the liquid in the fermenter is now beer. I measure the beer density, Final Gravity (FG), at room temperature.
There are a number of instruments which can measure density/specific gravity:
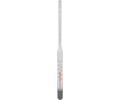
The hydrometer is the most common instrument among homebrewers to measure specific gravity (SG). I collect a wort/beer sample (a few ounces) using a turkey baster and place it within a hydrometer jar. It is important to measure at temperatures close to the intended use of this instrument (60 °F). I personally do not worry the aspect of reading accuracy at 60 °F vs. 70 °F but there are small correction factors which can be applied for those homebrewers who are fastidious. I use the same hydrometer to measuring the OG and FG values but some homebrewers like to use a more precise hydrometer for the FG readings. Below are photos for both types of hydrometers:


It is prudent to periodically check that your hydrometer is providing accurate readings by placing distilled water at 60 °F within the hydrometer jar and checking that the hydrometer reads 1.000.
A benefit to measuring density using a refractometer is that only a small sample needs to be collected (a few drops). This is especially helpful to small scale (e.g., 1 gallon batch) homebrewers. The refractometer is first calibrated using distilled water and then the sample drops are placed on the prism. The SG readings is indicated via an eyepiece.
.jpg)
Conducting a reading of the FG using a refractometer requires a correction via online calculators or other similar applications.
Below is an example of an online calculator for determining the final gravity:
https://www.brewersfriend.com/refractometer-calculator/
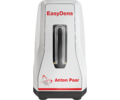
For brewers seeking the ultimate accuracy in measuring density there are analytical instruments available. One example is the EasyDens by Anton Paar which is based on the oscillating u-tube principle which is reported as the most accurate testing method. This instrument performs the math for you; no need for manual calculations and correction tables.

pH is important in brewing from mashing -> fermentation -> the resulting beer. In my homebrewing practice the only pH measurement I conduct is to ensure that I achieve a mash pH in the appropriate range: 5.2 – 5.4. For me just getting in the range is my goal. Achieving a proper pH range during the mash will result in proper pH values throughout the remaining brewing process.
How to measure mash pH
There are two ways to measure mash pH: test strips and pH meters.
I still remember using litmus paper in my high school chemistry class. There was not much in terms of accuracy here but we learned the concepts of acidic solutions vs. alkaline solutions. Thankfully there are test strips which are narrower in the measuring spectrum and more accurate for measuring pH in the range of interest for mashing. I use ColorPhast test strips in my homebrewery which are tailored to the pH range of 4.0 – 7.0. I also apply a correction factor via Kai Troester whereby I add 0.3 to the indicated reading:

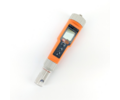
For greater accuracy a pH meter is the appropriate choice for measuring the mash pH. But this greater accuracy comes at greater costs:
“Current pH electrodes have a lifespan of about one year or up to 18 months at the most (with less frequent use). If you properly care for your electrodes, you’ll still need to replace them roughly annually.”
https://r4dn.com/how-long-does-a-ph-probe-last/
But if you have a desire to obtain a pH reading to two decimal points then a pH meter is needed.

There are a number of ingredients in homebrewing which are measured in volume:
Since water is > 90% of the content of beer the type and amount of water is important to the brewing process. To learn more about Brewing Water:
https://www.morebeer.com/articles/Brewing_Water
Some homebrewers quantify their amount of brewing water by etching lines within the brew kettle. Using a 1 gallon jug add water to the kettle and then etch the brew kettle with a screwdriver or etching tool to scratch marks in those increments. You can make increments on a narrower scale (e.g., every half-gallon) if you are so inclined.
Another method some homebrewers use instead of etching their kettle is to use a wooden paddle or a stick and mark that item instead as you add 1 gallon(s) of water to the kettle.
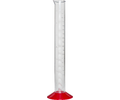
I use filtered tap water for my homebrewing and I simply choose to just fill up a 1 gallon water jug and incrementally add the water to the kettle; this method works for me. If there is ever a need to add/measure water in increments smaller than a gallon I simply use a 1 quart measuring cup instead.
I use a 7.9 gallon plastic bucket as my fermenter which is marked with volume lines in liters and gallons. My target is to have 5.5 gallons of wort in the bucket resulting in a little over 5 gallons of beer once primary fermentation is complete. On occasion my boil off rate is more aggressive than is typical, so I will top off the wort with some filtered tap water to reach my target of 5.5 gallons.
Glass carboys can be marked using permanent markers (e.g., a sharpie pen) in 1 gallon increments akin to the process described above for the brew kettle. The markings will over time become lighter so re-marking periodically is necessary. Another option is to use strips of tape (e.g., duct tape) to indicate the levels.
Stainless steel conical fermenters sometimes come with volume markings. If not, they can be etched as described above for brew kettles.
Example of ingredients that I measure by volume are: Irish Moss, Yeast Nutrient, and Lactic Acid. There are other examples beyond these.
For Irish Moss and Yeast Nutrient I use measuring spoons.

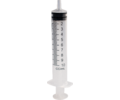
For the addition of lactic acid to my mash and sparge water I use a plastic syringe. Alternatively, a small pipette could be used instead.

The efficiency of the mash is strongly impacted by the grain crush size and it is important to regularly inspect the Grain Mill gap size and adjust if need be. Below is an extract from the below linked article
“It is also a good idea to periodically check your gap setting to ensure that it has not changed with wear/use. I have feeler gauge from my time maintaining cars that had gaps which needed to be checked/adjusted (e.g., rotor/distributor cap gap setting). I suspect that most folks do not own feeler gauges and I have read that some people will use a (old) credit card to set their gaps. A credit card’s thickness is smaller than what I want for my grain mill (i.e., 0.039 inches) but for some people who prefer a finer crush this would be a good way to measure/maintain their gap settings.”
https://www.morebeer.com/articles/Milling
From my conversations with fellow homebrewers, and discussions on homebrewing forums, it seems that homebrewers run the gamut from some folks just chucking in ingredients to others who obtain equipment certified by NIST (National Institute of Standards) to be accurate up to 10 decimal points. Needless to say, I am somewhere in between. My advice is that if you are looking to improve/maintain high quality (i.e., consistency) in your homebrewing practice you really need to make conscientious measurements in the brewing process. How far you want to go will be dependent on your individual budget and inclinations but to quote Ferris Bueller “You can never go too far.”

All contents copyright 2024 by MoreFlavor Inc. All rights reserved. No part of this document or the related files may be reproduced or transmitted in any form, by any means (electronic, photocopying, recording, or otherwise) without the prior written permission of the publisher.


.png)
.png)
(1).png)
.png)