Yeast abuse is the most common cause of mediocre homebrew. Many off-flavors and fermentation problems are the result of improper yeast handling. Learning the techniques of yeast management may well be the single best way to improve the quality of your beer.
This humbling statement is not an exaggeration; without yeast the brewer has nothing but bittered wort. The yeast strain you choose and how you treat it are probably the most critical factors in determining a beer’s character. This article will discuss the techniques of proper yeast management and the consequences of mistreating our unicellular friends.
Click here to browse our top-selling beer yeast, starters and nutrients!
Among the most common problems that challenge home brewers are long lag times, slow or stuck fermentations, slow carbonation of bottle-conditioned beer, and certain off-flavors. Off-flavors often found in home-brewed beer include vegetal, fruity, and solvent notes (or a little of each on a bad day!). These different flaws can all be caused by one common mistake: mistreating your yeast. If you pitch the proper amount of healthy yeast into well-oxygenated wort and maintain an appropriate fermentation temperature, fantastic, flawless beer can be yours to drink.
Long lag time: The lag time is the critical period after pitching when the wort looks still and quiet to our eyes. It might not look very exciting to us, but during this time the yeast are busy synthesizing compounds that they need for fermentation. They are also rapidly taking in oxygen and building up their sterol levels so that they can reproduce. A delay in the start of fermentation can cost you more than just time; long lag times often result in stuck fermentations. Also, certain bacteria (coliforms) can grow and damage the flavor of your beer in the time prior to fermentation. Some of the invaders are killed off by the drop in pH and increase in alcohol once the yeast start fermenting, but the vegetable-like flavors they produce while they are growing will taint the beer forever.
Slow or stuck fermentation: A sluggish or stuck fermentation is an obvious indicator of yeast management problems. Stuck ferments can be caused by the same problems as a long lag time — basically, pitching too little or unhealthy yeast — but may also be brought on by a very flocculent yeast strain or high levels of carbon dioxide.
Stuck fermentations that cannot be jump-started by rousing the yeast or adding more result in beers with higher than expected finishing gravities. The flavor of the beer will be sweet and worry. The beer will be more vulnerable to microbial infection than a fully attenuated brew because of the excess nutrients that remain. Bottling beer that is not at its fermentation limit can be dangerous because the yeast may eventually attenuate the beer fully. At best this will produce amusingly overcarbonated beer that dampens a judge at a homebrew contest. In the worst case the beer will become so carbonated that the bottles will explode.
A stuck fermentation is best avoided by practicing proper yeast management, but a stuck batch can be salvaged. Adding a fresh, healthy yeast culture in the high kräusen stage will usually get the fermentation finished. Oxygen must not be added to the stuck ferment! The partially fermented beer will undergo staling reactions. Although the young beer will ferment out, it will become undrinkable in a very short time — unless you like the metallic, buttery, papery flavors of stale beer.
Slow carbonation: Pitching inadequate yeast will result in too few healthy yeast at the end of fermentation. When these yeast are given the task of consuming the priming sugar to carbonate the beer, they simply cannot do it. It’s not normal for bottle-conditioned beer to take three weeks to teach proper carbonation levels. Properly managed brewing processes should produce consistent, complete carbonation in bottle-conditioned beer within a week.
If you bottle beer after a period of cold storage, or take other action to reduce the amount of yeast in the young beer, you should add a dose of fresh yeast at bottling time. This technique is called kräusening, and has been practiced for centuries. While true kräusening requires a bit of quality control skill, at home we can get good results with the following procedure: simply grow a yeast starter (1 L of starter should be adequate for a 19-L batch; see instructions for preparing a starter on page 51), allow it to ferment out, add it to the primed beer, and bottle.
Keep in mind that erratic carbonation can have causes more mundane than poor yeast management. Adding the wrong amount of priming sugar, or none at all, will obviously result in improper carbonation. Inadequate mixing of the beer and the primings will also cause bottle-to-bottle variations in carbonation.
Tip. My friend Bill Coleman taught me that a Cornelius keg makes a great bottling tank if you have a CO2 setup. Purge the keg with carbon dioxide, add the young beer and primings, purge it again with carbon dioxide, and seal it. Now you can shake the keg to mix the beer and the primings with no danger of oxygen pickup.
Off-flavors: Vegetal flavors. Vegetal off-flavors can be caused by several factors. Beers with an excessive amount of hops can display vegetal notes, and beers with excessive dimethyl sulfide (DMS) will also have a vegetable flavor. Excessive DMS can be found in worts that were inadequately boiled or cooled too slowly, but bacterial activity in the wort prior to the start of fermentation can also result in high levels of DMS. This is one of the main reasons to strive for the shortest possible lag time by pitching an adequate amount of healthy yeast; enteric bacteria die off quickly once fermentation gets under way.
Excessive fruitiness. Fruity notes in beer are the signature of a class of organic compounds called esters. While certain beer styles, such as Bavarian-style Hefeweizen, require noticeable esters, some styles demand more subdued fruitiness. The way you manage your fermentation is critical to the amount of esters in the finished beer.
Yeast produce esters during fermentation. Ester synthesis is inhibited while fatty acids are being produced by the yeast (1). Fatty acids can be synthesized only by yeast that have plenty of oxygen, so providing the yeast with adequate oxygen at pitching time can help to reduce ester levels in the finished beer.*
Excessive higher alcohols. Higher alcohols (those with more carbon atoms than ethanol has; they are also called “fusel oils”) may be perceived as harshly alcoholic, solvent, and warming. They are present in all beers, but in excessive quantities they will damage a beer’s character. Higher alcohols can occur at 60–90 ppm in lager beers and up to 100 ppm in ales without compromising the beer’s flavor.
Seldom can the word “always” be used in brewing, but here is a unique opportunity: Excessive yeast growth always results in excessive higher alcohols (1,2). This means that anything you do to increase yeast growth in your wort will increase the levels of higher alcohols. Underpitching the wort is one great way to encourage excessive yeast growth. Fermenting at high temperatures or introducing oxygen into the young beer at any point after pitching will also encourage excessive yeast growth. Higher alcohols are unpleasant in excessive quantities, so you should definitely work to avoid them by keeping yeast growth during fermentation to the minimum necessary to achieve complete attenuation.
|
Maximizing Yeast Growth During Propagation |
|
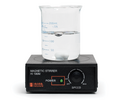
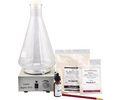
Constant agitation and aeration of a yeast culture will maximize yeast production and minimize the time for propagation. Stir the culture constantly with a magnetic stir plate and stir bar to keep the yeast in suspension and the nutrients well-mixed. An aquarium pump, fitted with a 0.2-micron filter or a half-inch plug of sterile cotton on the pump’s outlet tube, can be used to move air though the culture. An aeration stone is not desirable; the bubbles it makes are too fine and foam will quickly overflow the propagation vessel. It is enough to have air bubble through the wort from the open end of the outlet tube. The air will displace the carbon dioxide produced by the yeast, and the agitation at the surface will help dissolve air into the culture. Feed the culture fresh wort each time the kräusen falls. If the yeast are exposed to air while no fermentables are present, they will quickly exhaust their reserves of glycogen and die. If you do not want to constantly aerate the culture, you can still increase the rate of growth with constant agitation. Simply shake the culture each time you feed it fresh wort. |
Having dwelt long enough on the gloomy consequences of abusing our fungal friends, let’s pass to the brighter topic of proper yeast management, beginning with a short discussion about what yeast need to thrive.
*Some brewers use this idea in an attempt to increase esters by limiting the oxygen available to the yeast. This practice may work for large breweries with on-site laboratories and precise quality control, but it is an ill-advised method of ester control for the small brewer. Limiting the oxygen available to yeast can cause fermentation abnormalities (such as stuck fermentations), and the yeast used in such a fermentation are not suitable for harvest and reuse. Selecting ester-producing strains of yeast is a more reliable way to produce high-ester beer.
The role of oxygen: Although yeast do not use oxygen for respiration under normal brewery conditions, they do require it to produce sterols, and they need sterols to reproduce. Sterols are important components of the yeast cell membrane. Yeast cells can contain a maximum of 1% sterol, and they must have at least 0.1% sterol to remain viable. Each time a yeast cell divides, about half of its sterol goes to the daughter cell. This means that a yeast cell containing the maximum 1% sterol can divide only three times before its sterol level falls near the critical 0.1% level. A yeast cell with this little sterol cannot divide again unless it is provided with more oxygen, and adding oxygen once the fermentation is under way can ruin a good beer by causing staling.*
This fact is what determines the optimal pitching rate: You need to pitch enough yeast so that they can grow to a population large enough to efficiently ferment the wort in no more than three divisions. If you pitch too few yeast cells into your wort, the bulk of them will go through the maximum three divisions and be unable to divide further, leaving you with too few yeast to finish the fermentation in a reasonable amount of time. If you try to compensate for too small a quantity of yeast by oxygenating, the excessive yeast growth can result in off-flavors; we are making beer, not growing yeast (see Excessive Higher Alcohols section, above).
So what we’ve learned so far is that the more work yeast have to do during fermentation, the greater the risk of undesirable by-products. The best way to avoid problems down the road is to start with a large quantity of healthy yeast.
So what is the optimal pitching rate? Among commercial brewers, the universally accepted pitching rate for normal-gravity worts is about 1 million cells per milliliter of wort per °Plato. If you have a 12 °P wort (that’s a specific gravity of roughly 1.048), the pitching rate should be somewhere around 12 million cells/mL. Most yeast strains will perform quick, complete fermentations with agreeable flavor characteristics when pitched at this rate (high-gravity worts and lagers are often pitched at a somewhat higher rate).
Most home brewers do not have the equipment needed for yeast counting, but you can use the following as a guideline: Never feed an ale yeast culture more than 10 times its volume of wort. (Lager yeast propagated at cool temperatures is best fed even less at each step.) A swollen, “regular-size” package of yeast from Wyeast Laboratories (Hood River, Oregon) (commonly known as a smack pack) contains 50 mL of yeasty wort, so it should be added to no more than 500 mL (about 1 pint) of unfermented wort — not 5 gallons. After the 500 mL ferments out, it can be stepped up to as much as 5000 mL. Adhering to this rule will allow the quick production of healthy yeast in adequate numbers to get your fermentation off to a fast start and well-attenuated finish.
Don’t worry too much about overpitching; it can cause problems, but only at rates that are almost impossible for home brewers to achieve. For a home brewer to overpitch would require pitching a 5-gallon batch with the entire yeast cake from another 5-gallon batch. The biggest danger of overpitching is that yeasty flavors can mar the beer, and yeast autolysis can occur more quickly because the huge population will use up all of the wort’s nutrients very quickly.
Now that you fully understand the critical importance of making a yeast starter, let’s talk about how to do it.
Preparing a starter is really quite easy. You need to follow two basic rules:
Sanitation is key: A little contamination in the early phases of yeast propagation can become a much bigger problem later on.
Good planning is important: If you start with fresh yeast (either from a slant or a Wyeast package) it will take about five days to build up an adequate starter for a 5-gallon (19-L) batch. If your brew day should be delayed, it is not a big deal; just feed the yeast culture some fresh wort and oxygen every five days or so. You will end up with even more yeast by the time you get to brewing.
*Yeast grown in an oxygen-poor environment do not readily recover the ability to ferment normally, even if provided oxygen later in life. It is adequate to oxygenate the wort each time the yeast culture is stepped up. Propagating yeast with constant aeration is an option, but only if you are sure the yeast will not use up their food supply while they still have access to oxygen (see the box, “Maximizing Yeast Growth During Propagation,” above).
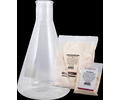
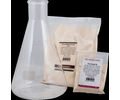
The most time-consuming part of making a starter is the preparation of sterile wort. In my brewery (um, kitchen) I minimize the amount of work it takes to make sterile wort by simply making extra wort each time I brew. I dilute the wort to 1.025–1.030 S.G., put it into Mason jars, and can it in a boiling water bath.* In this way I usually have a couple of gallons of starter wort on hand at all times.
An alternative is to make up some wort from brewing water, dry malt extract (DME), and hops (¼ cup DME per pint of water makes about a 1.020 wort). Although it is not absolutely necessary to use hopped wort as starter, some people maintain that it is best. Hops do exhibit a small degree of antimicrobial activity, and it is best to grow the yeast in an environment that is similar to the production wort. The “extract starter” can be also canned and stored for future use.
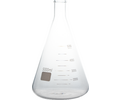
Once you have made the starter wort, the rest is easy. If you are starting with a swollen smack pack, you can simply pitch the contents of the package into 500 mL (1 pint) of wort in a sanitized, one-gallon jug (glass apple cider jugs work well). Oxygenate the wort by shaking it or using an aquarium pump, and put an airlock on the jug (some jugs require a #8 stopper). (A stir plate may help maximize yeast growth) After 24–48 hours the yeast will have fermented the wort and you can feed it again. This time you can feed the yeast as much as 5 L of wort, but 2 L (about 2 quarts) is just enough to produce adequate yeast for pitching a 5-gallon batch.
Oxygenate the culture, put the airlock back, and you are done. In another one or two days you will be ready to pitch the yeast into your main batch of oxygenated wort. It’s that easy!
Temperature: The yeast should be propagated at a temperature similar to the fermentation temperature of the production batch. The initial step can be fermented at a higher temperature than usual, but the last step should be conducted either at the production fermentation temperature or a few degrees cooler.
Gravity: The initial steps of propagation are best done using lower-gravity wort because fermentation is faster and the yeast undergo less stress than in a higher-gravity wort. The final propagation step can use wort that is close to the gravity of the production wort, but this is not absolutely necessary. Different yeast strains have different requirements; experience will be your best teacher.
Yeast storage: Do not store yeast for longer than a week without adding fresh wort; yeast can die pretty quickly once fermentation is complete, even when refrigerated. If the harvested yeast are exposed to oxygen, they will die very quickly unless fed some fresh wort. Oxygen stimulates yeast growth, and if there is no fermentable wort for the yeast, they will burn up their glycogen (energy) reserves instead.
A common question on the internet home brewing discussion group, Homebrew Digest (https://hbd.org), is “Should I pitch the entire starter, or just the yeast at the bottom of it?” Ideally, you should pitch the entire starter while it is at (or just after) high kräusen so that you use all of the yeast. (Yeast pitched when they are on the tail end of a fermentation will have very low sterol levels and will require more time to synthesize more before they can reproduce, partially defeating the purpose of the starter.) There can be some noticeable odd flavors in the starter, though, especially if you thoroughly oxygenate the partially fermented wort during the second feeding or use constant agitation to increase the rate of yeast growth.
If you are concerned about these flavors, simply allow the final step to ferment out until the beery liquid is fairly clear (no more than a week). On brew day decant the liquid off the yeast sediment (don’t worry if you leave a little liquid behind) and feed the yeast a fresh pint of wort. Oxygenate the culture and in a few hours it will be ready to pitch.
It is unwise to decant and discard the fermented wort off the yeast while it is still cloudy. By doing this you will be selecting the most flocculent cells in the culture. Just a couple of these unnatural selections can seriously affect the yeast culture’s ability to attenuate the wort. Flocculated yeast are not fermenting, so if the culture consists of mostly premature flocculators, a stuck fermentation is likely to occur. Remember, if they’re flocculating, they’re not up in the wort doing their job.
Just because you have pitched the proper amount of healthy, happy yeast doesn’t mean you can relax and stop worrying yet. As mentioned earlier, yeast growth depends on temperature, so it’s important to keep an eye on it. Both ale and lager yeasts will grow fastest at higher temperatures than those normally encountered in the fermentation cellar. Although it might seem counterintuitive, we want to limit yeast growth during fermentation, so we actually want to use lower than optimal temperatures for fermentation to avoid flavor problems in the final beer.
*Some people think that canning wort in a boiling water bath does not eliminate the threat of botulism. If you want to completely negate the threat of botulism, simply can the wort in a pressure cooker or keep the canned wort in a refrigerator; the bacteria that produce botulism toxin do not grow at less that 38 °F (4 °C) (4).
Ale yeasts generally yield the best-tasting beer when used at 60–68 °F (16–20 °C), whereas lagers are fermented at 45–55 °F (7–13 °C). Some yeast strains commonly used in Belgian-style ales will not fully attenuate if the fermentation is below 75 °F (24 °C). If you are concerned that such a warm fermentation will produce too-rapid yeast growth (and the flavors that come with it), pitch the yeast into wort at a slightly lower temperature than that used for the majority of the fermentation. The yeast is thus slowed down during the initial hours of fermentation, when yeast growth can be fastest. This also acts as a quality control tool under any conditions: You know that in a certain amount of time the fermentation should develop enough heat to bring the temperature to the desired goal. If it does not, you are alerted to the fact that something may be awry.
Understanding the rewards of proper yeast management will enable you to decide if the added effort of propagating yeast and controlling fermentation temperature is worth your time. In my opinion, proper treatment of yeast is the single best way to improve most homebrew. The benefits of making a starter, oxygenating the wort at pitching time, and controlling fermentation temperature far outweigh the minor inconvenience of planning the brew day a week in advance. Yeast work tirelessly to make us beer; they deserve the best treatment we can give them!
All contents copyright 2024 by MoreFlavor Inc. All rights reserved. No part of this document or the related files may be reproduced or transmitted in any form, by any means (electronic, photocopying, recording, or otherwise) without the prior written permission of the publisher.


.png)
.png)
(1).png)
.png)