by Pat Babcock
.jpg)
With a little effort, you can dispense your kegged beer in professional style. Seven handy home brewers share their ingenious systems for dispensing beer at home.
A Dorm Fridge and Cabinet as a Jockey Box
My old beer refrigerator is a late ’50s GE with a slightly rounded top and a curved door. The compressor on this old gal would freeze Lucifer’s mustache. For years, I pondered various methods for mounting the four-faucet stainless steel backsplash and drip catcher a friend gave me, but the thick walls and curved surfaces posed one hell of a challenge. Then, one day while thumbing through a Rapids catalog in search of ideas, I spotted a gleaming four-product cold plate (catalog number 5T93, Rapids Wholesale Company, Cedar Rapids, Iowa). A cold plate is a set of stainless steel coils cast into a block of aluminum. The aluminum provides a large thermal mass that allows the beer to be chilled with less coil length than is typically found in a cold box. The aluminum also acts as a thermal flywheel, isolating the coils from brief fluctuations in surrounding temperatures. “This is my holy grail!” I thought to myself. “But how to use it.…”
One day I heard that my sister had traded her old pop-up trailer in for a new one. This new one had a built-in refrigerator. Bingo! Her old dorm refrigerator might now be available! Sure enough, I now had a project that could accommodate the backsplash and the cold plate.
To support the refrigerator and house the CO2, the kegs, and the spill collector, I built a 25 x 25 x 36-in. services cabinet. This cabinet is open at the rear, and has casters for mobility. I built it out of ¾-in. CDX plywood because that’s what I had lying about.
On to the preparation of the refrigerator! First, I removed the inner shield from the door and replaced it with a piece of Plexiglas. (The inner shield was too fragile and curved to support the faucets to be mounted outside the door.) I drilled a pattern of small holes in the bottom right of the panel, duplicating the venting in the original panel. With a hole saw I bored through the Plexiglas and the refrigerator door for the faucet shanks. I cut sections of 1½-in. diameter PVC pipe to fit between the Plexiglas and the door and prevent the section from collapsing when tightening down the faucets.
I cut a piece of ¾-in. plywood to fit behind the splash. I drilled holes for the faucet shanks and mounted the board to the door using stainless steel machine screws. I mounted the splash to the board using stainless wood screws.
I then cut a 2-in. diameter hole through the floor of the refrigerator to serve as a beer line conduit. To protect the tubing from the metal edge, I cut a section of 2-in. PVC pipe long enough to drop into the hole in the fridge and the hole cut in the top of the services cabinet below. To prevent the pipe from simply dropping through, I wrapped PVC electrical tape around the pipe to form a stop.
Most small-format refrigerators incorporate the cooling coils in the housing of the freezer section. Be sure to identify the coils and the path the refrigerant lines take to reach them before you cut any holes into the housing of the refrigerator.
The insulation in the body of my refrigerator was dense closed-cell foam, so it wouldn’t be affected by moisture let in through the holes I drilled. If your refrigerator has fiberglass insulation or something similar, it’s a good idea to take steps to prevent water from entering the insulation. Put a large O-ring instead of tape around the PVC conduit, drop the conduit in the hole, then caulk the conduit to the bottom of the refrigerator using a good silicone caulk. To further insulate the conduit, fill it with aerosol polyurethane foam, such as Great Stuff (Flexible Products Co., Joliet, Illinois) after you’ve installed the hoses. You must do this in layers ½ in. to 1 in. thick to prevent the expanding foam from pinching the hoses shut. Allow each layer to harden for a few hours before continuing to the next. Wrap the sections of hose to be set in the foam with waxed paper. This will allow the hoses to be removed from the foam and replaced later, if necessary. Be sure to test a section of hose to make sure it’s compatible with the foam before you proceed.
With the refrigerator on the cabinet where I expected it to stay, the line conduit installed between the cabinet and the refrigerator, and the refrigerator door closed, I marked the top of the cabinet for the location of the hose for the spill tray drain. I cut the hole into the top and fed a section of fresh water feed line (solid, chromed copper such as that used under an exposed bathroom sink) through the hole. I then flared the tube over a nut and connected it to the spill drain. Plumber’s putty sealed the drain to the base of the pan of the splash. I connected a length of tubing to the other end to drain any overspill into an empty 2-L pop bottle.
Next, I fed four 7-ft lengths of 5/16in. beer hose up into the conduit. I installed swivel nuts on the cabinet end to accept the Corny keg fittings and placed labels on each hose to identify them. The other ends were connected to the inlets of the cold plate set onto the refrigerator’s shelf. Then I connected four 3-ft lengths of 3/16in. beer hose to the outlet side of the cold plate using permanent ear clamps to secure the beer lines to the fittings. (Note that the lengths and diameters of beer hose used are dictated by the design of the cold plate; check with the manufacturer of your cold plate.)
After placing a stainless steel flange on each faucet shank, I installed the shanks through the refrigerator door, then installed and tightened the jam nuts. I then assembled the faucet elbows, installed them onto the shanks, and connected the hose to each faucet elbow. The faucets on the front panel finished off the faucet setup.
Back in the services cabinet, I installed a four-position air distributor with a safety relief valve. My distributor is a plastic modular distributor from Rapids. It consists of one basic unit (catalog number 3K287), which includes the safety relief valve, and three additional shutoffs (catalog number 3K298). CO2 hose connects each valve of the distributor to the distributor main. I attached swivel fittings from USA Wholesale (defunct) and Brew & Grow (Livonia, Michigan) to the ends of each of the four keg pressure lines, and connected the inlet line to one leg of a Tap-Rite regulator (Superior Products, St. Paul, Minnesota) equipped with a T fitting. Finally, I used an eye-screw inside the cabinet to hold the tip-chain for the gas cylinder. For finishing touches, I put pieces of foam between the cold plate and the freezer element to help prevent the top of the plate from icing up. I drilled a ⅛-in. hole into the side of the refrigerator for a bimetal thermometer to monitor the internal temperature, and then I connected the drain of the spill pan to the drain line.
Because of the lengths of hose and the restriction of the plate itself, fairly high pressure is required to drive the system — 35 psi! Since the kegs are stored at cellar temperature while on line, this pressure would spell disaster for any reasonably carbonated beer. To prevent overcarbonation, I exploit the physical law of partial pressures, mixing N2 (virtually insoluble in beer) with CO2 to provide appropriate carbonation pressure at the high line pressure. In my system, I use 70% CO2 (or 24.5 psi) and 30% N2. With the kegs at 70 °F (21 °C), the 24.5 psi yields approximately 2.3 volumes of CO2 in the beer — suitable for most styles, and my preferred level.
The system performs admirably. With the thermostat set to its lowest setting, the interior of the refrigerator stays at or slightly below freezing — ideal for a cold plate which is designed to be used under ice and water. Thermal variation from the keg’s being stored warm is evident in occasional foaming during continuous use, but this is never excessive and thus never a problem. Serving soda through the system is problematic in two regards, however: lacking alcohol, the soda has a tendency to freeze inside the plate, and, particularly with aromatic sodas such as root beer and ginger ale, it’s nearly impossible to get the odor and flavor out of the lines. In hindsight, I’d also use check valves in all the gas lines to prevent cross-contamination of the flavors. The approximate cost to build the system was $525, including cabinet, refrigerator, and all fasteners.
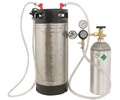
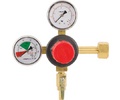
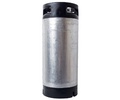
Click here to browse our selection of Kegerator and Keezer conversion kits!
Under-Bar Keg Chiller
by Vincent Masciandaro
My family and friends have been enjoying my basement bar for more than a year now. I keep kegs cool under the bar in a refrigerated box. After weighing the options, I decided to build an insulated box myself and use parts from an old refrigerator to cool it. I’d be happy to tell you how I did it, but modifying a fridge in some of the ways suggested in this feature is a lot easier.
A Modified Full-Size Fridge
by Tracy Gast
The first draught system I built incorporated an old stainless steel cabinet used in a semiconductor plant as an isopropyl alcohol (IPA — yes, I’ve heard it before) vapor dryer. (I work in R&D and I’m a real scrounge hound, so I get lots of good stuff free.) The guts of a dorm fridge cool the cabinet. The kegs had been used to dispense IPA. They have no ball- or pin-lock connections, so all lines were connected by compression connectors (Swagelok, Solon, Ohio). The kegs rest on load cells, which gives me an idea of how much beer is left in each. Now that I have built a bigger system, I plan to replace the tap tower on this one with two beer engines.
The new, larger system I assembled started as a two-door refrigerator–freezer. I removed the solid section between the refrigerator and the freezer, replaced the inner shelves on the doors with ⅛-in. polypropylene sheet to allow more room for kegs, and built a polypropylene shelf in the bottom so that the kegs would sit on a level surface. I sheathed the outside in ¼-in. pine tongue-and-groove paneling and constructed a polypropylene drip tray under the taps. The unit has nine taps, of which seven dispense beer by means of CO2 and two by means of a CO2/N2 mix. My family compels me to devote two of my CO2 taps to Wild Cherry Pepsi and Sprite. The refrigerator holds six 5-gallon and three 3-galIon kegs.
The black box on top of the refrigerator houses the refrigerator temperature controller, the keg temperature controller, and a system of regulators and gauges that can supply different dispense pressures to different kegs.
When I got the refrigerator from a friend, it ran constantly. It got cold, but would not cycle off. I discovered that the control circuitry of the refrigerator was at fault. Fortunately, in my scrounge pile, I had a microprocessor-based temperature controller (Omega, Stamford, Connecticut) that could replace the original circuitry. I programmed the new controller so that the compressor is currently on about 10 minutes every hour. Controlling a refrigerator by means of a $ 250 microprocessor-based controller and a $ 30 solid-state relay is overkill — there are much cheaper ways of accomplishing comparable control — but I had the parts on hand, so I used them.
The keg temperature controller will be used to keep one of the kegs slightly warmer than the others in the fridge. There are times when you have a beer, such as a barleywine, that you want to serve a little warmer than your other beers. I plan to construct a small heater that I will wrap around one of the 3-gallon kegs.
Because I dispense a variety of different beer styles, I built a manifold that can provide different pressures to different kegs. I have four regulators. Two of the regulators supply CO2 pressure to two 5-gallon kegs each; one controls the CO2/N2 mix pressure to two 5-gallon kegs; and the remaining regulator controls CO2 pressure to the three 3-gallon kegs.
Stainless steel quarter-turn ball valves on the lines to all the kegs let me seal off each keg so that I can keep them under constant pressure even if I remove the gas bottle. I order my CO2/N2 mixture from a welding supply house. Each gas tank sits on a bathroom scale, so I have some idea of how much gas is left in the tanks.
Dorm Fridge as Jockey Box
by Greg Sower
When my wife and I switched from bottling to kegging, we needed a way to chill our beer. A full-sized refrigerator would have crowded our small apartment. I considered making a cooler into a jockey box, but it seemed that it would take a lot of work to keep the coils iced. I had read numerous posts to the Usenet mailing list rec.crafts.brewing about using a dorm refrigerator to chill a single keg, but we wanted to have both beer and cider on tap.
That’s when I realized a dorm fridge could be considered just an electric cooler. So I drilled holes in the top and side of a dorm fridge and ran three 20-ft coils of ¼-in. stainless steel tubing through the refrigerator and up to the tap tower on top. Hoses lead to the kegs that sit to the right of the fridge. The tap tower is mahogany. I simulated stained glass under the tower with Gallery Glass (Plaid Enterprises Inc., Norcross, Georgia). Inside the refrigerator, there is still plenty of room for bottles, yeast slants, hops, and a few chilled pint glasses. The refrigerator’s temperature control adequately adjusts the amount of chill. No one has ever complained of getting a warm pint at our house (though, to be fair, few people ever complain about free beer). We brew only ales and not lagers, which might appropriately be served much colder. However, our cider is always noticeably cooler than the beer, perhaps because of its lighter body.
When the weather gets brutally hot here in Tucson, we place the kegs in a cooler with a little water and place frozen water bottles in it once a day. The water bottles fit snugly between the kegs, and with the top on the cooler (with cutouts to accommodate the kegs), the beer stays nice and cool.
Even folks who already have a full-size refrigerator could benefit from such a setup. A single coil routed through their refrigerator could quickly chill beer.
We have been very happy with this system and recommend it to folks who live where space is limited.
Two-Liter Bottles in the Fridge
by Bruce Taber
I have been using my dispense system for a few years and haven’t heard of one like it. I needed a setup that used my kitchen fridge but didn’t take up much space. I also wanted more than one beer on tap, and I didn’t want to spend much money.
I figured out a way to dispense my beer out of 2-L pop bottles; I naturally carbonate the beer in the 2-L bottles and use the CO2 just to dispense it and keep it fresh.
I built a holder for two bottles that stack on one side of the top shelf of my fridge. The two bottles hold the equivalent of 10 12-oz bottles, but they take up less space.
I have a CO2 tank in my basement. I run inexpensive ¼-in. vinyl tubing from the tank up through the kitchen floor behind my fridge and into the fridge through the side wall. The hose is very inconspicuous.
Once inside the fridge, this line is split into two lines by a ¼-in. copper T plumbing fitting and gear clamps. From there it attaches to a valve on each pop bottle.
The valves are the key to the system. I used three-way high-pressure ball valves made by Whitey (#B-42X-S4) that cost around $ 35 each. The valves allow either beer or gas to flow through, depending on the valve position.
Each valve is attached to a ⅛-in. i.d. stainless steel dip tube that I bent slightly at the end so that it will pick up almost all the beer in the bottle. To pass the dip tube through the cap so that there are no leaks, I drilled down through a ⅜-in. stainless steel bolt and soldered the dip tube in. The bolt passes through the plastic cap and the nut on the inside provides a tight, leak-proof seal.
A 3/16in. i.d. piece of tubing serves as a spout. (Using a spout with a larger diameter than the dip tube reduces foaming.) The handle of the valve sits in the off position. To dispense beer I simply turn the handle down to fill a glass, then turn it up to repressurize the bottle. (I’ve found that 12–15 psi works well for dispensing.) When a bottle is empty it takes only a couple of minutes to install a new one.
It warms my heart to see the envy in my friends’ eyes as I pour them a draught straight from my kitchen fridge.
Chest Freezer Turned Bar
by Larry Maxwell
My system (not pictured) is a 2 x 4-ft chest freezer that I converted by replacing the lid with a brass-covered, foam-insulated plywood panel that has two twin-tap towers and a drip tray. I had to replace the lid with plywood because the original lid was sheet metal on top, plastic on the bottom, and insulation in between. It wasn’t rigid enough to support the tap towers. Also, I wanted to leave the original lid unmodified so that I could sell the freezer or get warranty service if I had to.
I cut a piece of ¾-in. plywood to size and had my local metal supplier cut me a sheet of the thinnest-gauge brass they had, sized so that it overlapped the sides of the plywood. I glued the sheet to the plywood using contact adhesive. I then glued two layers of 1-in. expanded polystyrene sheet to the other side for insulation. I trimmed the corners of the brass sheet and used hand tools to bend the four edges of the sheet over the edges of the plywood and insulation. It was very difficult, even with such thin sheet metal, and the bends didn’t come out perfectly; I should have sprung for the money to have a professional do the bending. Two consecutive 90° bends formed a nice C-shape in each edge, so that the sharp edge of the sheet was now tucked underneath the lid. I removed the sealing gasket from the original lid and mounted it on the underside of my lid for a perfect fit. Initially I just rested the lid on top, but later I added hinges.
To finish the lid, I placed it on the freezer and removed the protective backing from the exposed surface. To discourage tarnishing, I polished the surface with Brasso, a commonly available metal polish, then applied a mixture of acetic acid (vinegar) and hydrogen peroxide for good measure, and finally washed it thoroughly several times with distilled water using a very clean cheesecloth rag. I then applied several coats of high-gloss polyurethane. Despite this treatment, a few days after the polyurethane dried, some spots of tarnish emerged. They haven’t gotten worse with time, though.
When all was dry, I drilled the holes for the tap towers and installed them. The drain channel is currently surface-mounted, but I plan to convert it to a recessed model. The drain tube inside the freezer is connected to the freezer’s drain hole, and a tube on the outside of the freezer carries the liquid away from the freezer using the natural slope of the garage floor.
The freezer comfortably holds four Cornelius kegs, and I can squeeze in six. I keep a 5-lb CO2 tank in the freezer when I have beer on tap, but I have heard that a regulator can be damaged by condensation or mold, so when I get back to brewing more regularly I plan to drill a hole in the lid for a hose so that CO2 can be supplied from the outside.
Another modification to the freezer is a castered support frame. Using aluminum angle stock, I made a rectangular frame that securely cradles the bottom of the freezer. Generously sized casters at the corners allow me to roll it easily wherever I need it. Its longest trip is from my garage to my patio, where it stands as the focus of attention at my wife’s and my annual Oktoberfest party. Guests love pouring their own beer as much as, if not more than, they love drinking my homebrew.
In the future, I hope to cover the external surfaces of the freezer with a quality wood veneer and finish it a deep walnut or similar color. I am also considering installing brass railing around the back and sides of the top so that glasses, bottles, or other items placed on top are less likely to be knocked off. If the freezer becomes this respectable, it may eventually be invited inside the house to function as a full-service bar, with liquor bottles along the back railing behind the taps.
An Inspiration to Us All
by Olin Schultz
My brother Darren Schleth and I, the proprietors of MoreBeer!, a home brewing supplier in Concord, California, designed this rolling tiki hut for the annual Bay to Breakers “race” in San Francisco. The event draws all manner of participants, most of whom are not preoccupied with speed. Now, every year 150 friends of ours, dressed in Hawaiian clothes, gather for the tradition of pushing this hut over the hilly 7.5-mile course. Darren, our other brother Derek, and I serve homebrew and margaritas while running on the inside of the bar. Darren and I also belong to the Diablo Order of Zymiracle Enthusiasts, a Concord, California, home brewing club, so we brought the hut to the inaugural Northern California Homebrewers Festival last summer, where our club was one of many dispensing homebrews to the 300+crowd.
The hut has been through about six remodels. Built on an ever-evolving frame that now has a trailer axle in back, the hut has more amenities than most of us have at home. It has a four-sided oak bar featuring four beer taps with cold storage for six kegs, in-line cooling plates, one margarita tap, capacity for three margarita kegs, two built-in commercial blenders, running water off CO2 pressure, a misting system for hotter days, two 6-in. TVs, a Denon/Klipsch stereo system with 100-CD changer, a rear deck barbecue, 600 lb of ice storage, a ceiling fan, attic storage for food, a thatched roof, and finally a generator with roof exhaust to power everything on the go.
The hut was seen last summer in a Miller Genuine Draft commercial that was filmed in Las Vegas. The commercial was run most prominently on ESPN.
All contents copyright 2024 by MoreFlavor Inc. All rights reserved. No part of this document or the related files may be reproduced or transmitted in any form, by any means (electronic, photocopying, recording, or otherwise) without the prior written permission of the publisher.


.png)
.png)
(1).png)
.png)